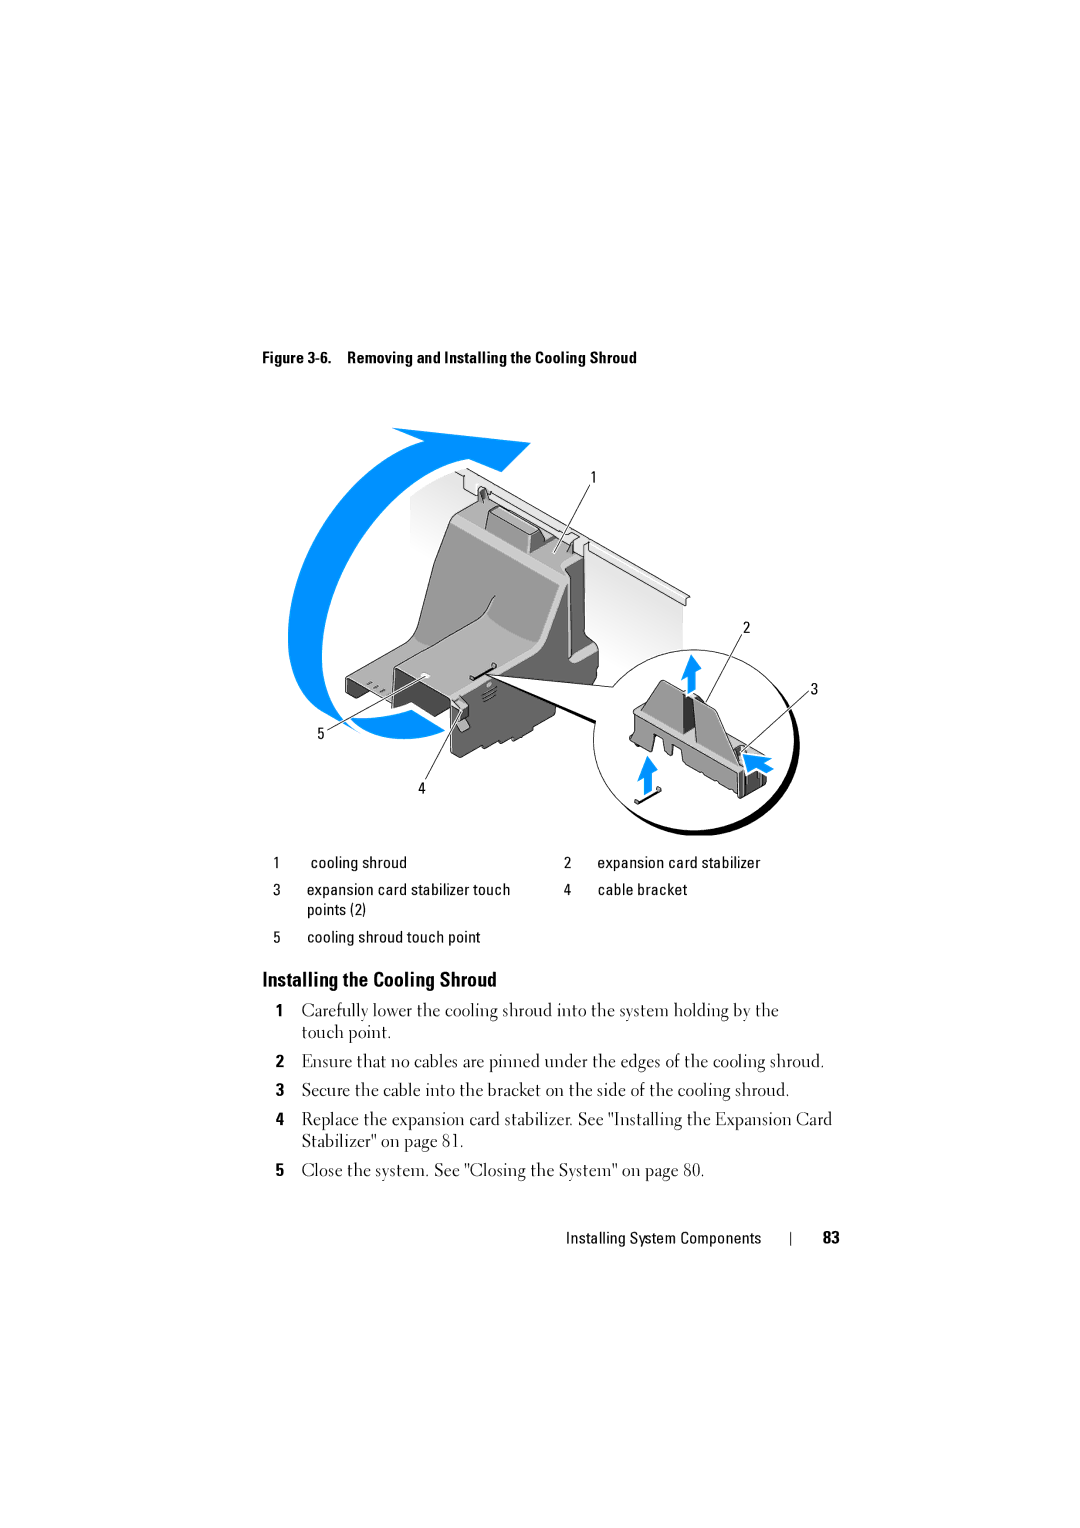
Figure 3-6. Removing and Installing the Cooling Shroud
1
2
3
| 5 |
|
|
| 4 |
|
|
1 | cooling shroud | 2 | expansion card stabilizer |
3 | expansion card stabilizer touch | 4 | cable bracket |
| points (2) |
|
|
5 | cooling shroud touch point |
|
|
Installing the Cooling Shroud
1Carefully lower the cooling shroud into the system holding by the touch point.
2Ensure that no cables are pinned under the edges of the cooling shroud.
3Secure the cable into the bracket on the side of the cooling shroud.
4Replace the expansion card stabilizer. See "Installing the Expansion Card Stabilizer" on page 81.
5Close the system. See "Closing the System" on page 80.
Installing System Components
83