Installing the Hardware
Installing the Control Module
The primary control module always resides in the CM slot. If you need to replace the primary control module in the CM slot, or you want to install a redundant control module in slot CM/1, use the following procedure (you will need a #2 Phillips screwdriver to perform this procedure). The primary control module must be installed in slot CM. The redundant control module must be installed in slot CM/1. (See Chassis on page 10 for information about the chassis slots.)
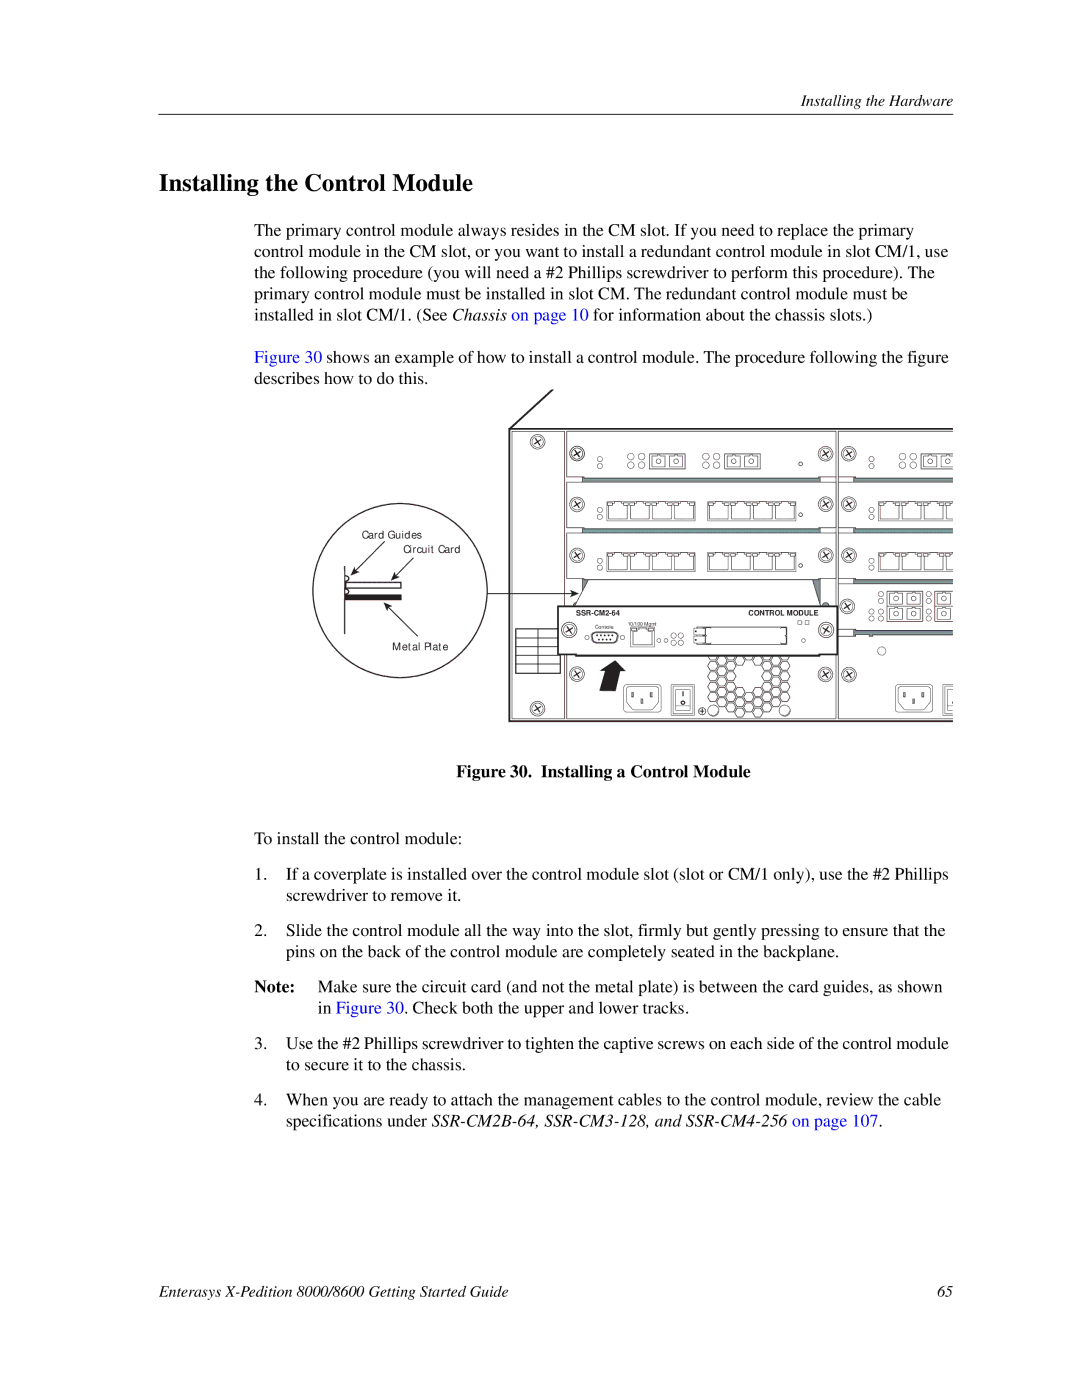
Figure 30 shows an example of how to install a control module. The procedure following the figure describes how to do this.
Card Guides Circuit Card
Metal Plate
CONTROL MODULE | |
Console | 10/100 Mgmt |
| |
|
Figure 30. Installing a Control Module
To install the control module:
1.If a coverplate is installed over the control module slot (slot or CM/1 only), use the #2 Phillips screwdriver to remove it.
2.Slide the control module all the way into the slot, firmly but gently pressing to ensure that the pins on the back of the control module are completely seated in the backplane.
Note: Make sure the circuit card (and not the metal plate) is between the card guides, as shown in Figure 30. Check both the upper and lower tracks.
3.Use the #2 Phillips screwdriver to tighten the captive screws on each side of the control module to secure it to the chassis.
4.When you are ready to attach the management cables to the control module, review the cable specifications under
Enterasys | 65 |