Installing the Hardware
Installing the Switching Fabric Module (X-Pedition 8600 only)
On the
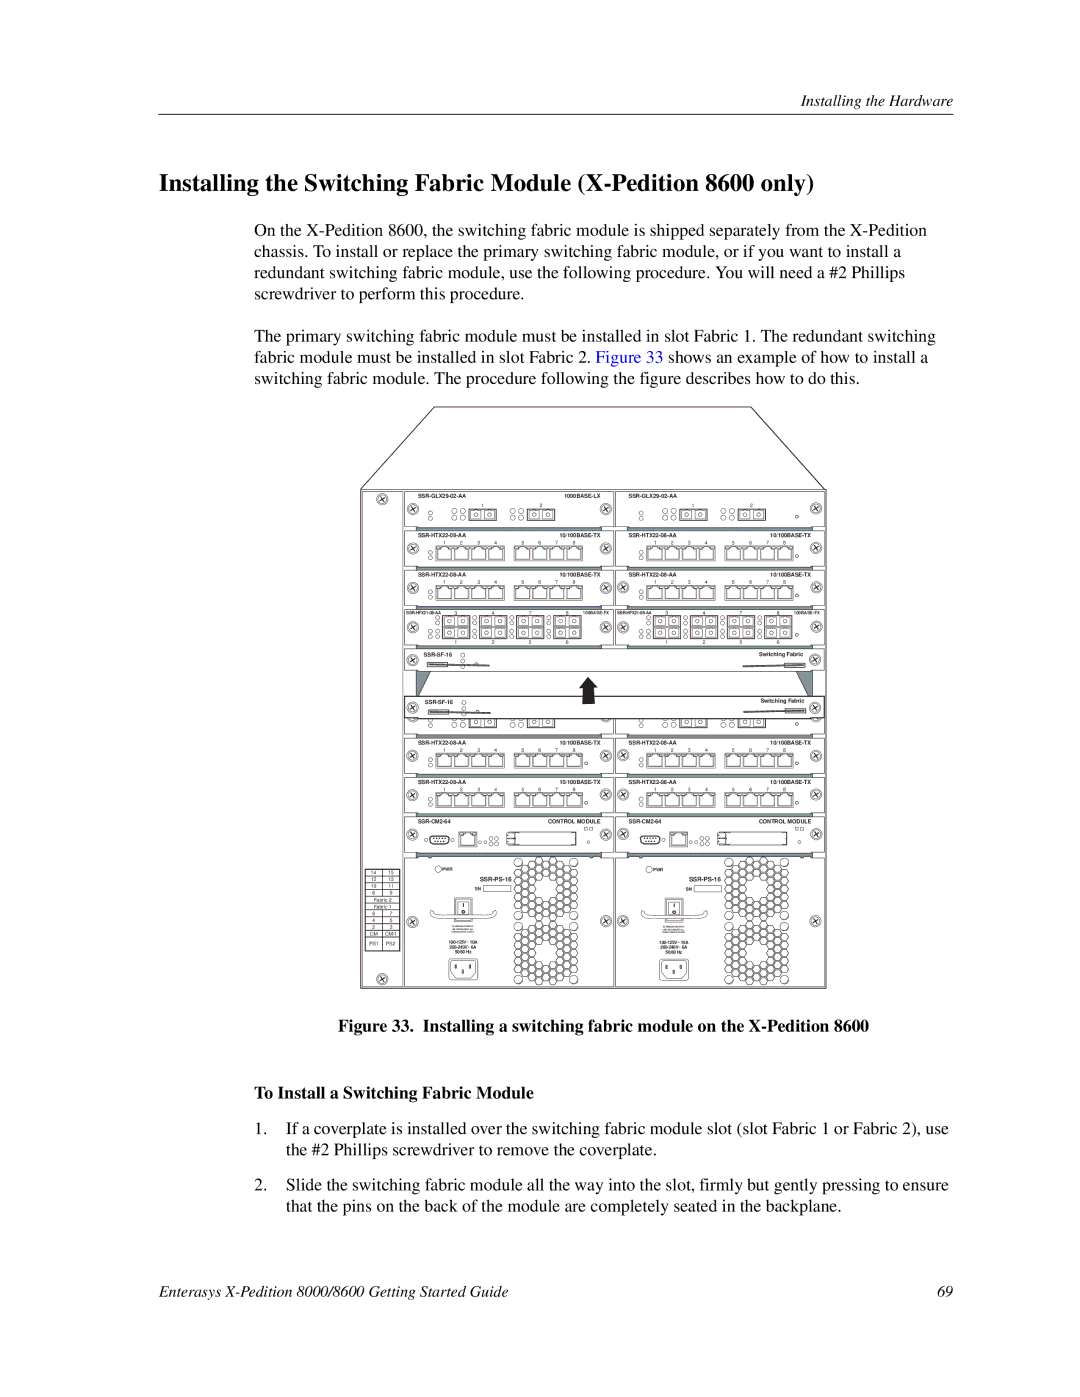
The primary switching fabric module must be installed in slot Fabric 1. The redundant switching fabric module must be installed in slot Fabric 2. Figure 33 shows an example of how to install a switching fabric module. The procedure following the figure describes how to do this.
|
|
|
|
|
|
|
|
| ||||||||
|
|
|
| 1 |
| 2 |
|
|
|
|
| 1 |
| 2 |
|
|
|
|
|
|
|
|
|
|
| ||||||||
| 1 | 2 | 3 | 4 | 5 | 6 | 7 | 8 | 1 | 2 | 3 | 4 | 5 | 6 | 7 | 8 |
|
|
|
|
|
|
|
|
| ||||||||
| 1 | 2 | 3 | 4 | 5 | 6 | 7 | 8 | 1 | 2 | 3 | 4 | 5 | 6 | 7 | 8 |
| 3 |
| 4 |
| 7 | 8 | 3 |
| 4 |
| 7 | 8 | ||||
|
| 1 |
| 2 |
| 5 | 6 |
|
| 1 |
| 2 |
| 5 | 6 |
|
|
|
|
|
|
|
|
|
|
|
|
|
| Switching Fabric | |||
|
|
|
|
|
|
|
|
| Switching Fabric | |||||||
|
|
|
|
|
|
|
|
| ||||||||
|
|
|
| 1 |
| 2 |
|
|
|
|
| 1 |
| 2 |
|
|
|
|
|
|
|
|
|
|
| ||||||||
| 1 | 2 | 3 | 4 | 5 | 6 | 7 | 8 | 1 | 2 | 3 | 4 | 5 | 6 | 7 | 8 |
|
|
|
|
|
|
|
|
| ||||||||
| 1 | 2 | 3 | 4 | 5 | 6 | 7 | 8 | 1 | 2 | 3 | 4 | 5 | 6 | 7 | 8 |
|
|
|
|
| CONTROL MODULE |
|
|
|
| CONTROL MODULE | ||||||
14 | PWR |
|
|
|
|
|
| PWR |
|
|
|
|
|
| ||
15 |
|
|
|
|
|
|
|
|
|
|
|
|
| |||
12 | 13 |
|
|
|
|
|
|
|
|
|
|
|
| |||
10 | 11 |
| SN |
|
|
|
|
|
|
| SN |
|
|
|
|
|
8 | 9 |
|
|
|
|
|
|
|
|
|
|
|
|
| ||
|
|
|
|
|
|
|
|
|
|
|
|
|
|
| ||
Fabric 2 |
|
|
|
|
|
|
|
|
|
|
|
|
|
|
| |
Fabric 1 |
|
|
|
|
|
|
|
|
|
|
|
|
|
|
| |
6 | 7 |
|
|
|
|
|
|
|
|
|
|
|
|
|
|
|
4 | 5 |
|
|
|
|
|
|
|
|
|
|
|
|
|
|
|
2 | 3 | TO REMOVE POWER TO |
|
|
|
|
|
|
| TO REMOVE POWER TO |
|
|
|
|
|
|
UNIT DISCONNECT ALL |
|
|
|
|
|
|
| UNIT DISCONNECT ALL |
|
|
|
|
|
| ||
CM | CM/1 | POWER SUPPLY CORDS |
|
|
|
|
|
|
| POWER SUPPLY CORDS |
|
|
|
|
|
|
|
|
|
|
|
|
|
|
|
|
|
|
|
|
| ||
PS1 | PS2 |
|
|
|
|
|
|
|
|
|
|
| ||||
|
|
|
|
|
|
|
|
|
|
|
|
| ||||
|
| 50/60 Hz |
|
|
|
|
|
|
| 50/60 Hz |
|
|
|
|
|
|
|
|
|
|
|
|
|
|
|
|
|
|
|
|
| ||
Figure 33. Installing a switching fabric module on the X-Pedition 8600
To Install a Switching Fabric Module
1.If a coverplate is installed over the switching fabric module slot (slot Fabric 1 or Fabric 2), use the #2 Phillips screwdriver to remove the coverplate.
2.Slide the switching fabric module all the way into the slot, firmly but gently pressing to ensure that the pins on the back of the module are completely seated in the backplane.
Enterasys | 69 |