Operational Procedures
The Diagnostics/Config button
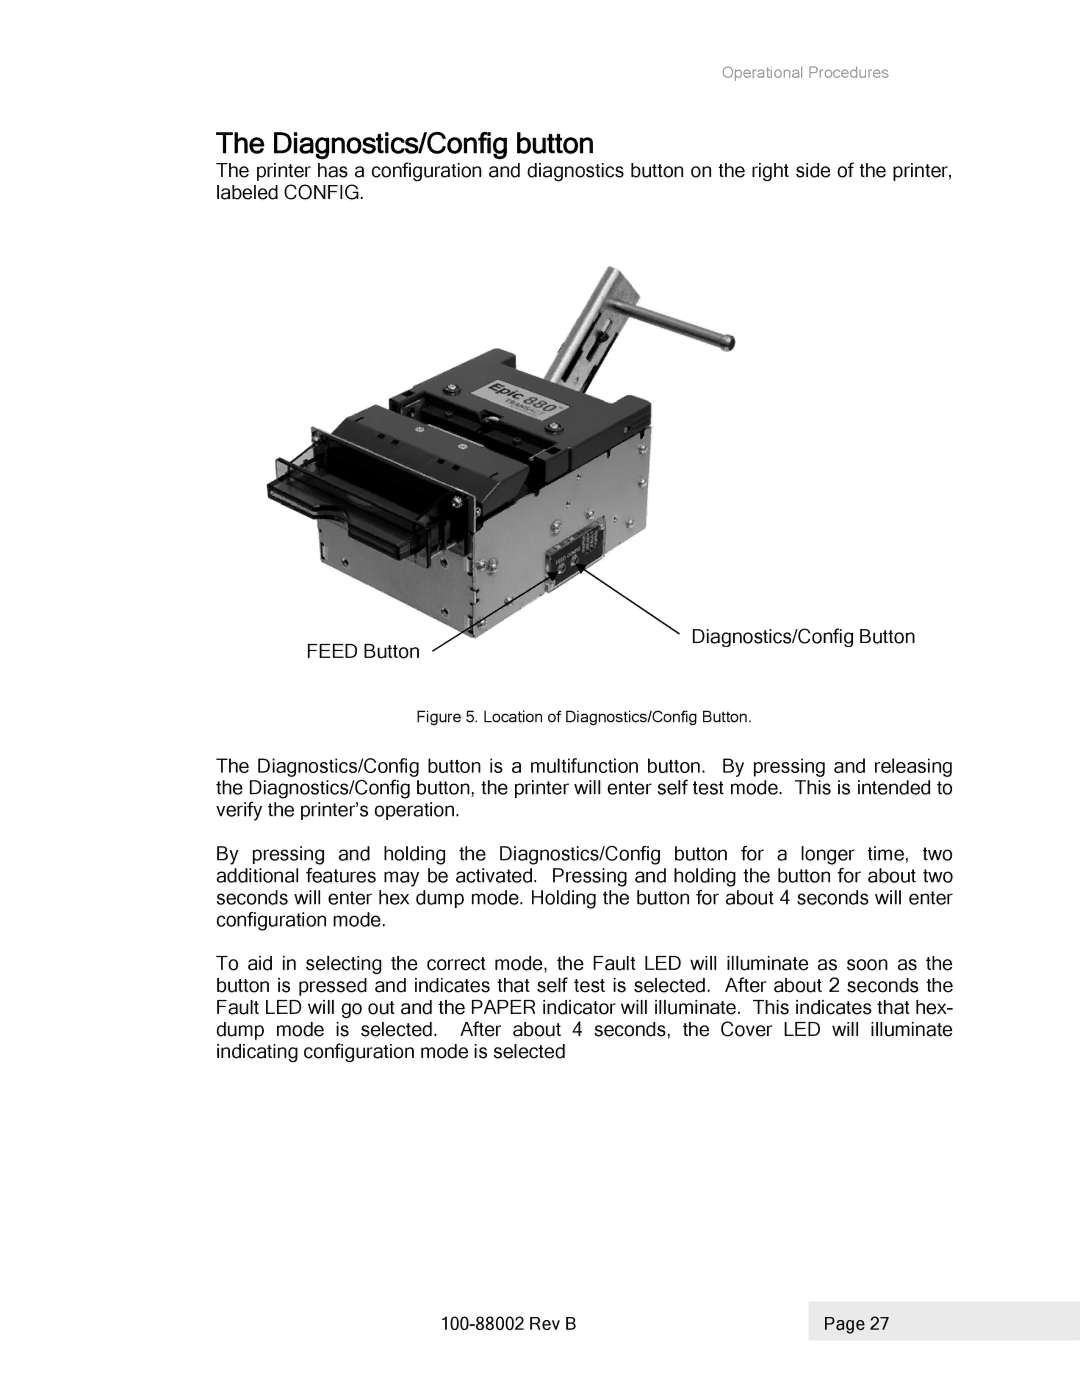
The printer has a configuration and diagnostics button on the right side of the printer, labeled CONFIG.
FEED Button
Diagnostics/Config Button
Figure 5. Location of Diagnostics/Config Button.
The Diagnostics/Config button is a multifunction button. By pressing and releasing the Diagnostics/Config button, the printer will enter self test mode. This is intended to verify the printer’s operation.
By pressing and holding the Diagnostics/Config button for a longer time, two additional features may be activated. Pressing and holding the button for about two seconds will enter hex dump mode. Holding the button for about 4 seconds will enter configuration mode.
To aid in selecting the correct mode, the Fault LED will illuminate as soon as the button is pressed and indicates that self test is selected. After about 2 seconds the Fault LED will go out and the PAPER indicator will illuminate. This indicates that hex- dump mode is selected. After about 4 seconds, the Cover LED will illuminate indicating configuration mode is selected
| Page 27 |
|
|
