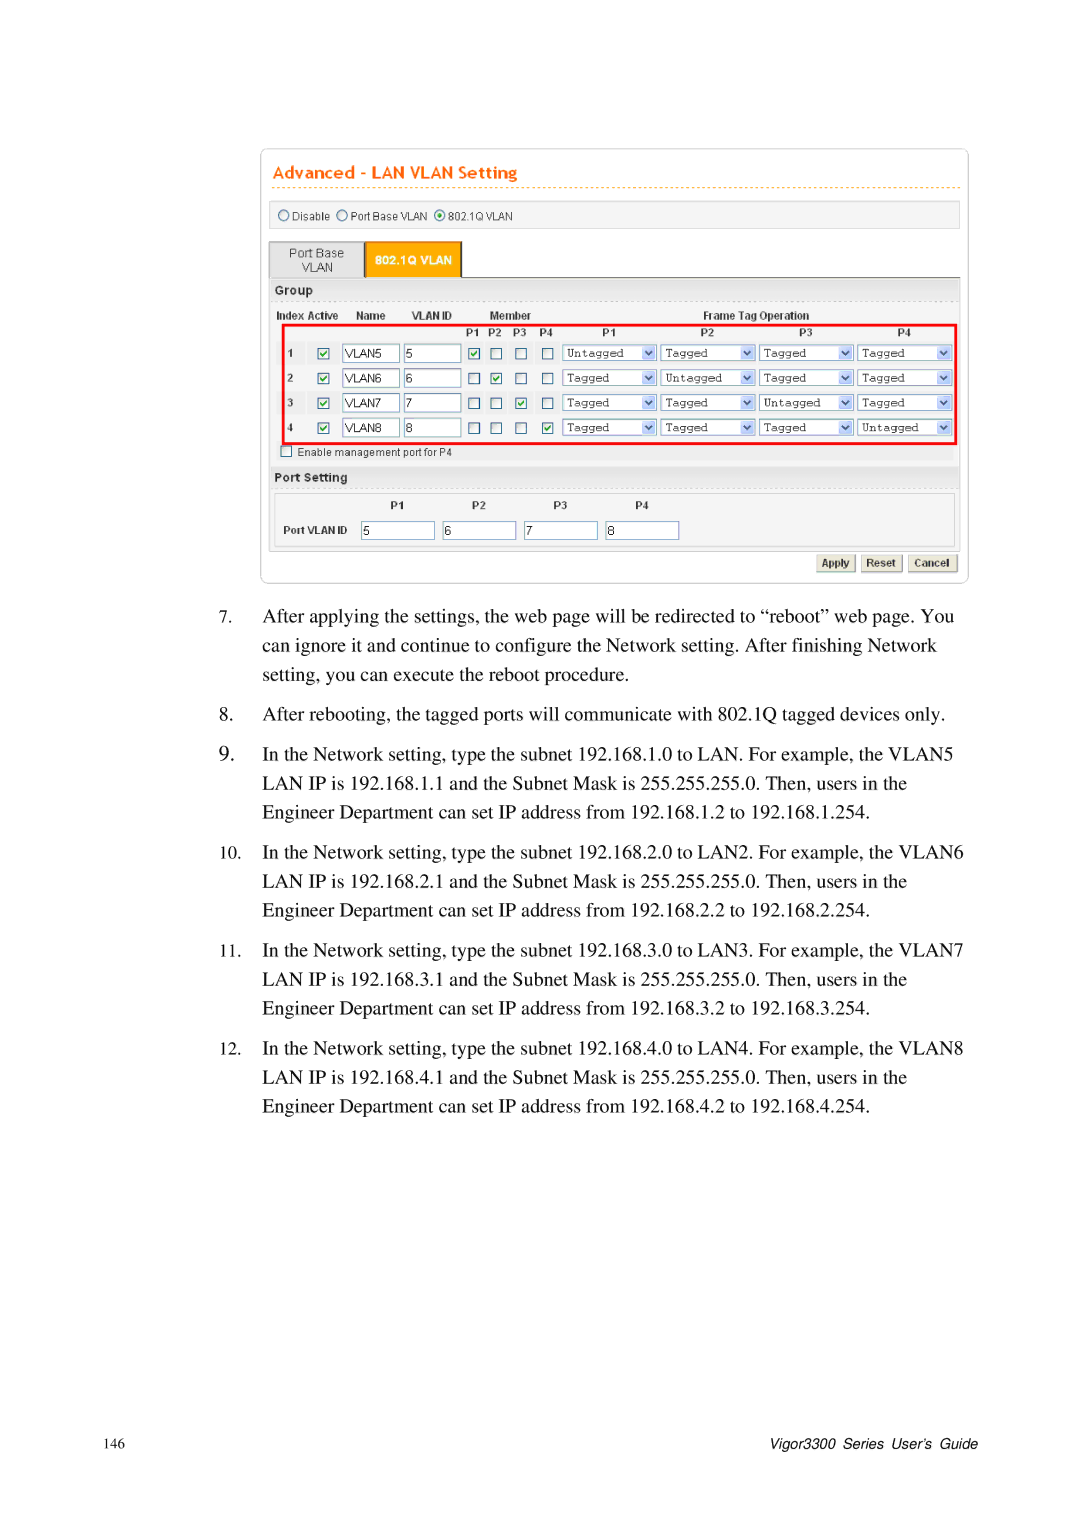
7.After applying the settings, the web page will be redirected to “reboot” web page. You can ignore it and continue to configure the Network setting. After finishing Network setting, you can execute the reboot procedure.
8.After rebooting, the tagged ports will communicate with 802.1Q tagged devices only.
9.In the Network setting, type the subnet 192.168.1.0 to LAN. For example, the VLAN5 LAN IP is 192.168.1.1 and the Subnet Mask is 255.255.255.0. Then, users in the Engineer Department can set IP address from 192.168.1.2 to 192.168.1.254.
10.In the Network setting, type the subnet 192.168.2.0 to LAN2. For example, the VLAN6 LAN IP is 192.168.2.1 and the Subnet Mask is 255.255.255.0. Then, users in the Engineer Department can set IP address from 192.168.2.2 to 192.168.2.254.
11.In the Network setting, type the subnet 192.168.3.0 to LAN3. For example, the VLAN7 LAN IP is 192.168.3.1 and the Subnet Mask is 255.255.255.0. Then, users in the Engineer Department can set IP address from 192.168.3.2 to 192.168.3.254.
12.In the Network setting, type the subnet 192.168.4.0 to LAN4. For example, the VLAN8 LAN IP is 192.168.4.1 and the Subnet Mask is 255.255.255.0. Then, users in the Engineer Department can set IP address from 192.168.4.2 to 192.168.4.254.
146 | Vigor3300 Series User’s Guide |