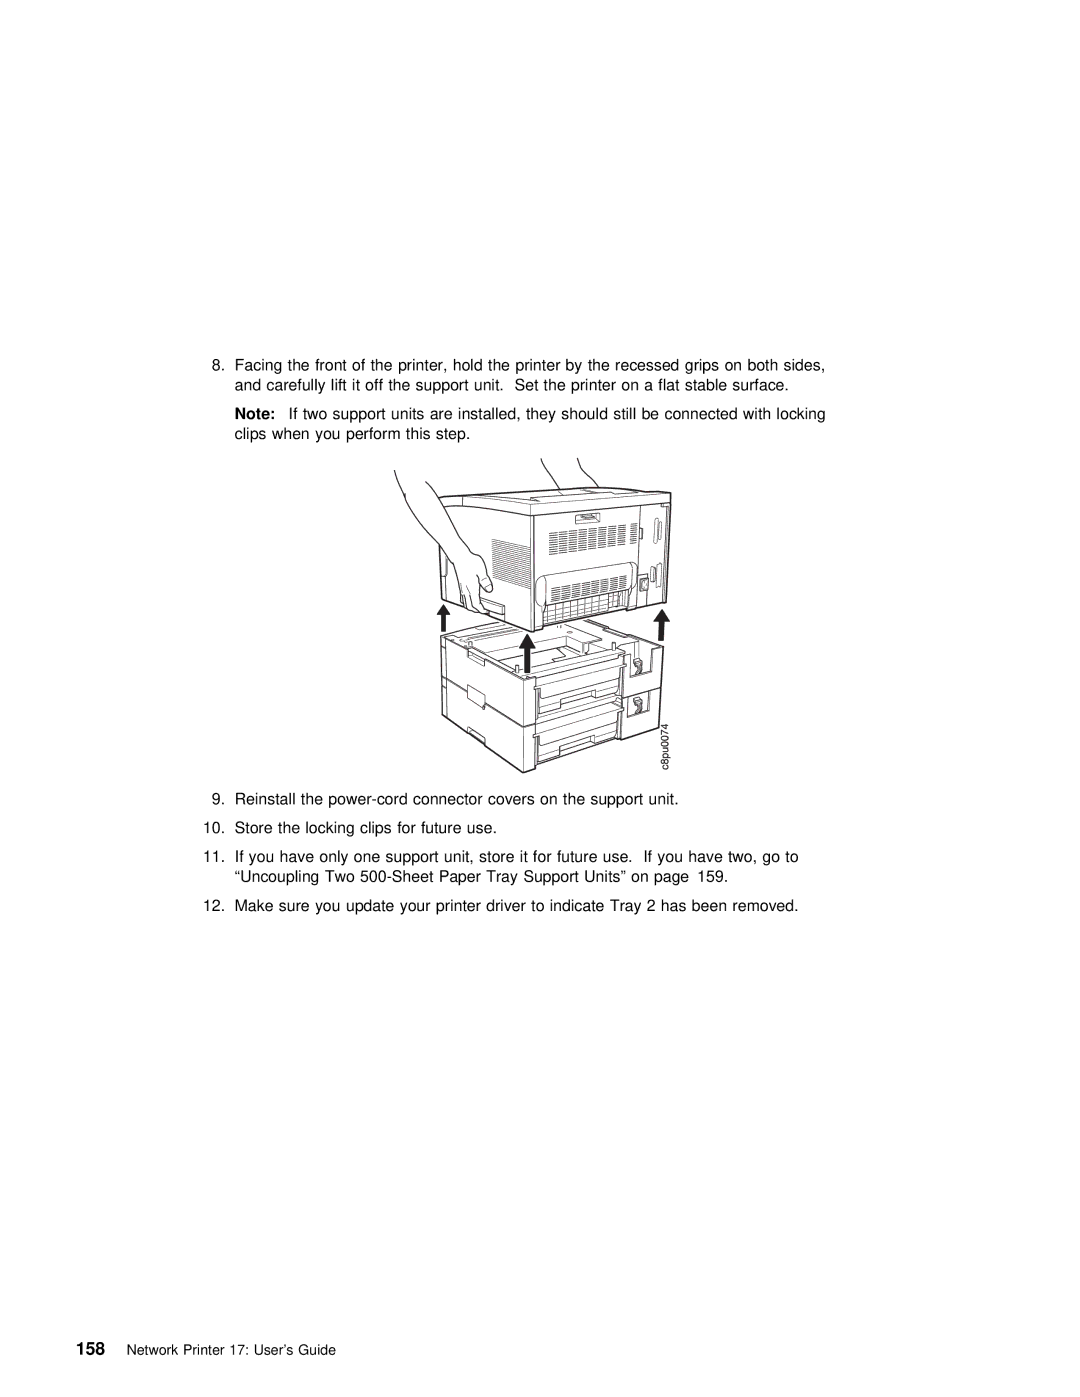
8. Facing the front of | the printer, hold the printer by | the | recessed grips on | both | ||||
and | carefully | lift | it | off the support unit. Set the | printer on a flat stable | surf | ||
Note: | If | two | support | units are installed, they should | still | be connected with | locking | |
clips | when | you | perform | this step. |
|
|
| |
9. Reinstall the
10.Store the locking clips for future use.
11.If you have only one support unit, store it for future use. If you have two, “Uncoupling Two
12.Make sure you update your printer driver to indicate Tray 2 has been removed.