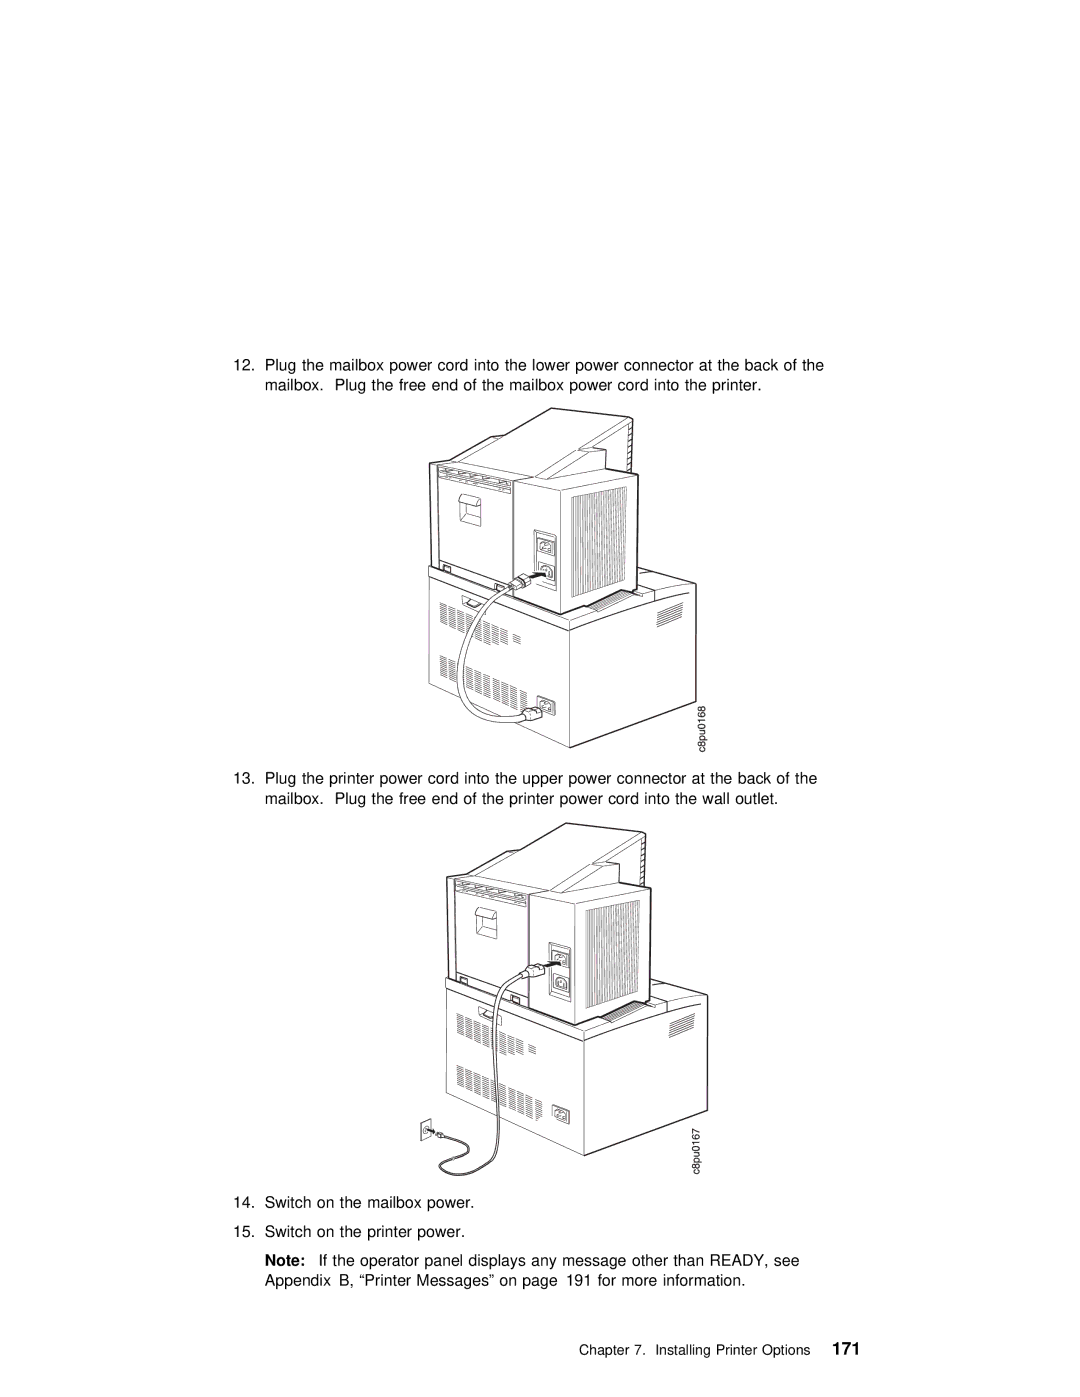
12. Plug the mailbox power cord into the lower power connector at the back of the mailbox. Plug the free end of the mailbox power cord into the printer.
13. Plug the printer power cord into the upper power connector at the back of th mailbox. Plug the free end of the printer power cord into the wall outlet.
14.Switch on the mailbox power.
15.Switch on the printer power.
Note: If the operator panel displays any message other than READY, see Appendix B, “Printer Messages” on page 191 for more information.