Croma24 Service Manual
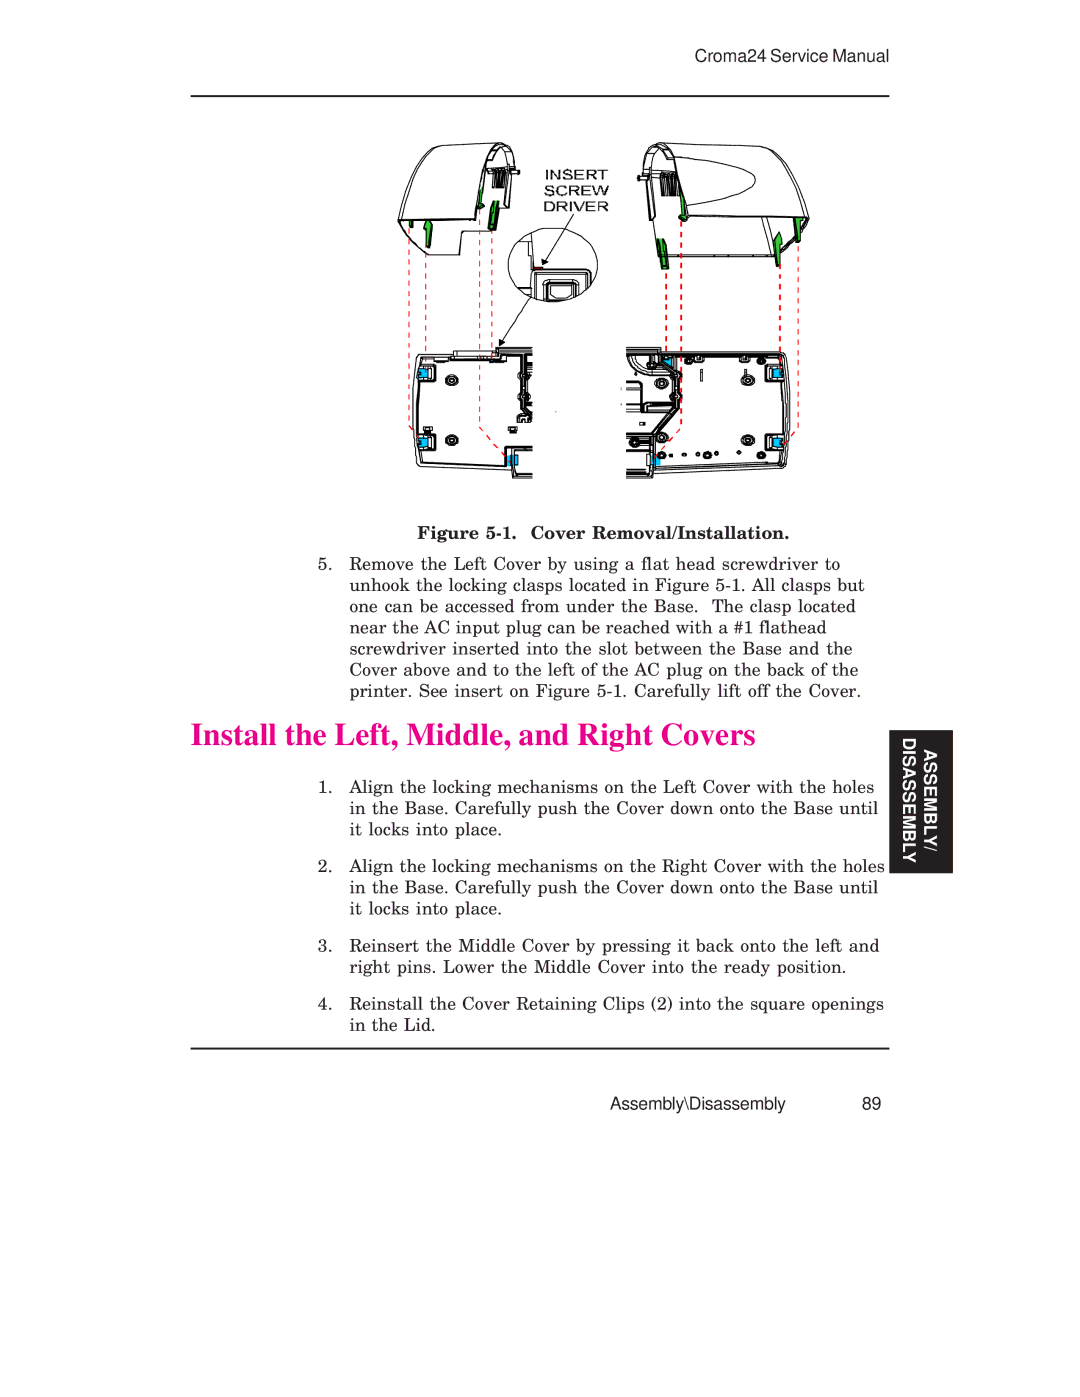
Figure 5-1. Cover Removal/Installation.
5.Remove the Left Cover by using a flat head screwdriver to unhook the locking clasps located in Figure
Install the Left, Middle, and Right Covers
1.Align the locking mechanisms on the Left Cover with the holes in the Base. Carefully push the Cover down onto the Base until it locks into place.
2.Align the locking mechanisms on the Right Cover with the holes in the Base. Carefully push the Cover down onto the Base until it locks into place.
3.Reinsert the Middle Cover by pressing it back onto the left and right pins. Lower the Middle Cover into the ready position.
4.Reinstall the Cover Retaining Clips (2) into the square openings in the Lid.
DISASSEMBLY | ASSEMBLY/ |
|
|
