Chapter 2: Installation
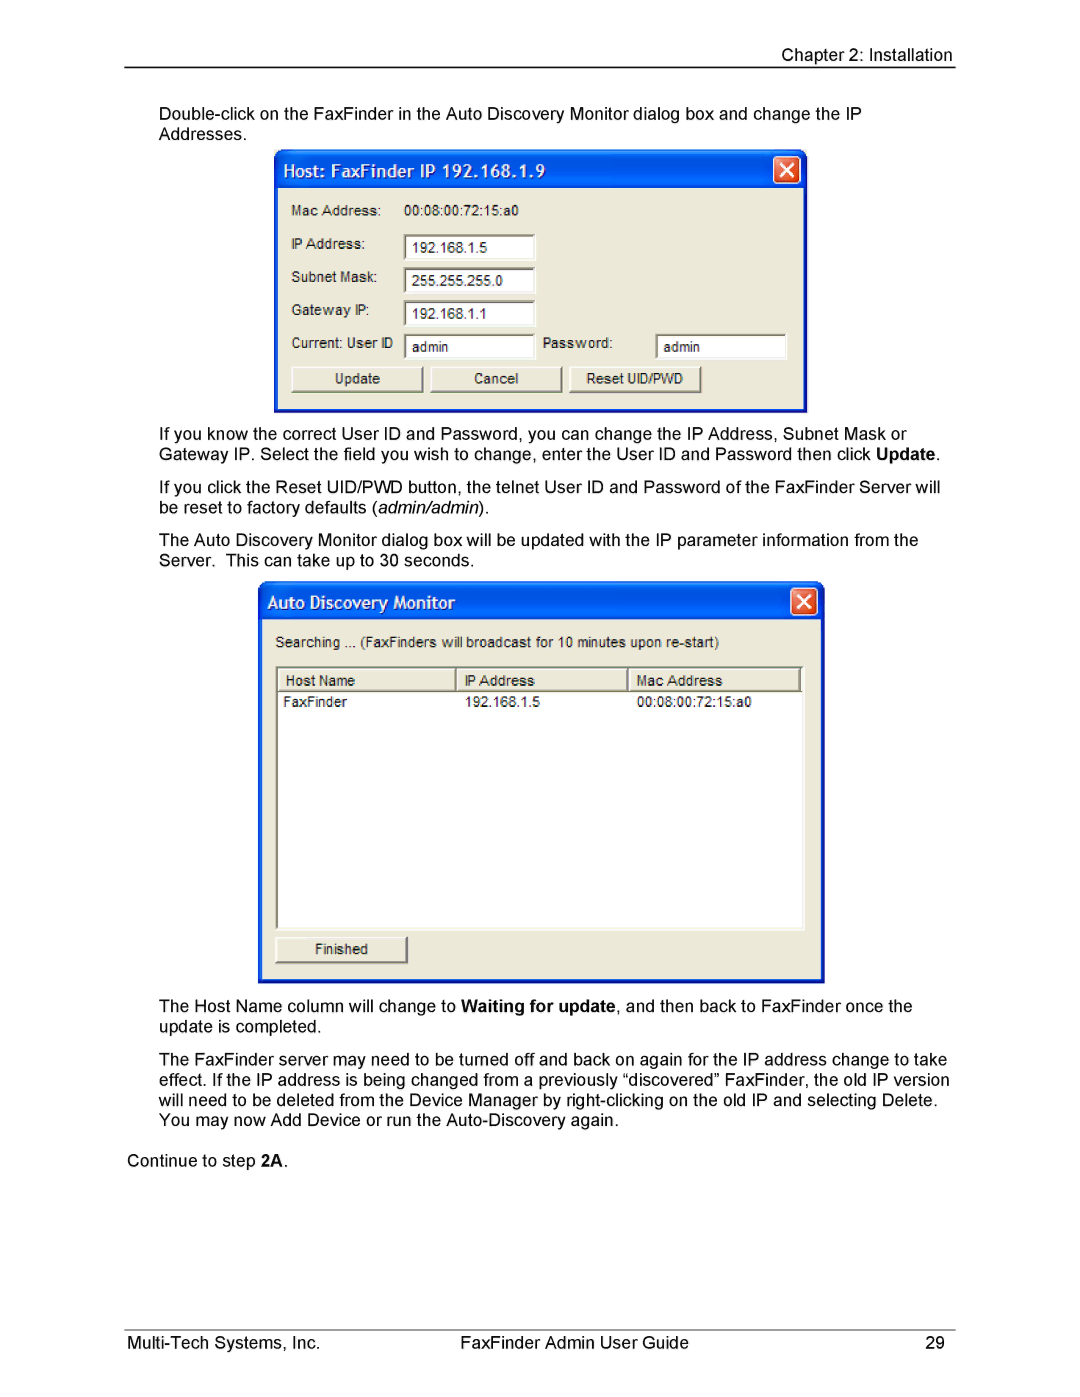
If you know the correct User ID and Password, you can change the IP Address, Subnet Mask or Gateway IP. Select the field you wish to change, enter the User ID and Password then click Update.
If you click the Reset UID/PWD button, the telnet User ID and Password of the FaxFinder Server will be reset to factory defaults (admin/admin).
The Auto Discovery Monitor dialog box will be updated with the IP parameter information from the Server. This can take up to 30 seconds.
The Host Name column will change to Waiting for update, and then back to FaxFinder once the update is completed.
The FaxFinder server may need to be turned off and back on again for the IP address change to take effect. If the IP address is being changed from a previously “discovered” FaxFinder, the old IP version will need to be deleted from the Device Manager by
You may now Add Device or run the
Continue to step 2A.
FaxFinder Admin User Guide | 29 |