Chapter 4: FaxFinder Client Software Configuration
FaxFinder Fax Client Software Menu Command Definitions
Option tab | Description |
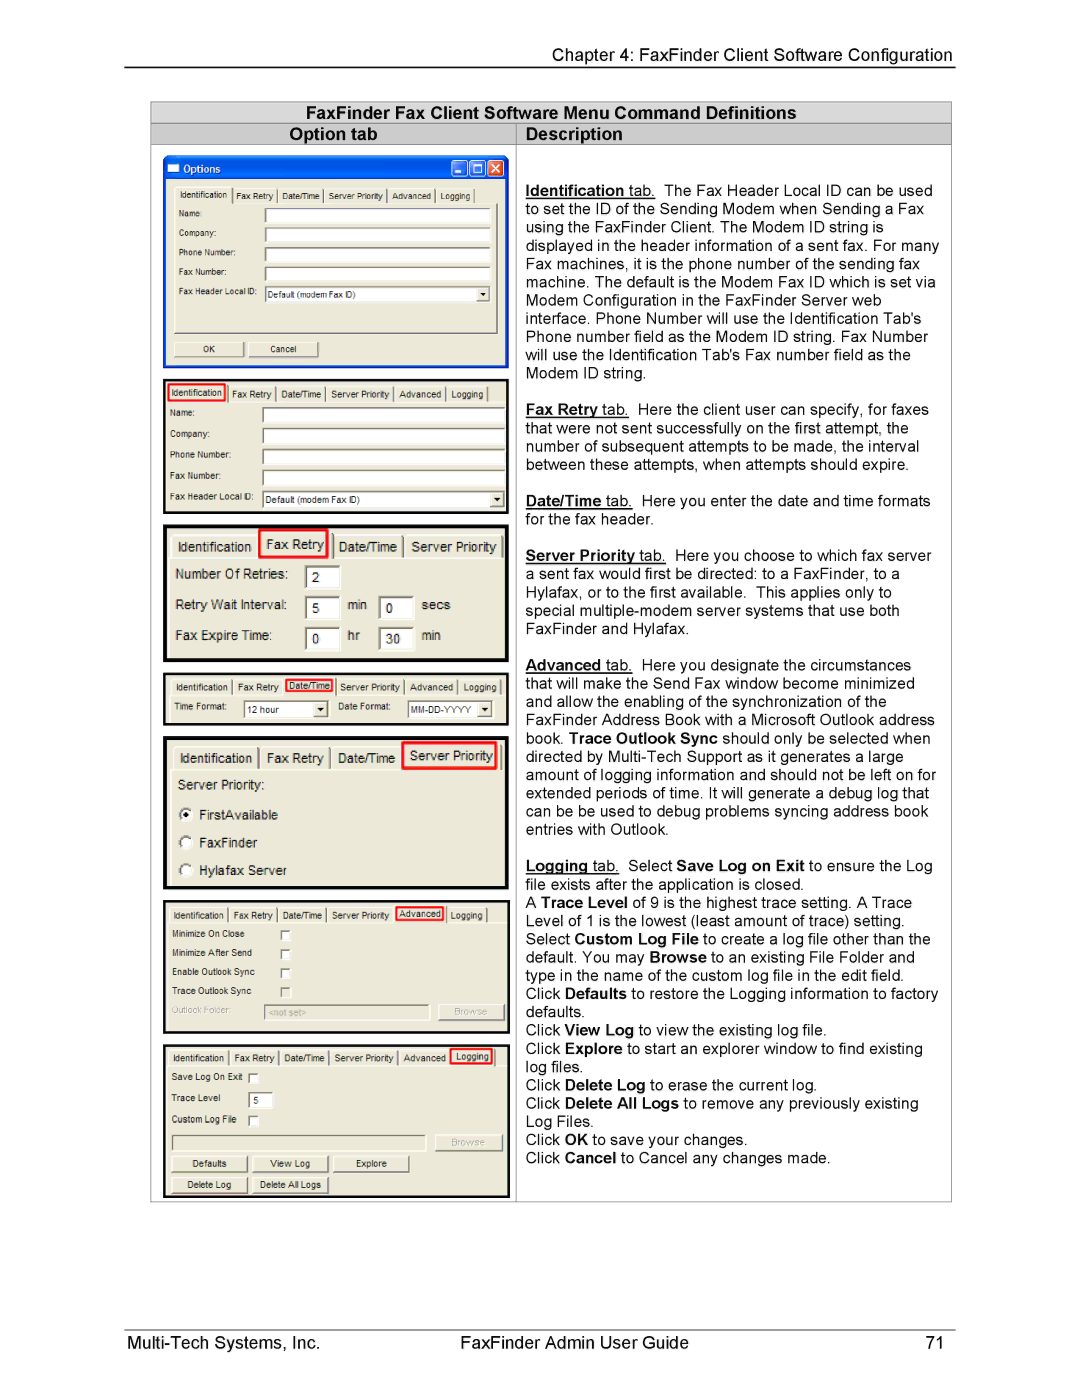
Identification tab. The Fax Header Local ID can be used to set the ID of the Sending Modem when Sending a Fax using the FaxFinder Client. The Modem ID string is displayed in the header information of a sent fax. For many Fax machines, it is the phone number of the sending fax machine. The default is the Modem Fax ID which is set via Modem Configuration in the FaxFinder Server web interface. Phone Number will use the Identification Tab's Phone number field as the Modem ID string. Fax Number will use the Identification Tab's Fax number field as the Modem ID string.
Fax Retry tab. Here the client user can specify, for faxes that were not sent successfully on the first attempt, the number of subsequent attempts to be made, the interval between these attempts, when attempts should expire.
Date/Time tab. Here you enter the date and time formats for the fax header.
Server Priority tab. Here you choose to which fax server a sent fax would first be directed: to a FaxFinder, to a Hylafax, or to the first available. This applies only to special
Advanced tab. Here you designate the circumstances that will make the Send Fax window become minimized and allow the enabling of the synchronization of the FaxFinder Address Book with a Microsoft Outlook address book. Trace Outlook Sync should only be selected when directed by
Logging tab. Select Save Log on Exit to ensure the Log file exists after the application is closed.
A Trace Level of 9 is the highest trace setting. A Trace Level of 1 is the lowest (least amount of trace) setting. Select Custom Log File to create a log file other than the default. You may Browse to an existing File Folder and type in the name of the custom log file in the edit field. Click Defaults to restore the Logging information to factory defaults.
Click View Log to view the existing log file.
Click Explore to start an explorer window to find existing log files.
Click Delete Log to erase the current log.
Click Delete All Logs to remove any previously existing Log Files.
Click OK to save your changes.
Click Cancel to Cancel any changes made.
| FaxFinder Admin User Guide | 71 |