Chapter 2: Installation
7. Setting up the Mail Server
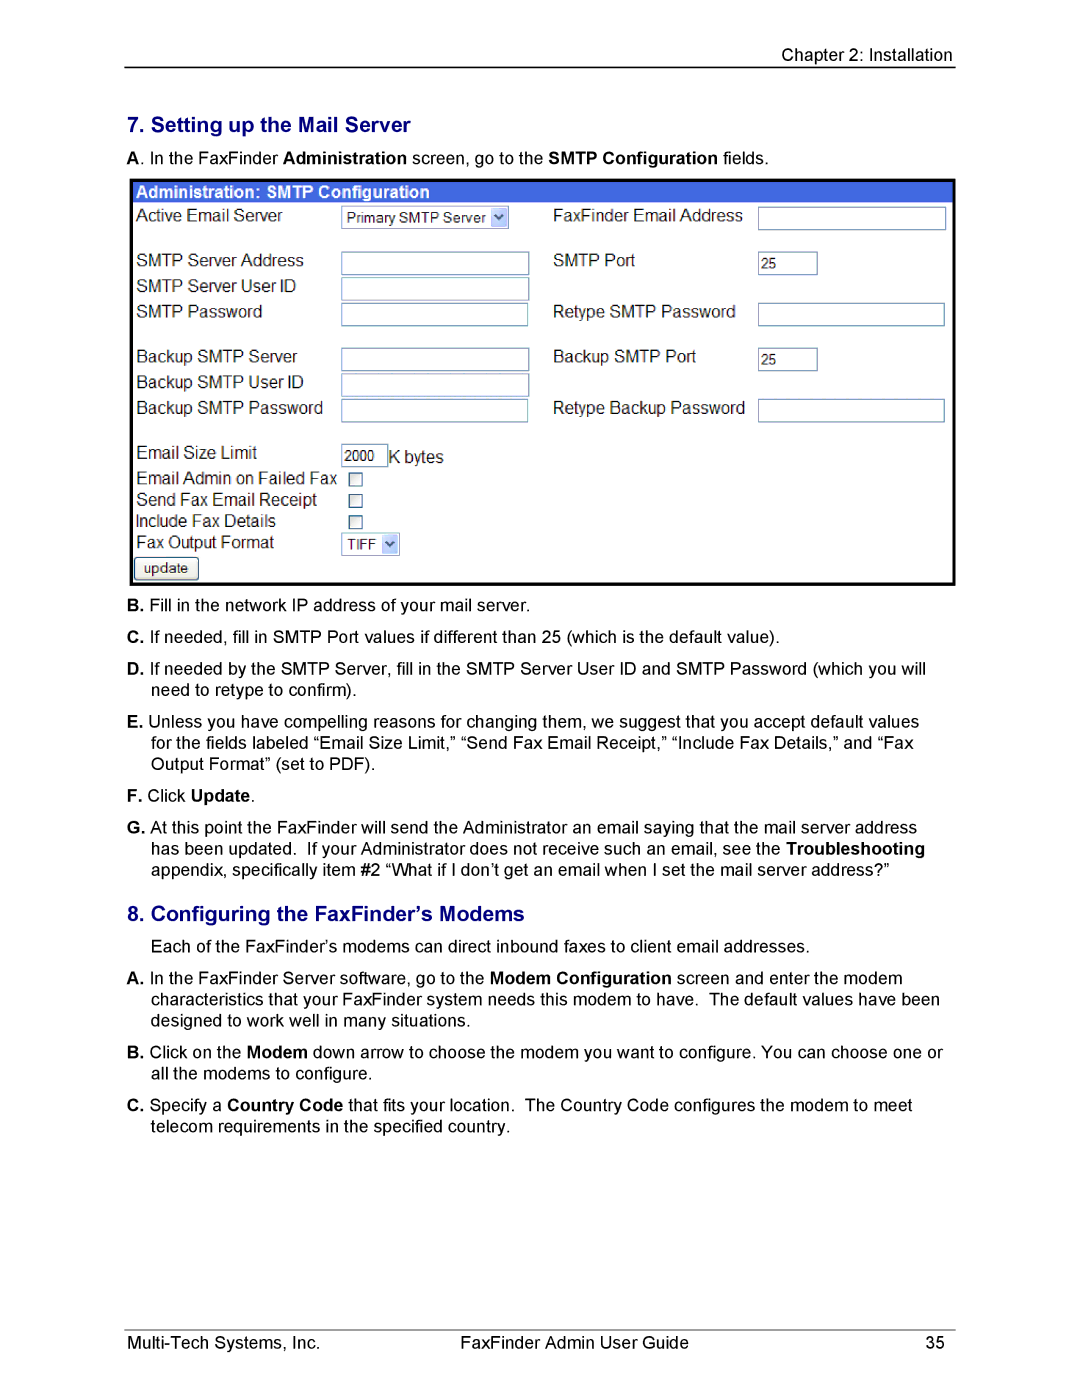
A. In the FaxFinder Administration screen, go to the SMTP Configuration fields.
B. Fill in the network IP address of your mail server.
C. If needed, fill in SMTP Port values if different than 25 (which is the default value).
D. If needed by the SMTP Server, fill in the SMTP Server User ID and SMTP Password (which you will need to retype to confirm).
E. Unless you have compelling reasons for changing them, we suggest that you accept default values for the fields labeled “Email Size Limit,” “Send Fax Email Receipt,” “Include Fax Details,” and “Fax Output Format” (set to PDF).
F.Click Update.
G.At this point the FaxFinder will send the Administrator an email saying that the mail server address has been updated. If your Administrator does not receive such an email, see the Troubleshooting appendix, specifically item #2 “What if I don’t get an email when I set the mail server address?”
8. Configuring the FaxFinder’s Modems
Each of the FaxFinder’s modems can direct inbound faxes to client email addresses.
A. In the FaxFinder Server software, go to the Modem Configuration screen and enter the modem characteristics that your FaxFinder system needs this modem to have. The default values have been designed to work well in many situations.
B. Click on the Modem down arrow to choose the modem you want to configure. You can choose one or all the modems to configure.
C. Specify a Country Code that fits your location. The Country Code configures the modem to meet telecom requirements in the specified country.
FaxFinder Admin User Guide | 35 |
