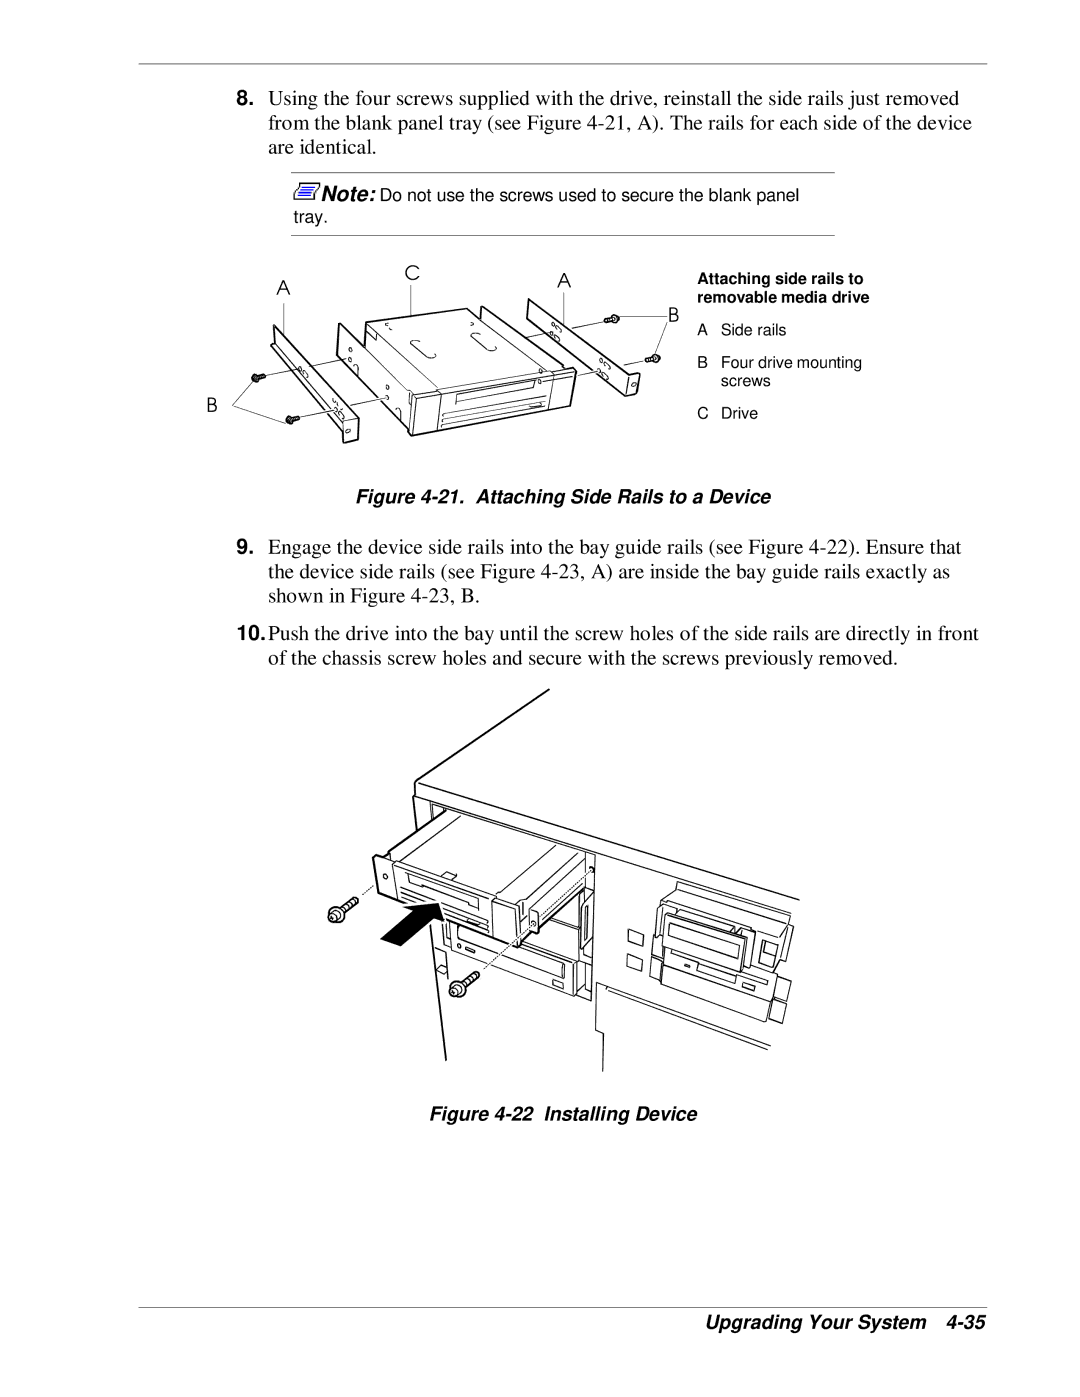
8.Using the four screws supplied with the drive, reinstall the side rails just removed from the blank panel tray (see Figure
![]() Note: Do not use the screws used to secure the blank panel tray.
Note: Do not use the screws used to secure the blank panel tray.
A | C | A |
| Attaching side rails to | ||||
|
|
|
|
| removable media drive | |||
|
|
|
|
| ||||
|
|
|
|
|
|
| ||
|
|
|
|
|
|
| B |
|
|
|
|
|
|
|
|
| |
|
|
|
|
|
|
| A | Side rails |
|
|
|
|
|
|
| B | Four drive mounting |
B |
|
|
|
|
|
| screws | |
|
|
|
|
|
| |||
|
|
|
|
| C | Drive | ||
|
|
|
|
|
|
| ||
Figure 4-21. Attaching Side Rails to a Device
9.Engage the device side rails into the bay guide rails (see Figure
10.Push the drive into the bay until the screw holes of the side rails are directly in front of the chassis screw holes and secure with the screws previously removed.