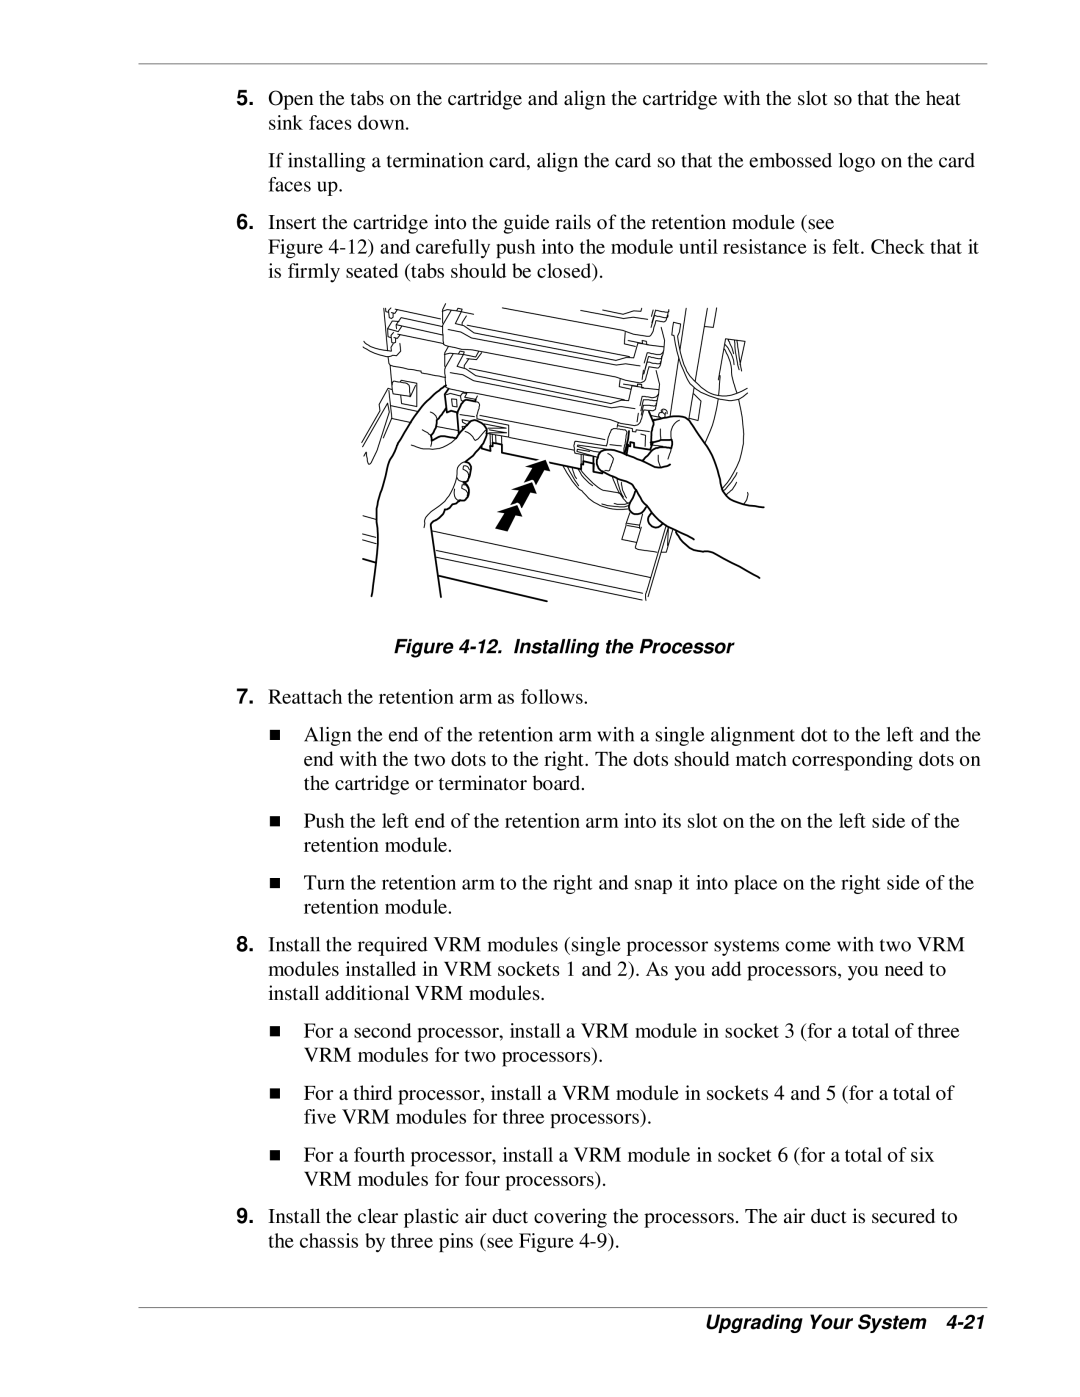
5.Open the tabs on the cartridge and align the cartridge with the slot so that the heat sink faces down.
If installing a termination card, align the card so that the embossed logo on the card faces up.
6.Insert the cartridge into the guide rails of the retention module (see
Figure 4-12) and carefully push into the module until resistance is felt. Check that it is firmly seated (tabs should be closed).
Figure 4-12. Installing the Processor
7.Reattach the retention arm as follows.
Align the end of the retention arm with a single alignment dot to the left and the end with the two dots to the right. The dots should match corresponding dots on the cartridge or terminator board.
Push the left end of the retention arm into its slot on the on the left side of the
Tretention module.
Turn the retention arm to the right and snap it into place on the right side of the retention module.
8.Install the required VRM modules (single processor systems come with two VRM modules installed in VRM sockets 1 and 2). As you add processors, you need to install additional VRM modules.
For a second processor, install a VRM module in socket 3 (for a total of three VRM modules for two processors).
For a third processor, install a VRM module in sockets 4 and 5 (for a total of
Tfive VRM modules for three processors).
For a fourth processor, install a VRM module in socket 6 (for a total of six VRM modules for four processors).
9.Install the clear plastic air duct covering the processors. The air duct is secured to the chassis by three pins (see Figure
