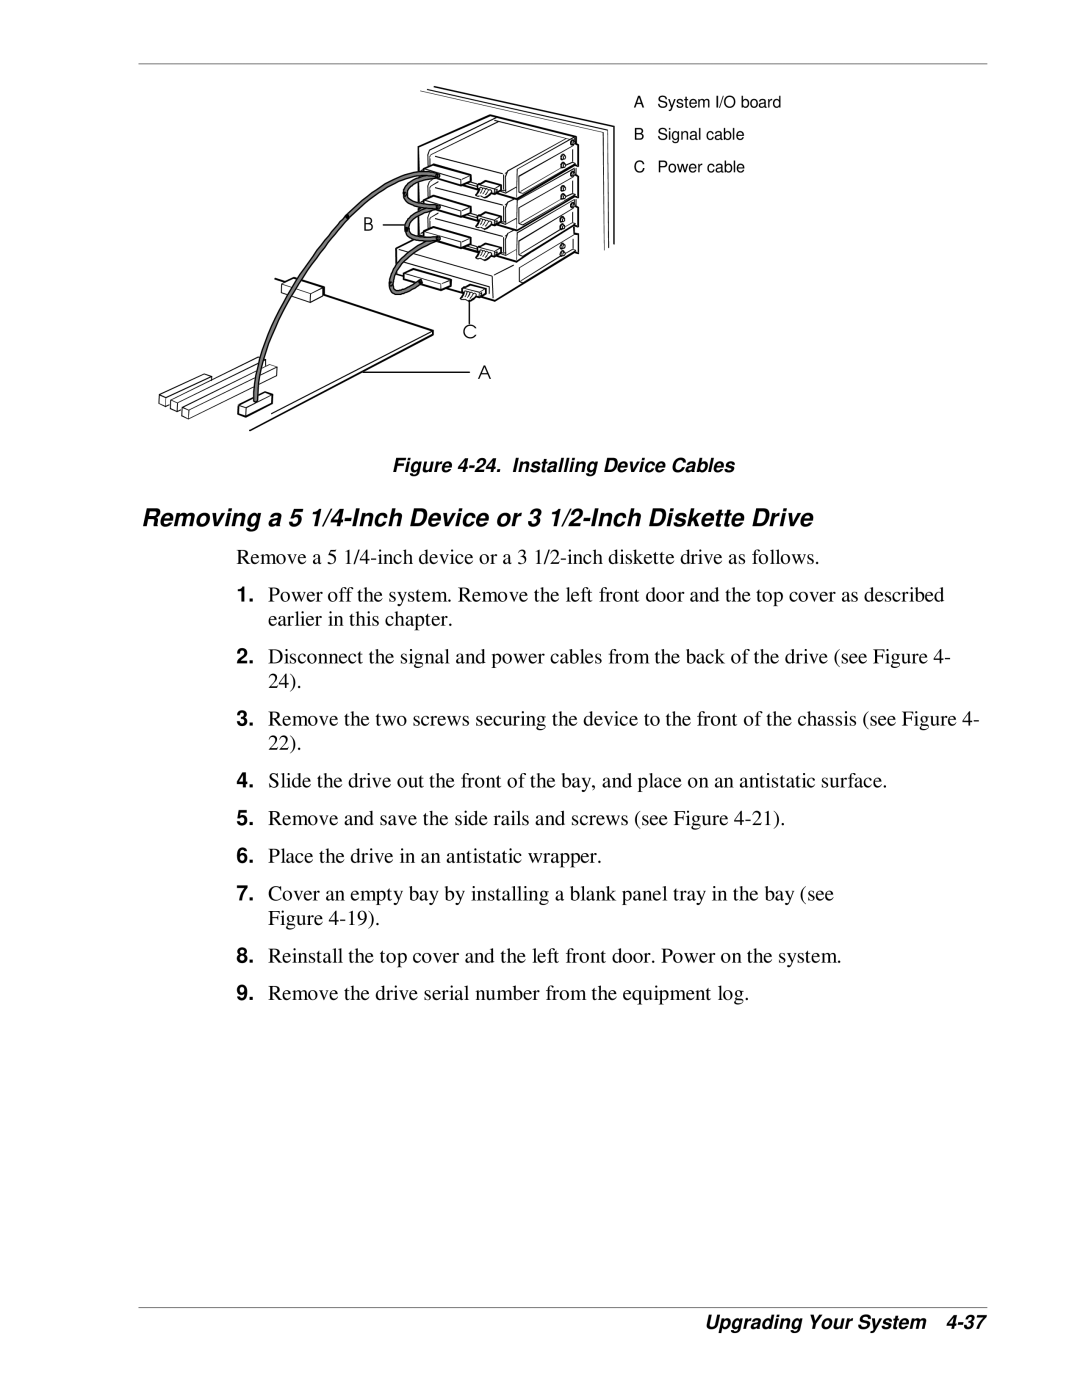
A System I/O board
B Signal cable
C Power cable
B ![]()
![]()
![]()
![]()
![]()
![]()
![]()
![]()
![]()
![]()
C
A
Figure 4-24. Installing Device Cables
Removing a 5 1/4-Inch Device or 3 1/2-Inch Diskette Drive
Remove a 5
1.Power off the system. Remove the left front door and the top cover as described earlier in this chapter.
2.Disconnect the signal and power cables from the back of the drive (see Figure 4- 24).
3.Remove the two screws securing the device to the front of the chassis (see Figure 4- 22).
4.Slide the drive out the front of the bay, and place on an antistatic surface.
5.Remove and save the side rails and screws (see Figure
6.Place the drive in an antistatic wrapper.
7.Cover an empty bay by installing a blank panel tray in the bay (see Figure
8.Reinstall the top cover and the left front door. Power on the system.
9.Remove the drive serial number from the equipment log.
