![]() Note: Observe static precautions. Use an antistatic wrist strap.
Note: Observe static precautions. Use an antistatic wrist strap.
4.The drive carrier is shipped with the
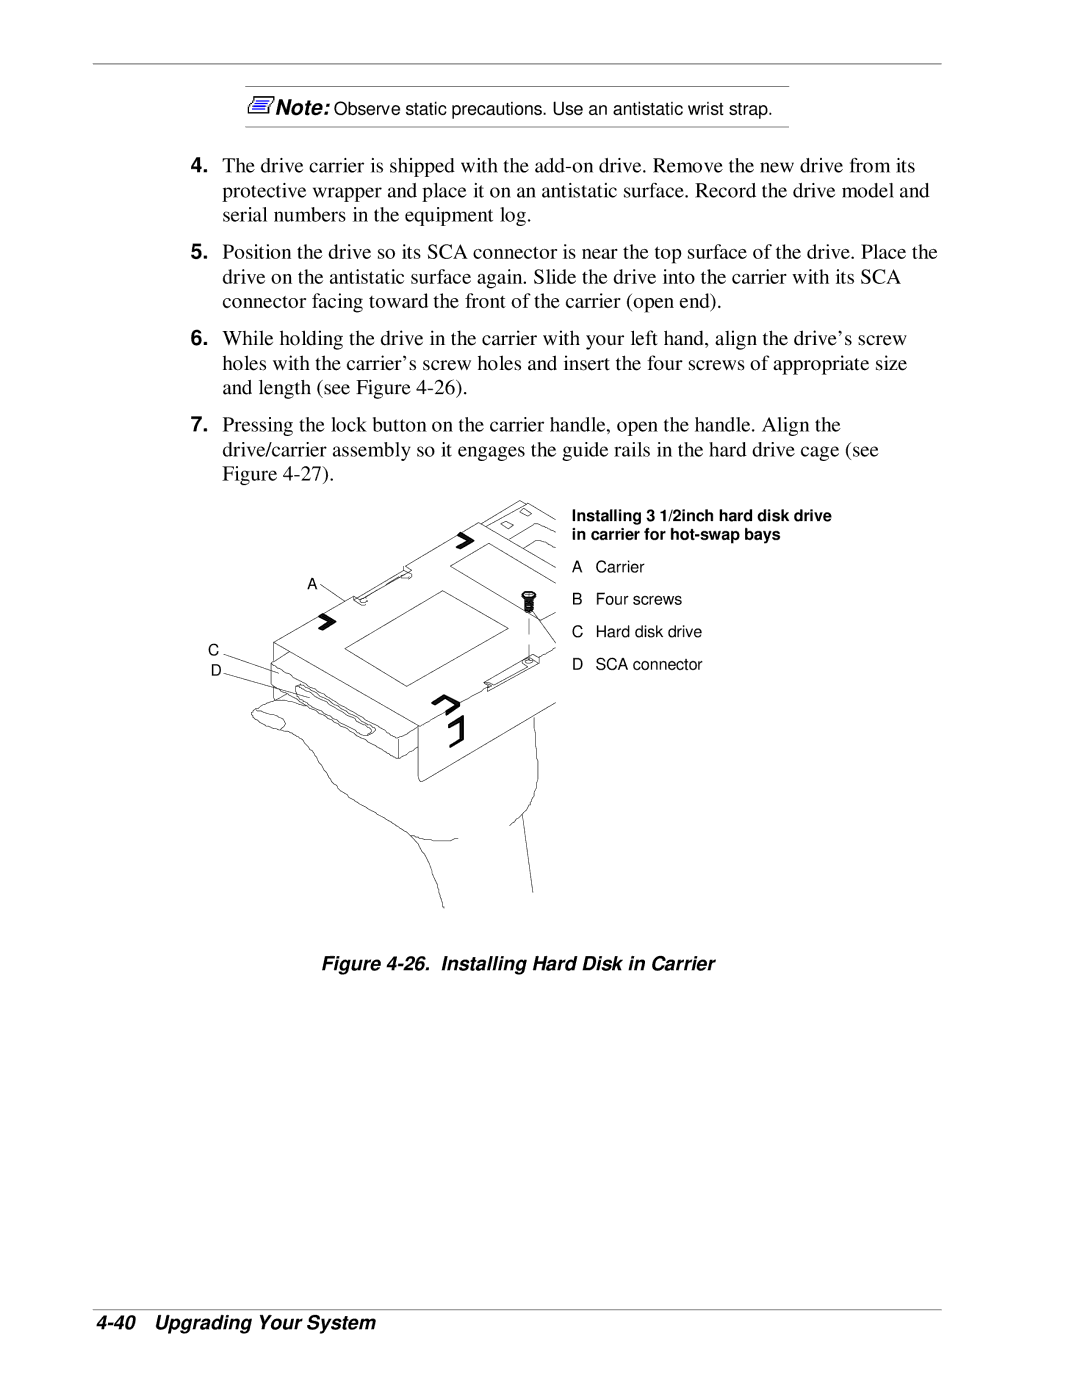
5.Position the drive so its SCA connector is near the top surface of the drive. Place the drive on the antistatic surface again. Slide the drive into the carrier with its SCA connector facing toward the front of the carrier (open end).
6.While holding the drive in the carrier with your left hand, align the drive’s screw holes with the carrier’s screw holes and insert the four screws of appropriate size and length (see Figure
7.Pressing the lock button on the carrier handle, open the handle. Align the drive/carrier assembly so it engages the guide rails in the hard drive cage (see Figure
C D
Installing 3 1/2inch hard disk drive in carrier for
A Carrier
A
B Four screws
C Hard disk drive
D SCA connector
