6-30 Firmware User Guide
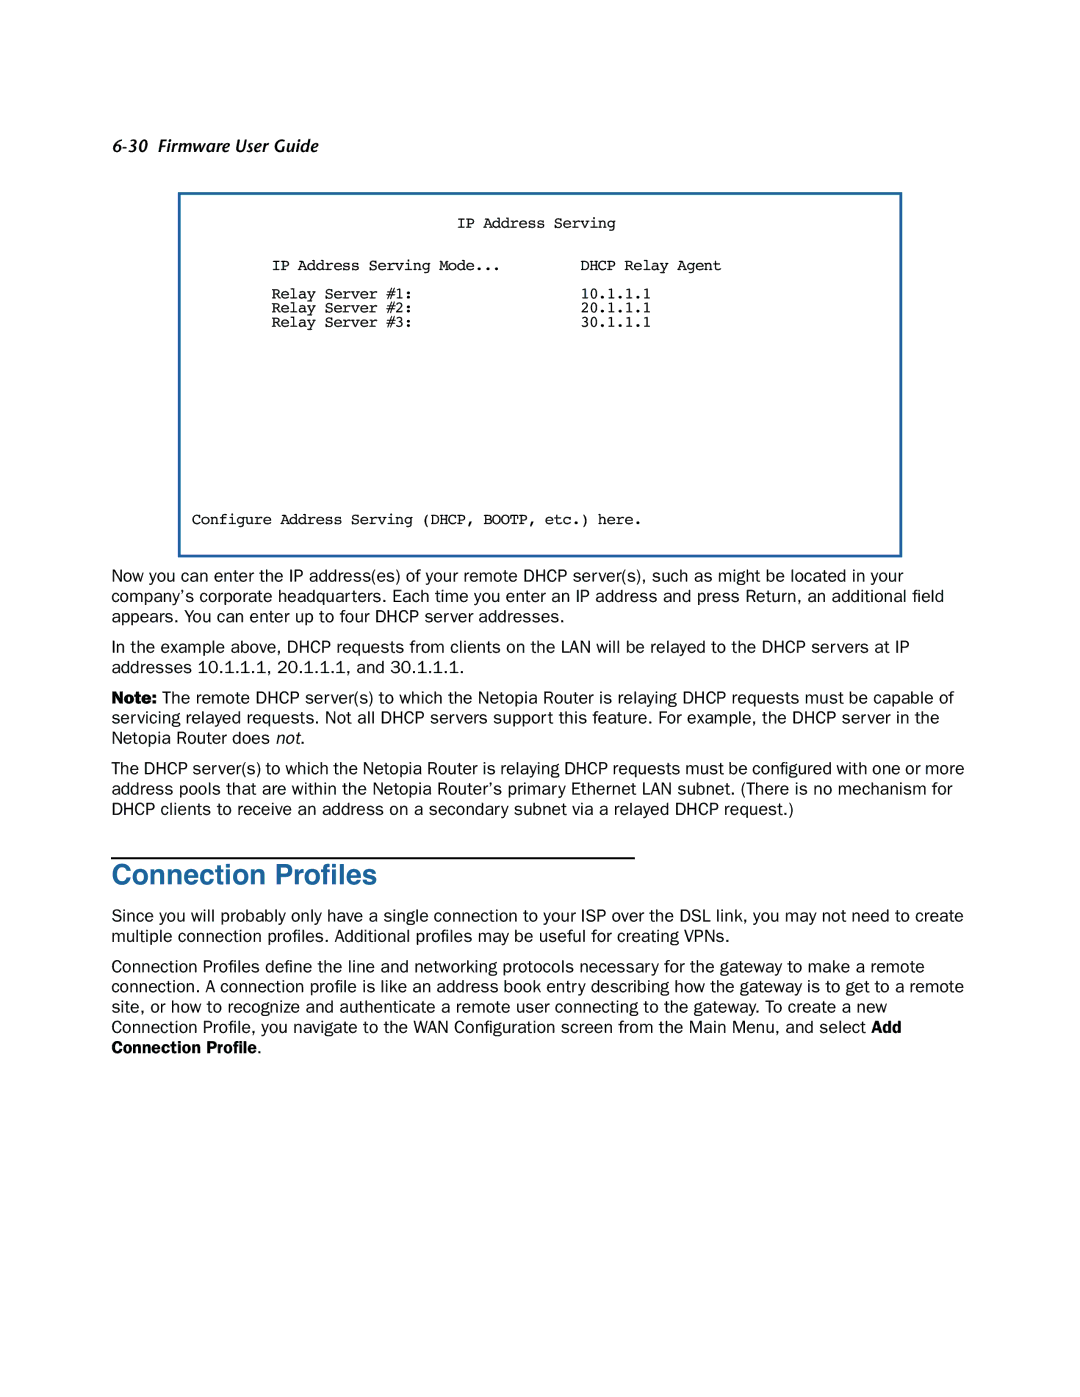
IP Address Serving
IP Address Serving Mode... | DHCP Relay Agent |
Relay Server #1: | 10.1.1.1 |
Relay Server #2: | 20.1.1.1 |
Relay Server #3: | 30.1.1.1 |
Configure Address Serving (DHCP, BOOTP, etc.) here.
Now you can enter the IP address(es) of your remote DHCP server(s), such as might be located in your company’s corporate headquarters. Each time you enter an IP address and press Return, an additional field appears. You can enter up to four DHCP server addresses.
In the example above, DHCP requests from clients on the LAN will be relayed to the DHCP servers at IP addresses 10.1.1.1, 20.1.1.1, and 30.1.1.1.
Note: The remote DHCP server(s) to which the Netopia Router is relaying DHCP requests must be capable of servicing relayed requests. Not all DHCP servers support this feature. For example, the DHCP server in the Netopia Router does not.
The DHCP server(s) to which the Netopia Router is relaying DHCP requests must be configured with one or more address pools that are within the Netopia Router’s primary Ethernet LAN subnet. (There is no mechanism for DHCP clients to receive an address on a secondary subnet via a relayed DHCP request.)
Connection Profiles
Since you will probably only have a single connection to your ISP over the DSL link, you may not need to create multiple connection profiles. Additional profiles may be useful for creating VPNs.
Connection Profiles define the line and networking protocols necessary for the gateway to make a remote connection. A connection profile is like an address book entry describing how the gateway is to get to a remote site, or how to recognize and authenticate a remote user connecting to the gateway. To create a new Connection Profile, you navigate to the WAN Configuration screen from the Main Menu, and select Add Connection Profile.