Monitoring Tools
The SNMP Setup screen
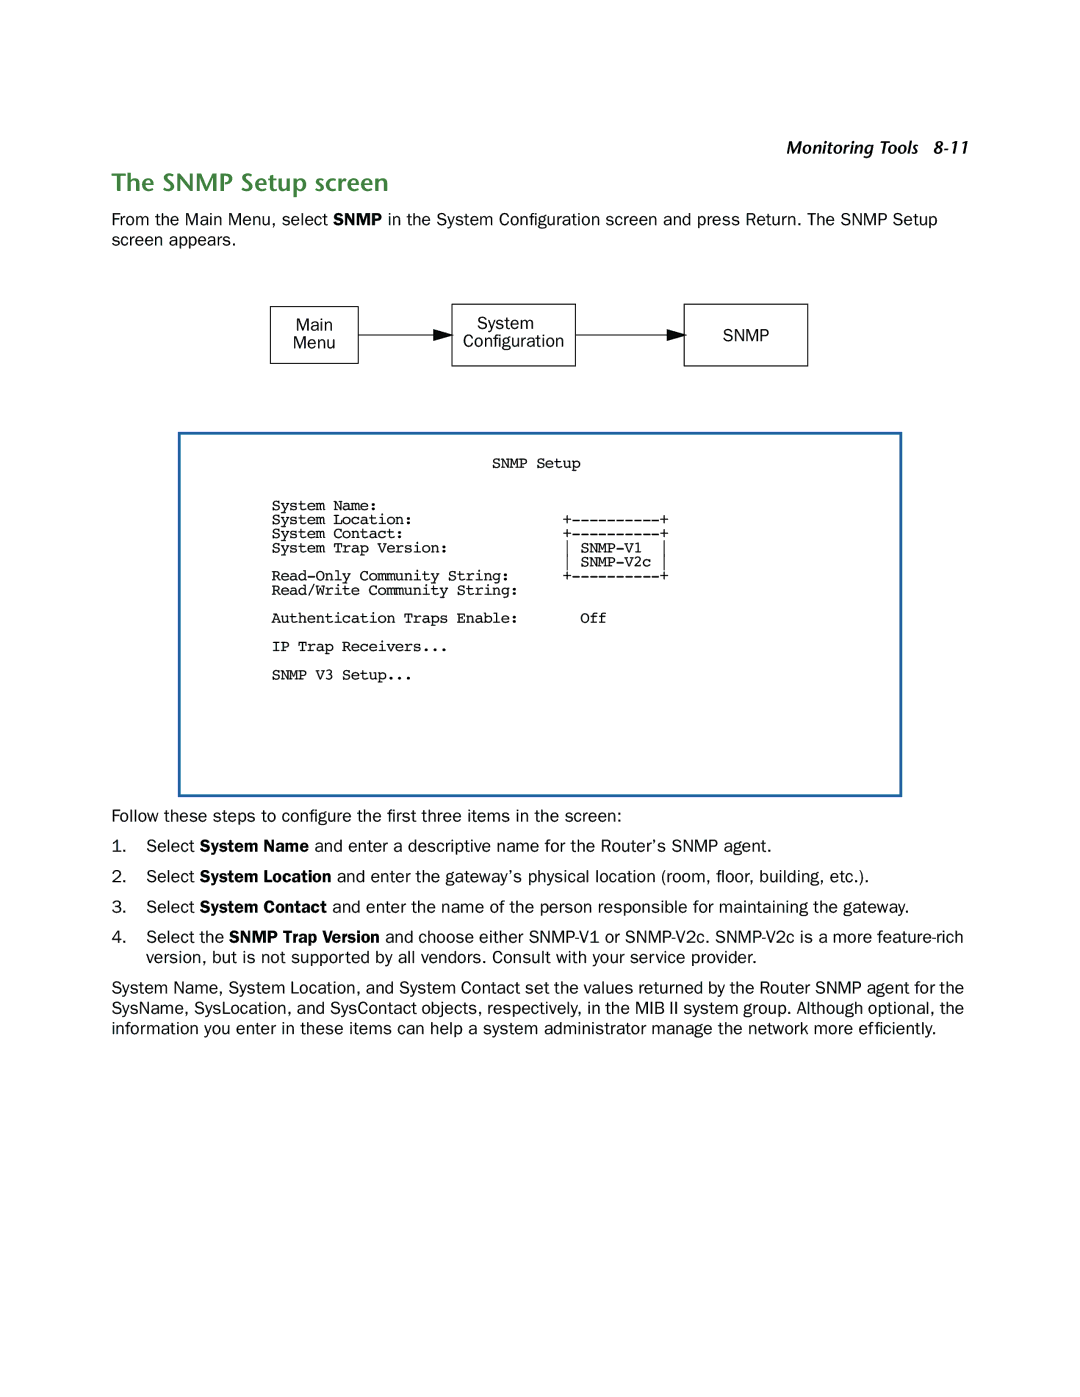
From the Main Menu, select SNMP in the System Configuration screen and press Return. The SNMP Setup screen appears.
Main
Menu
System
Configuration
SNMP
SNMP Setup |
| |
System Name: |
|
|
System Location: | + | |
System Contact: | + | |
System Trap Version: | | |
| | |
+ | ||
Read/Write Community String: |
|
Authentication Traps Enable: | Off |
IP Trap Receivers... |
|
SNMP V3 Setup... |
|
Follow these steps to configure the first three items in the screen:
1.Select System Name and enter a descriptive name for the Router’s SNMP agent.
2.Select System Location and enter the gateway’s physical location (room, floor, building, etc.).
3.Select System Contact and enter the name of the person responsible for maintaining the gateway.
4.Select the SNMP Trap Version and choose either
System Name, System Location, and System Contact set the values returned by the Router SNMP agent for the SysName, SysLocation, and SysContact objects, respectively, in the MIB II system group. Although optional, the information you enter in these items can help a system administrator manage the network more efficiently.