File menu:
-Page Settings — Click this menu to display the Page Settings tab.
-Image Settings — Click this menu to display the Image Settings tab.
-Scan — Click this menu to start remote scanning and acquire the image.
-Close — Click this menu to close the Remote Scan driver.
Edit menu:
- Reset Settings — Click this to reset the all settings to the factory defaults.
Devices menu:
-Discovery — Click this menu to add a new connection to this equipment in your network for the Remote Scan driver.
P.137 “Adding a New Device Using Network Discovery”
-Select
P.137 “Changing the Target Device”
Help
-Help — Click this menu to display Online Help.
-About — Click this menu to display the version information.
2)Page Settings/Image Settings tab
You can set the various scan settings in each tab. P.135 “Page Settings Tab”
P.136 “Image Settings Tab”
3)[Scan]
Click this to start remote scanning and acquire the image
4)[Cancel]
Click this to exit the Remote Scan driver.
5)Status Bar
This displays the communication status and the IP address of the equipment to be con- nected.
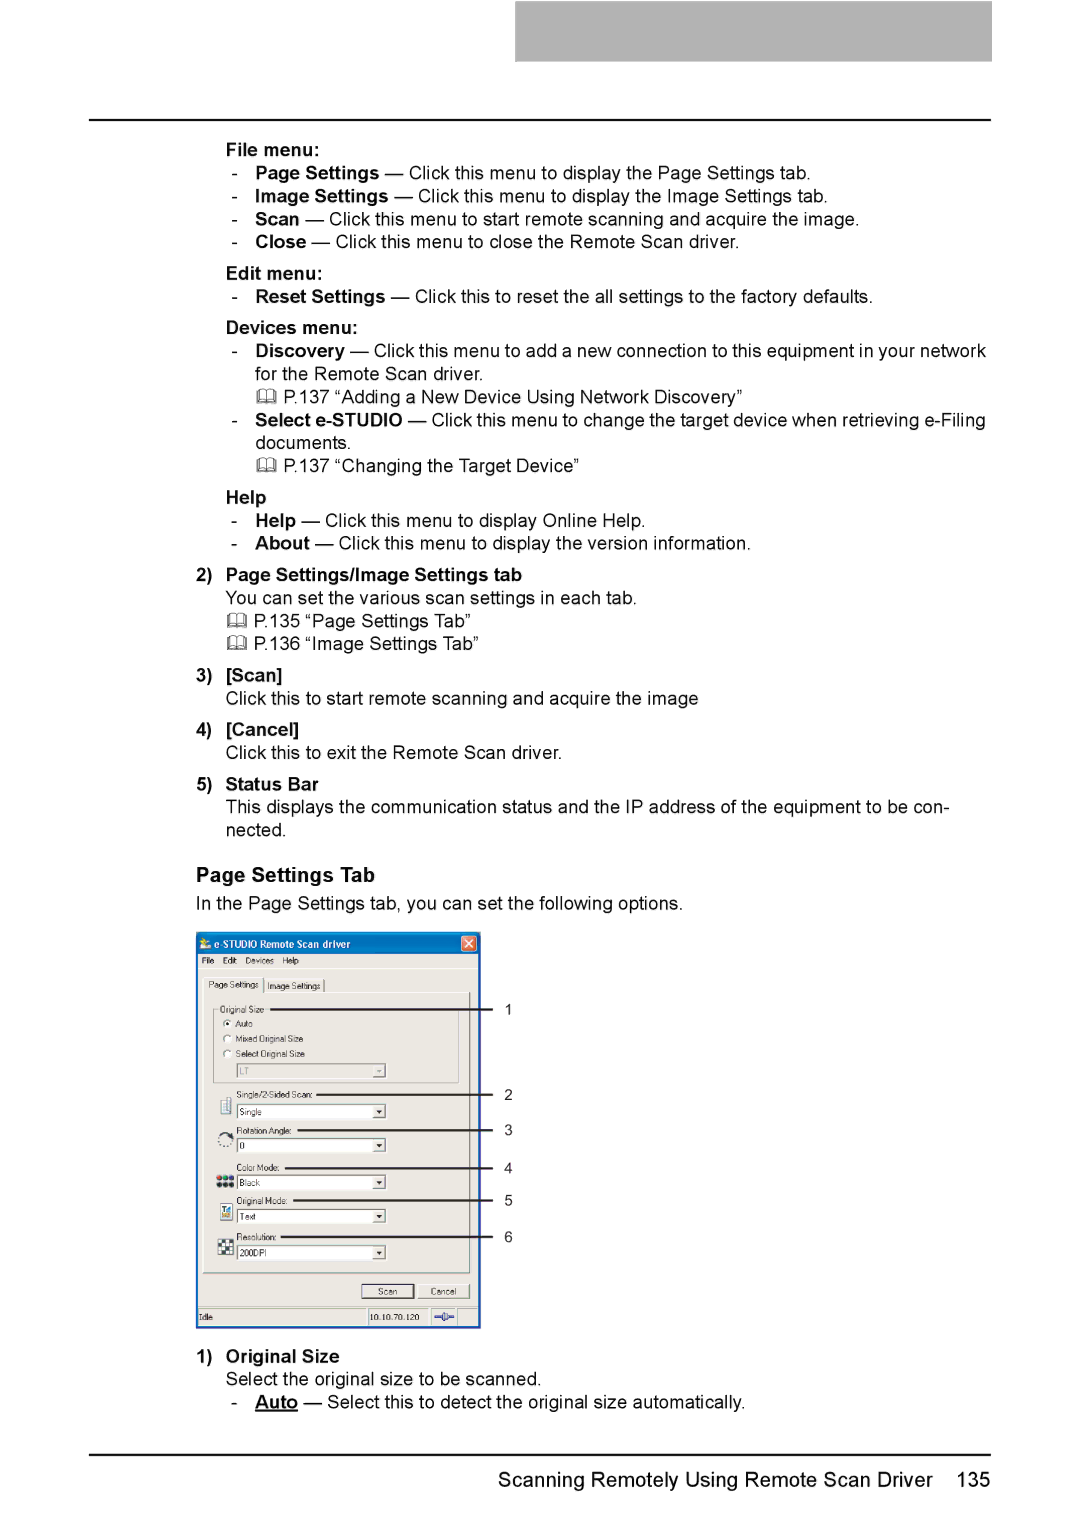
Page Settings Tab
In the Page Settings tab, you can set the following options.
1
2
3
4
5
6
1)Original Size
Select the original size to be scanned.
-Auto — Select this to detect the original size automatically.
Scanning Remotely Using Remote Scan Driver 135
