1 Overview
Confirming the Scan Job Status
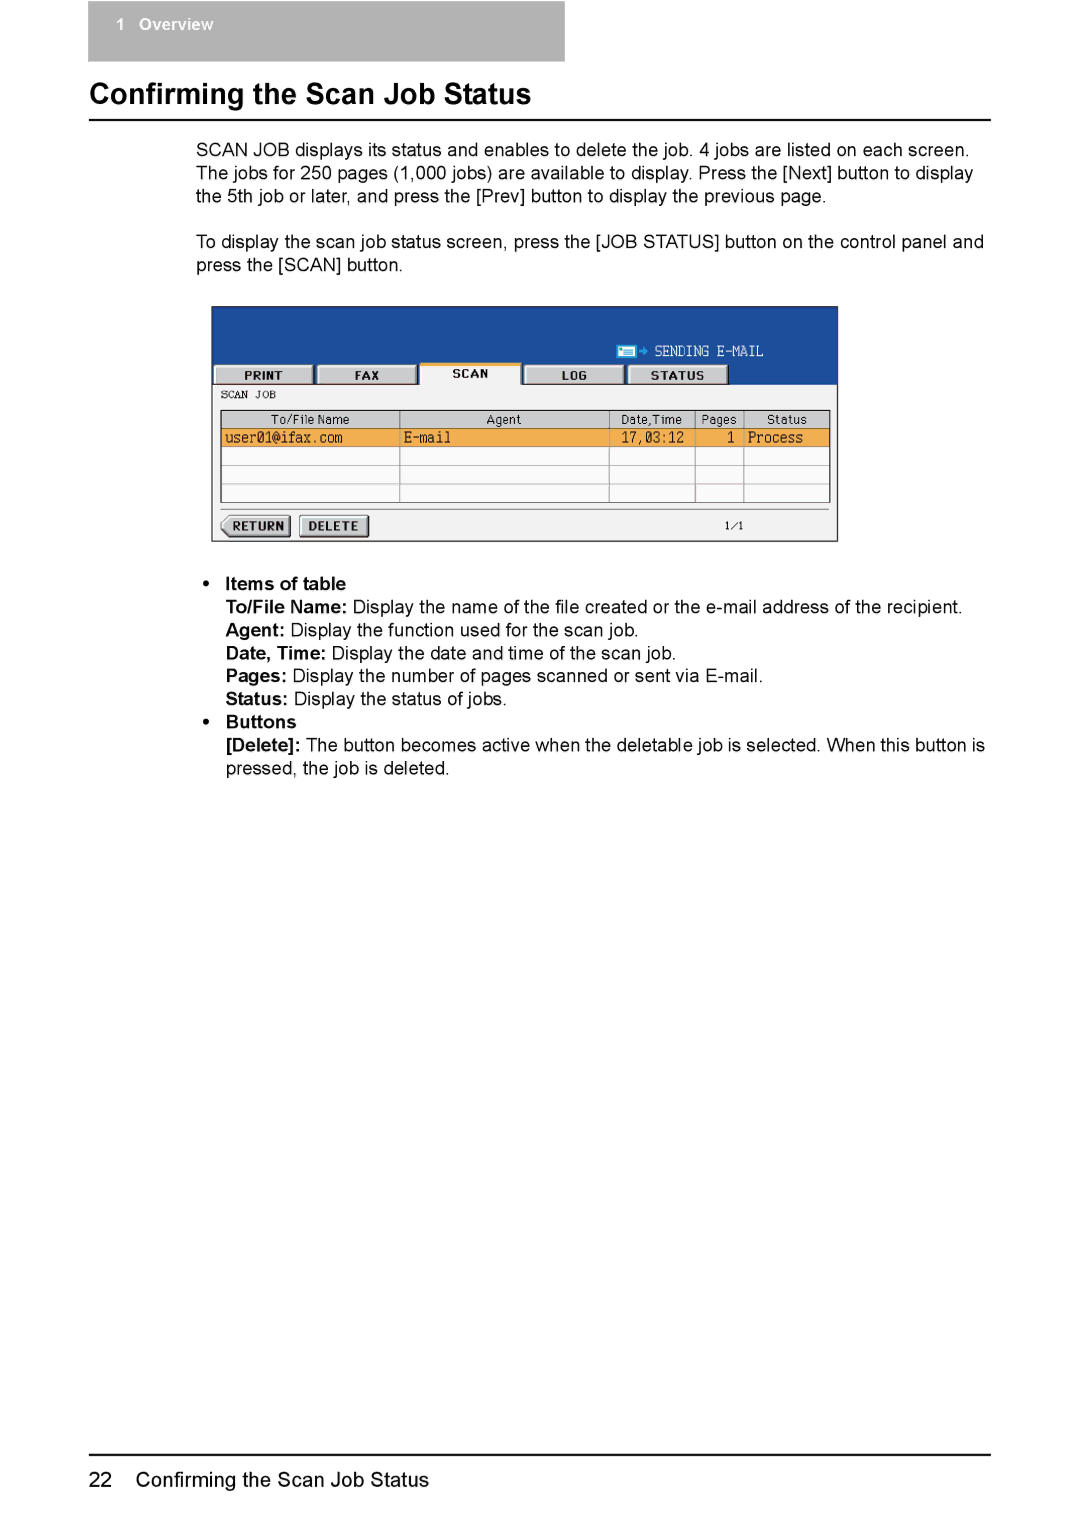
SCAN JOB displays its status and enables to delete the job. 4 jobs are listed on each screen. The jobs for 250 pages (1,000 jobs) are available to display. Press the [Next] button to display the 5th job or later, and press the [Prev] button to display the previous page.
To display the scan job status screen, press the [JOB STATUS] button on the control panel and press the [SCAN] button.
yItems of table
To/File Name: Display the name of the file created or the
Agent: Display the function used for the scan job.
Date, Time: Display the date and time of the scan job.
Pages: Display the number of pages scanned or sent via
Status: Display the status of jobs.
yButtons
[Delete]: The button becomes active when the deletable job is selected. When this button is pressed, the job is deleted.
22 Confirming the Scan Job Status