3.In general, the memory in the scanner unit is sufficient to store captured data for several hundred items. If you are capturing inventory data for a large number of units in a large physical space (for example, in a warehouse), transmit the captured data after completing the scan of a portion of the stored inventory. For example, transmit the captured data after you have completed scanning the northern section of a large warehouse, a corner section, etc.
Do Not Attempt to Scan An Entire Store or Warehouse Branch All at Once! You should do your inventory in smaller, easier to manage segments, instead of trying to do the entire inventory branch at once. This will be easier for both you and the scanner to manage.
4. Press to view a listing of all scanned items. The total number of items scanned displays at the bottom of the scanner window.
5.To view more information about the item, press the Scroll Right key below the Backspace key to scroll right, and the Scroll Left key below the ESC key to scroll left.
6. Press to return to the single item view. The most recent item viewed is displayed. To display a different item, return to the list mode by pressing the Backspace key and use the arrow keys to select the item you want to view.
7.After you have completed scanning of all desired inventory items, simultaneously press the <FN Alpha> and <0> keys to transmit the captured data to Furniture Wizard.
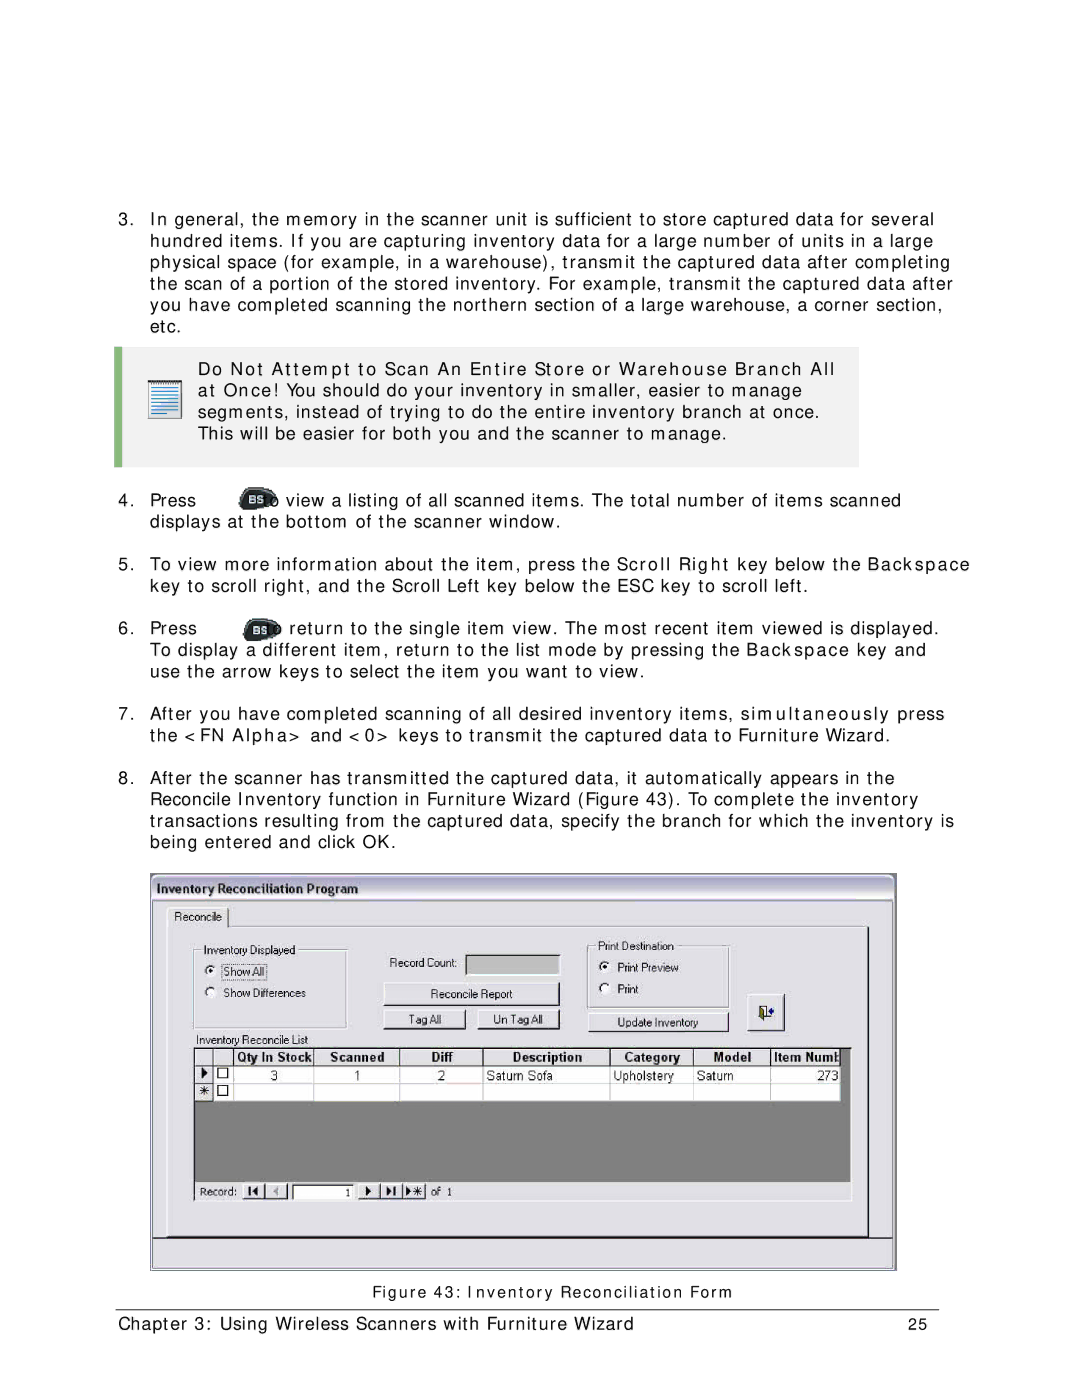
8.After the scanner has transmitted the captured data, it automatically appears in the Reconcile Inventory function in Furniture Wizard (Figure 43). To complete the inventory transactions resulting from the captured data, specify the branch for which the inventory is being entered and click OK.
Figure 43: Inventory Reconciliation Form
Chapter 3: Using Wireless Scanners with Furniture Wizard | 25 |
