OVERLAY 67
Customizing overlays
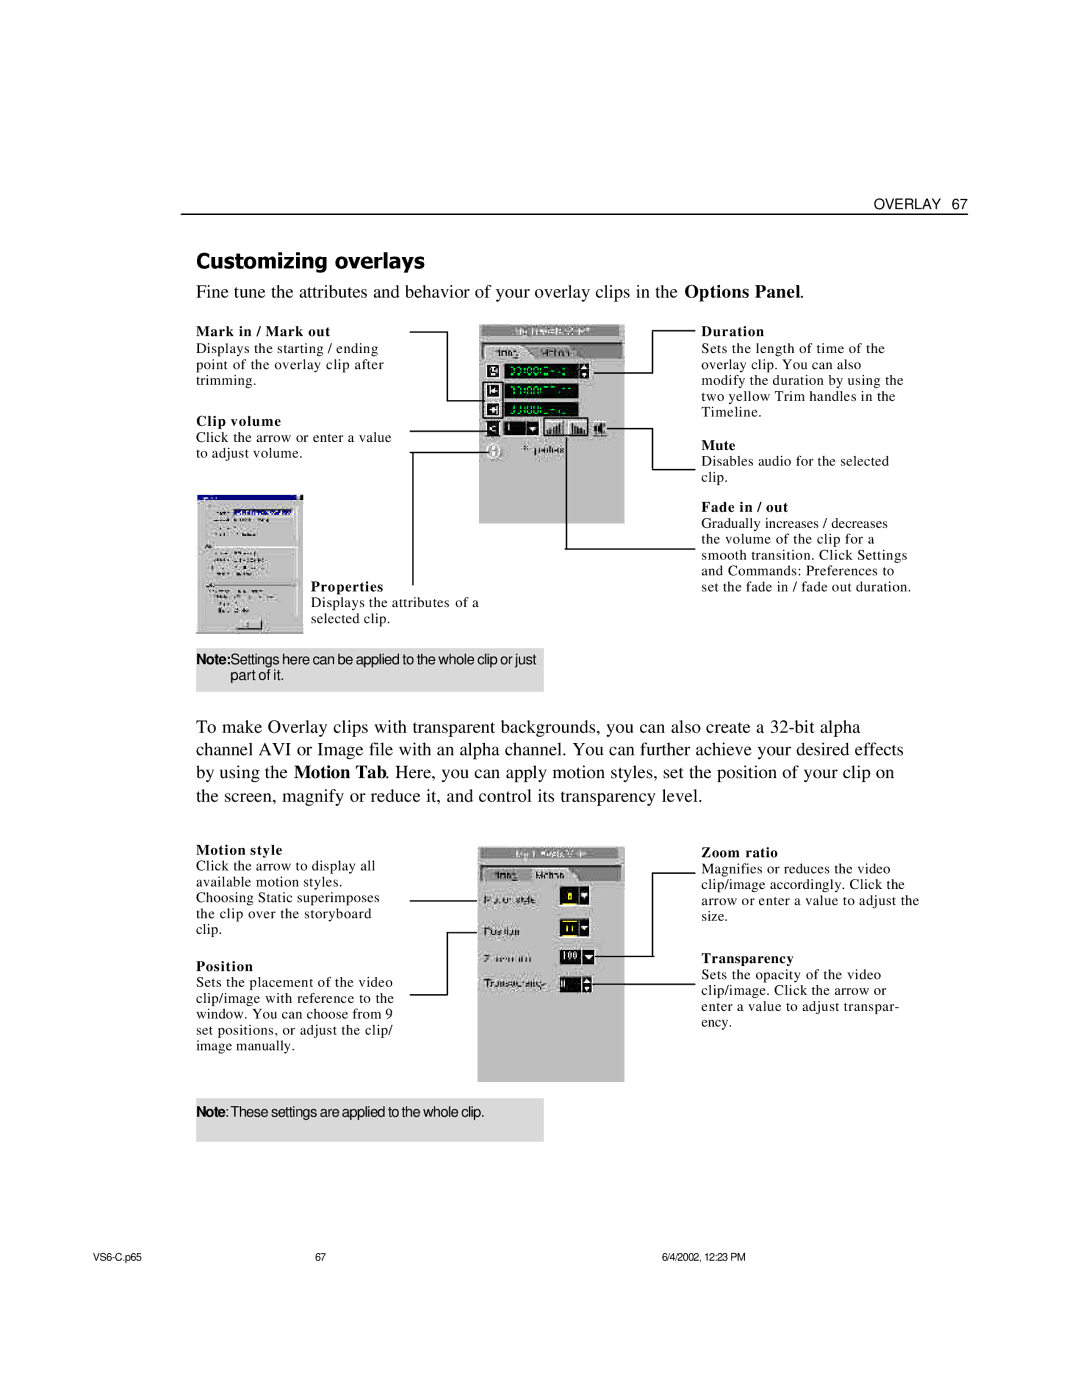
Fine tune the attributes and behavior of your overlay clips in the Options Panel.
Mark in / Mark out
Displays the starting / ending point of the overlay clip after trimming.
Clip volume
Click the arrow or enter a value to adjust volume.
Properties
Displays the attributes of a selected clip.
Note:Settings here can be applied to the whole clip or just part of it.
Duration
Sets the length of time of the overlay clip. You can also modify the duration by using the two yellow Trim handles in the Timeline.
Mute
Disables audio for the selected clip.
Fade in / out
Gradually increases / decreases the volume of the clip for a smooth transition. Click Settings and Commands: Preferences to set the fade in / fade out duration.
To make Overlay clips with transparent backgrounds, you can also create a
Motion style
Click the arrow to display all available motion styles. Choosing Static superimposes the clip over the storyboard clip.
Position
Sets the placement of the video clip/image with reference to the window. You can choose from 9 set positions, or adjust the clip/ image manually.
Zoom ratio
Magnifies or reduces the video clip/image accordingly. Click the arrow or enter a value to adjust the size.
Transparency
Sets the opacity of the video clip/image. Click the arrow or enter a value to adjust transpar- ency.
Note:These settings are applied to the whole clip.
67 | 6/4/2002, 12:23 PM |