Chapter 2: System Configuration
2.6.2 Communities
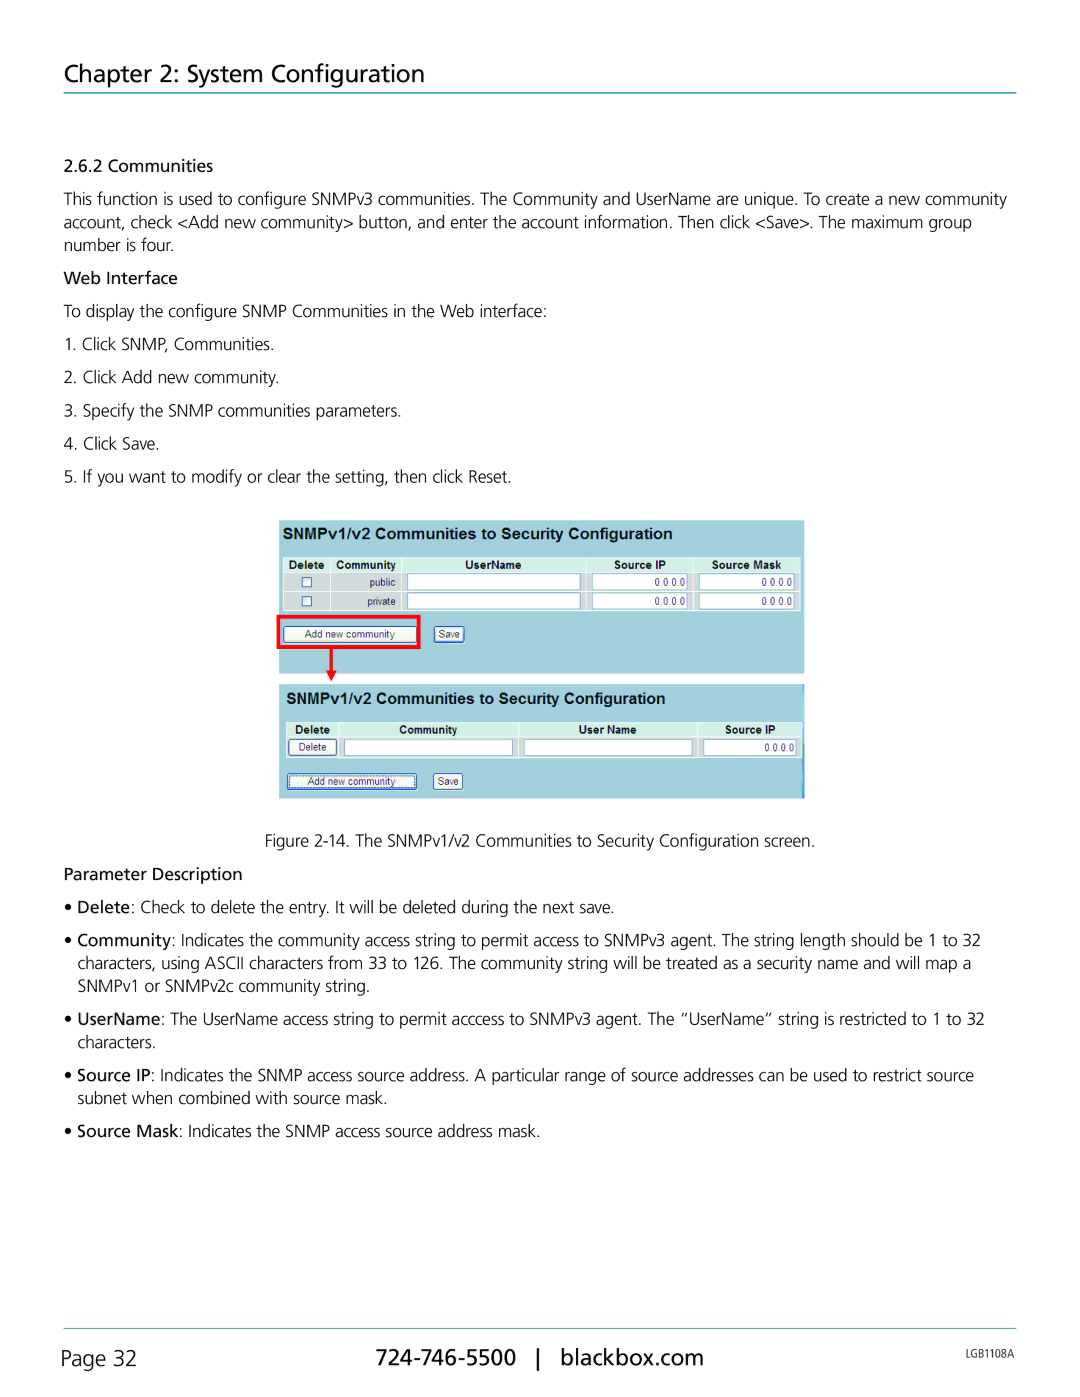
This function is used to configure SNMPv3 communities. The Community and UserName are unique. To create a new community account, check <Add new community> button, and enter the account information. Then click <Save>. The maximum group number is four.
Web Interface
To display the configure SNMP Communities in the Web interface:
1.Click SNMP, Communities.
2.Click Add new community.
3.Specify the SNMP communities parameters.
4.Click Save.
5.If you want to modify or clear the setting, then click Reset.
Figure 2-14. The SNMPv1/v2 Communities to Security Configuration screen.
Parameter Description
•Delete: Check to delete the entry. It will be deleted during the next save.
•Community: Indicates the community access string to permit access to SNMPv3 agent. The string length should be 1 to 32 characters, using ASCII characters from 33 to 126. The community string will be treated as a security name and will map a SNMPv1 or SNMPv2c community string.
•UserName: The UserName access string to permit acccess to SNMPv3 agent. The “UserName” string is restricted to 1 to 32 characters.
•Source IP: Indicates the SNMP access source address. A particular range of source addresses can be used to restrict source subnet when combined with source mask.
•Source Mask: Indicates the SNMP access source address mask.
Page 32 | LGB1108A | |
|
|
