Chapter 3: Configuration
Group to VLAN
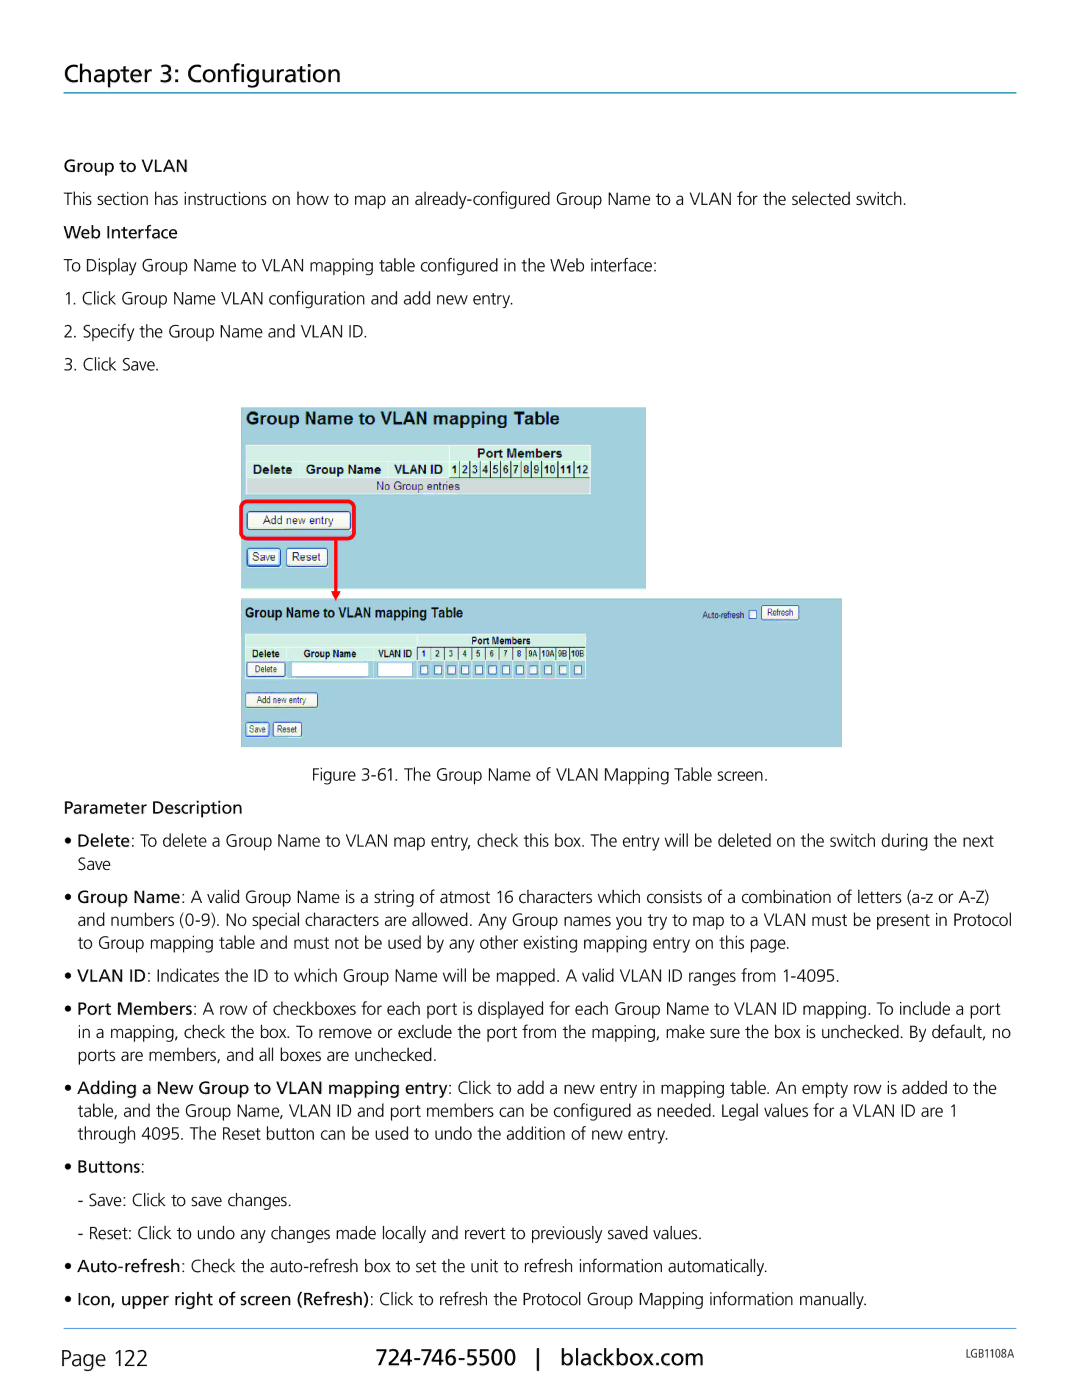
This section has instructions on how to map an
Web Interface
To Display Group Name to VLAN mapping table configured in the Web interface:
1.Click Group Name VLAN configuration and add new entry.
2.Specify the Group Name and VLAN ID.
3.Click Save.
Figure 3-61. The Group Name of VLAN Mapping Table screen.
Parameter Description
•Delete: To delete a Group Name to VLAN map entry, check this box. The entry will be deleted on the switch during the next Save
•Group Name: A valid Group Name is a string of atmost 16 characters which consists of a combination of letters (a-z or A-Z) and numbers (0-9). No special characters are allowed. Any Group names you try to map to a VLAN must be present in Protocol to Group mapping table and must not be used by any other existing mapping entry on this page.
•VLAN ID: Indicates the ID to which Group Name will be mapped. A valid VLAN ID ranges from 1-4095.
•Port Members: A row of checkboxes for each port is displayed for each Group Name to VLAN ID mapping. To include a port in a mapping, check the box. To remove or exclude the port from the mapping, make sure the box is unchecked. By default, no ports are members, and all boxes are unchecked.
•Adding a New Group to VLAN mapping entry: Click to add a new entry in mapping table. An empty row is added to the table, and the Group Name, VLAN ID and port members can be configured as needed. Legal values for a VLAN ID are 1 through 4095. The Reset button can be used to undo the addition of new entry.
•Buttons:
-Save: Click to save changes.
-Reset: Click to undo any changes made locally and revert to previously saved values.
•Auto-refresh: Check the auto-refresh box to set the unit to refresh information automatically.
•Icon, upper right of screen (Refresh): Click to refresh the Protocol Group Mapping information manually.
Page 122 | LGB1108A | |
|
|
