Selecting the Display Resolution
Procedure with a Computer
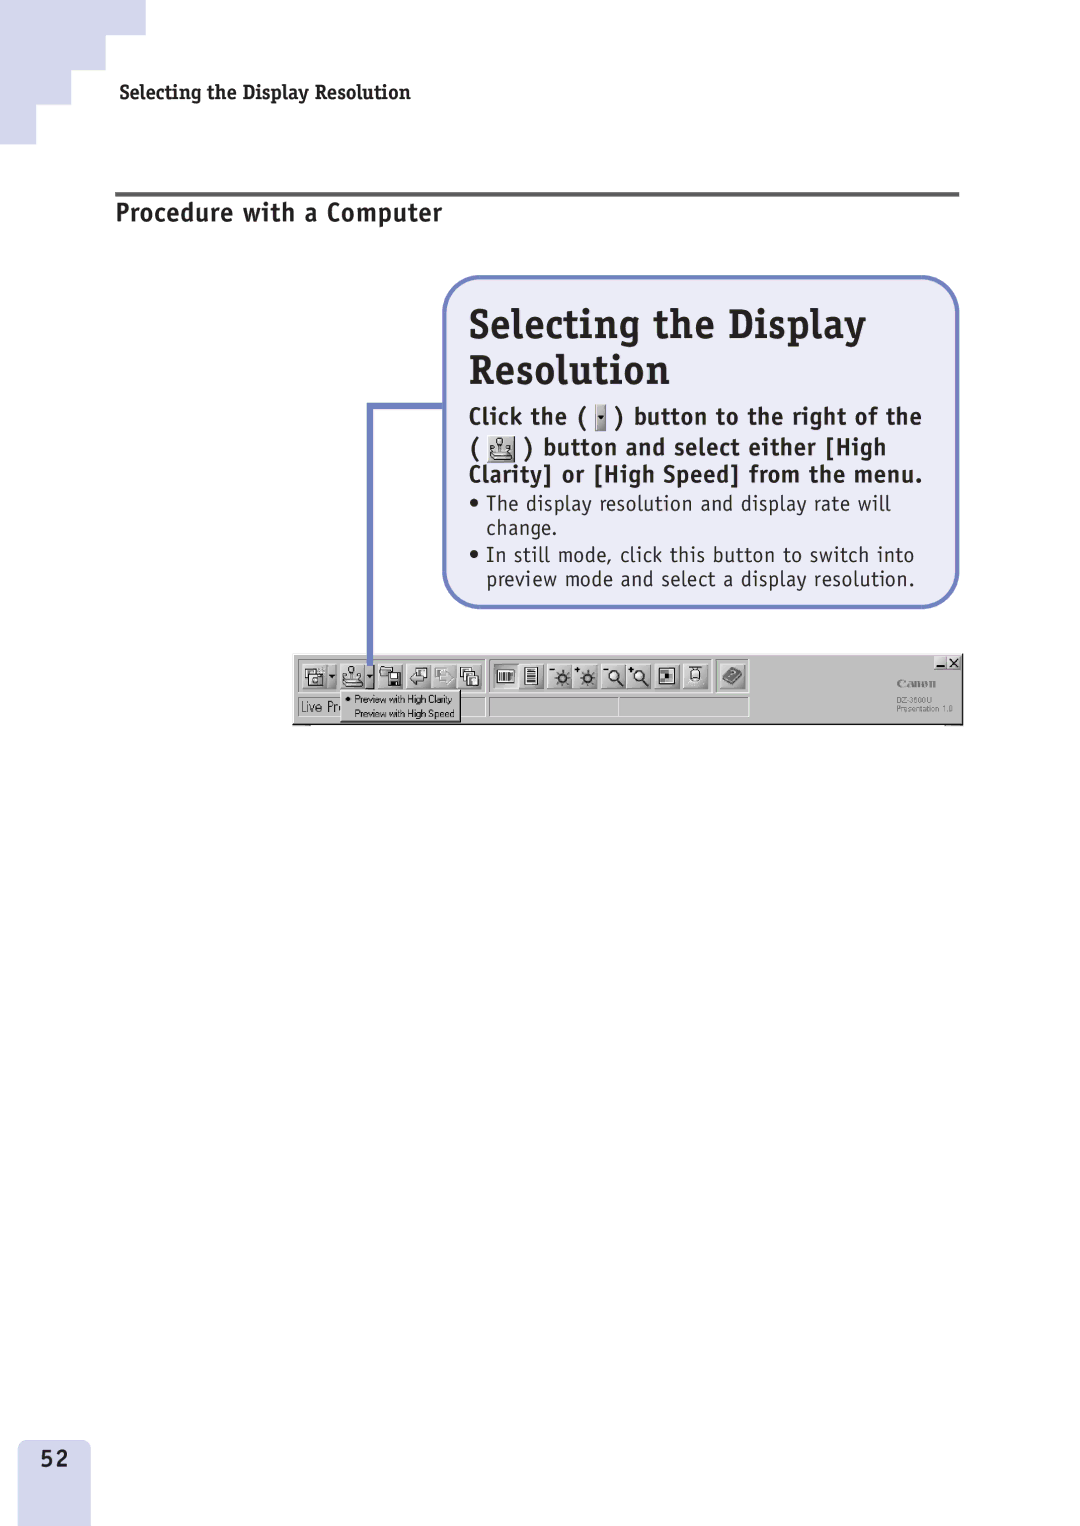
Selecting the Display
Resolution
Click the (![]() ) button to the right of the (
) button to the right of the ( ![]() ) button and select either [High Clarity] or [High Speed] from the menu.
) button and select either [High Clarity] or [High Speed] from the menu.
•The display resolution and display rate will change.
•In still mode, click this button to switch into preview mode and select a display resolution.
52