Chapter 4---Optical
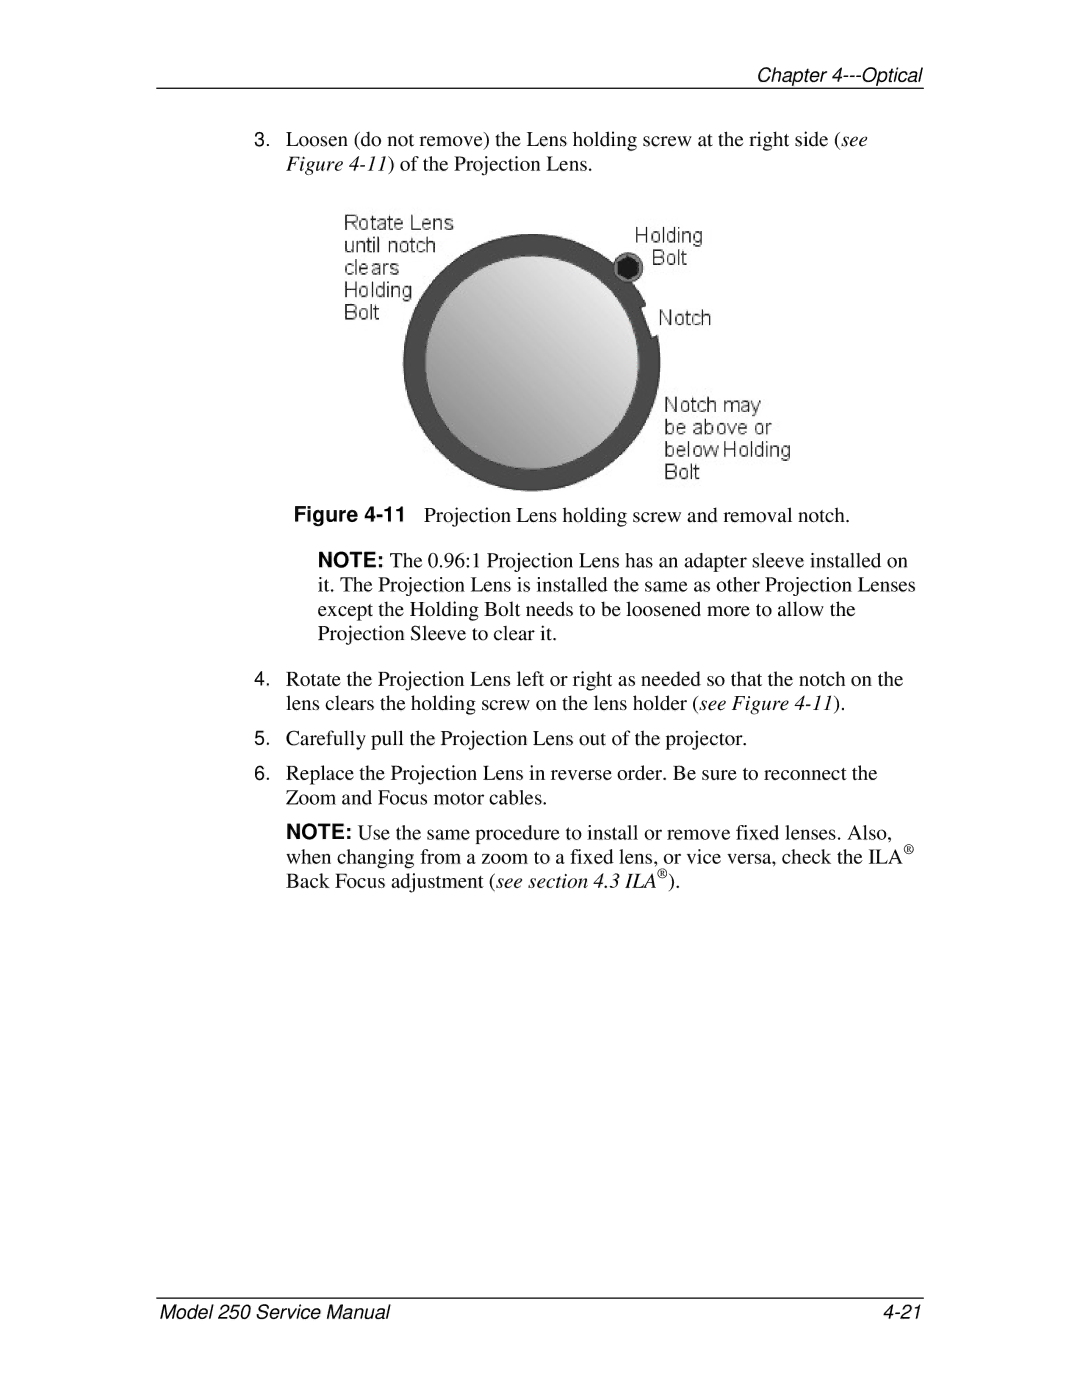
3.Loosen (do not remove) the Lens holding screw at the right side (see Figure
Figure 4-11 Projection Lens holding screw and removal notch.
NOTE: The 0.96:1 Projection Lens has an adapter sleeve installed on it. The Projection Lens is installed the same as other Projection Lenses except the Holding Bolt needs to be loosened more to allow the Projection Sleeve to clear it.
4.Rotate the Projection Lens left or right as needed so that the notch on the lens clears the holding screw on the lens holder (see Figure 4-11).
5.Carefully pull the Projection Lens out of the projector.
6.Replace the Projection Lens in reverse order. Be sure to reconnect the Zoom and Focus motor cables.
NOTE: Use the same procedure to install or remove fixed lenses. Also, when changing from a zoom to a fixed lens, or vice versa, check the ILA® Back Focus adjustment (see section 4.3 ILA® ).
Model 250 Service Manual |