Chapter 5---Electronics
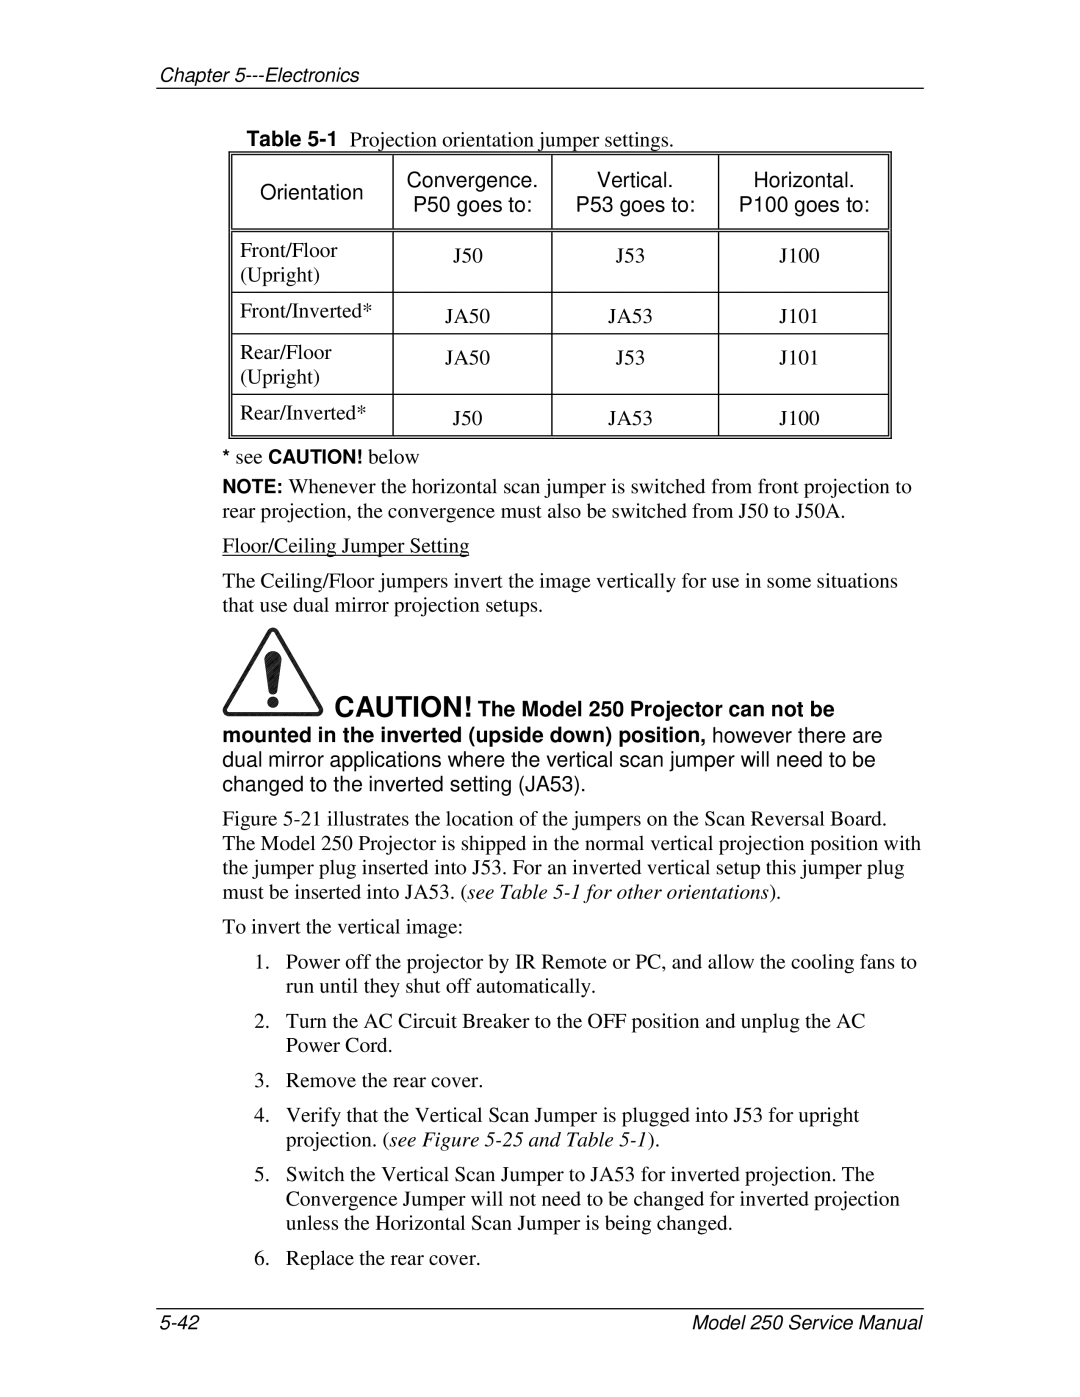
Table 5-1 Projection orientation jumper settings.
Orientation | Convergence. | Vertical. | Horizontal. | |
P50 goes to: | P53 goes to: | P100 goes to: | ||
| ||||
|
|
|
| |
|
|
|
| |
Front/Floor | J50 | J53 | J100 | |
(Upright) |
|
|
| |
|
|
|
| |
Front/Inverted* | JA50 | JA53 | J101 | |
|
|
|
| |
Rear/Floor | JA50 | J53 | J101 | |
(Upright) |
|
|
| |
|
|
|
| |
Rear/Inverted* | J50 | JA53 | J100 | |
|
|
|
| |
|
|
|
|
*see CAUTION! below
NOTE: Whenever the horizontal scan jumper is switched from front projection to rear projection, the convergence must also be switched from J50 to J50A.
Floor/Ceiling Jumper Setting
The Ceiling/Floor jumpers invert the image vertically for use in some situations that use dual mirror projection setups.
CAUTION! The Model 250 Projector can not be
mounted in the inverted (upside down) position, however there are dual mirror applications where the vertical scan jumper will need to be changed to the inverted setting (JA53).
Figure 5-21 illustrates the location of the jumpers on the Scan Reversal Board. The Model 250 Projector is shipped in the normal vertical projection position with the jumper plug inserted into J53. For an inverted vertical setup this jumper plug must be inserted into JA53. (see Table 5-1 for other orientations).
To invert the vertical image:
1.Power off the projector by IR Remote or PC, and allow the cooling fans to run until they shut off automatically.
2.Turn the AC Circuit Breaker to the OFF position and unplug the AC Power Cord.
3.Remove the rear cover.
4.Verify that the Vertical Scan Jumper is plugged into J53 for upright projection. (see Figure 5-25 and Table 5-1).
5.Switch the Vertical Scan Jumper to JA53 for inverted projection. The Convergence Jumper will not need to be changed for inverted projection unless the Horizontal Scan Jumper is being changed.
6.Replace the rear cover.
Model 250 Service Manual |