Learning about the MFP
Understanding the MFP control panel
MFP and scanner settings can be changed several ways: through the MFP control panel, the software application in use, the print driver, MarkVision™ Professional, or Web pages. Settings changed from the application or print driver apply only to the job being sent to the MFP.
Changes made to print, fax, copy, and
If a setting cannot be changed from the application, use the MFP control panel, MarkVision Professional, or the Web pages. Changing a setting from the MFP control panel, MarkVision Professional, or the Web pages makes that setting the user default.
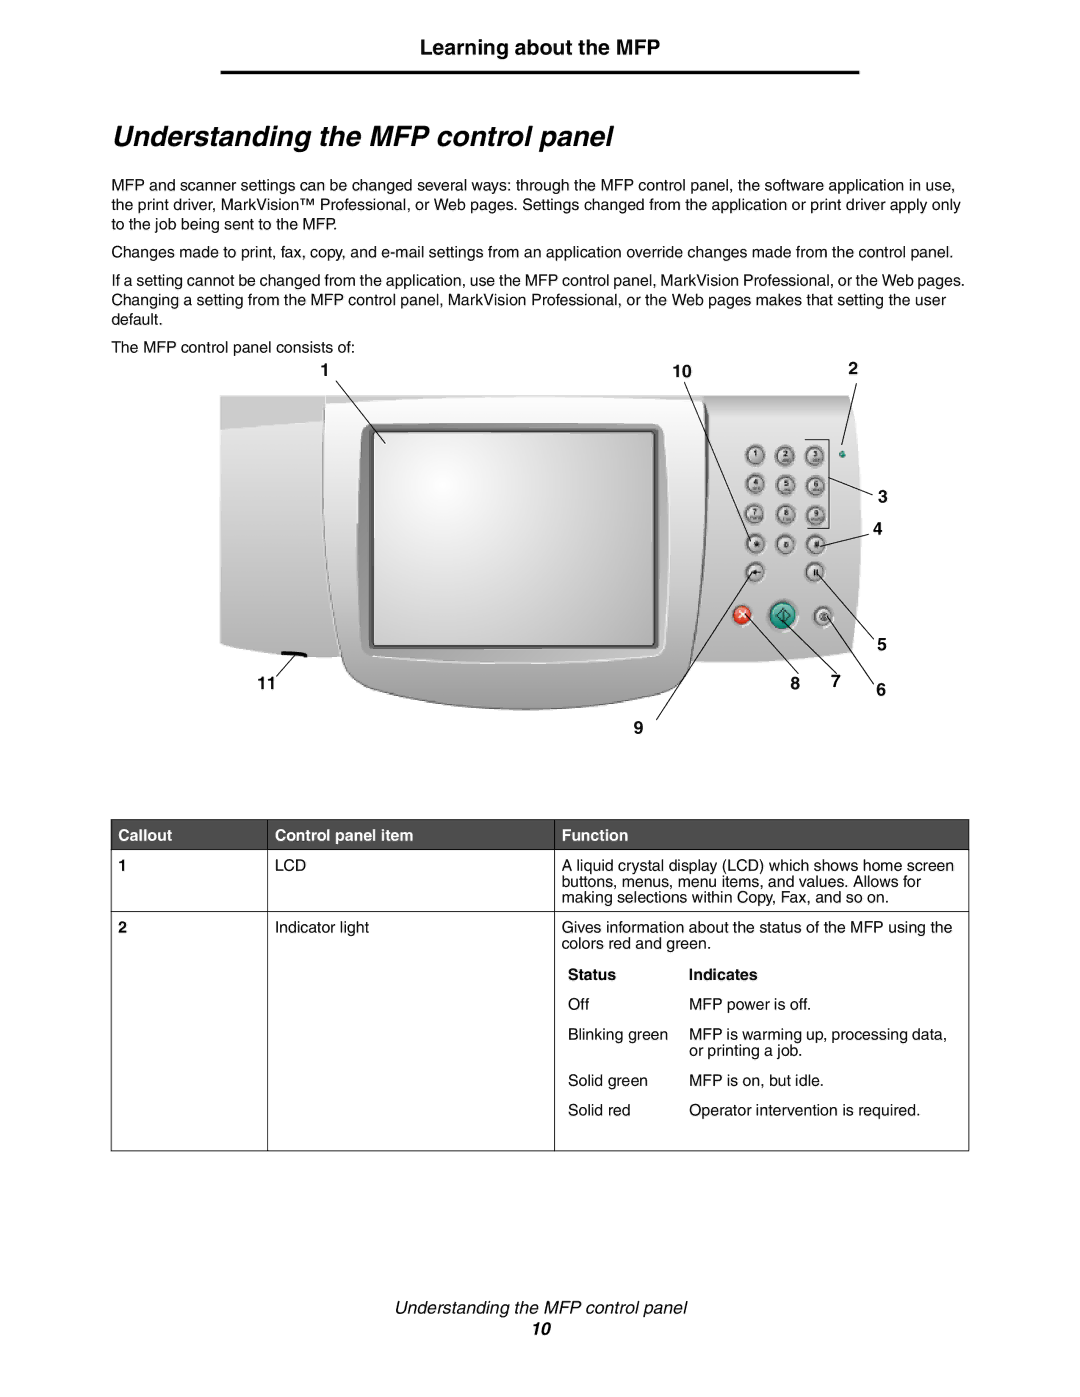
The MFP control panel consists of:
1 | 10 | 2 |
3
4
|
|
| 5 |
11 | 8 | 7 | 6 |
|
|
| |
| 9 |
|
|
Callout | Control panel item | Function |
1 | LCD | A liquid crystal display (LCD) which shows home screen |
|
| buttons, menus, menu items, and values. Allows for |
|
| making selections within Copy, Fax, and so on. |
|
|
|
2 | Indicator light | Gives information about the status of the MFP using the |
|
| colors red and green. |
Status | Indicates |
Off | MFP power is off. |
Blinking green | MFP is warming up, processing data, |
| or printing a job. |
Solid green | MFP is on, but idle. |
Solid red | Operator intervention is required. |
Understanding the MFP control panel
10
