TOC
TOC
NOTES | ||
|
|
|
DRIVE ROLL PRESSURE SETTING | To change the gun bushing: |
|
Return to Section
Return to Section TOC
TOC
Return to Master
Return to Master TOC
TOC
The Power Feed 10M Single Wire Feeder is factory set with the pressure indicator approximately "2". The best drive roll pressure varies with wire type, wire surface, lubrication and hardness. Too much pressure could cause "birdnesting", but too little pressure could cause slippage.
Set the drive roll pressure by:
1.Press the end of the gun against a solid object that is electrically isolated from the welder output and press the gun trigger for several seconds.
2.If the wire "birdnests" or jams, the drive roll pressure is too high. Reduce the pressure by one turn of the knob, run new wire through the gun, and repeat step 1.
3.If the only result is slippage, disconnect the gun and pull the gun cable forward about 6" (150mm). There should be a slight waviness in the exposed wire. If there is no waviness, increase the pressure setting one turn, reconnect the gun and repeat the above steps.
CHANGING THE GUN RECEIVER BUSHING
Gun receiver bushings make it easy to switch from one gun to another.
Tools required: 1/4" Allen wrench
1.Turn off power at the welding power source.
2.Remove the welding wire from the wire drive.
3.Remove the thumb screw from the wire drive.
4.Remove the welding gun from the wire drive.
5.Loosen the socket head cap screw that holds the con- nector bar against the gun bushing. Important: Do not attempt to completely remove the socket head cap screw.
6.Remove the outer wire guide, and push the gun bush- ing out of the wire drive. Because of the precision fit, light tapping may be required to remove the gun bush- ing.
7.Disconnect the shielding gas hose from the gun bush- ing, if required.
8.Connect the shielding gas hose to the new gun bush- ing, if required.
9.Rotate the gun bushing until the thumb screw hole aligns with the thumb screw hole in the feed plate. Slide the gun receiver bushing into the wire drive and verify the thumb screw holes are aligned.
Note: Some gun bushings do not require the use of the thumb screw.
10.Tighten the socket head cap screw.
11.Insert the welding gun into the gun bushing and tight- en the thumb screw.
Return to Section
Return to Section TOC
Return to Master
Return to Master TOC
1 |
| Gun Receiver | For use With | |
| Bushing |
| ||
|
|
| ||
2 |
| |||
|
| Innershield and Subarc guns) | ||
|
| |||
|
|
| connectors; Magnum 200/300/400 | |
|
|
| guns and compatible with Tweco® | |
|
|
| #4) | |
3 | 4 | |||
|
| Magnum 550 guns and compatible | ||
|
|
| ||
|
|
| with Tweco® #5) | |
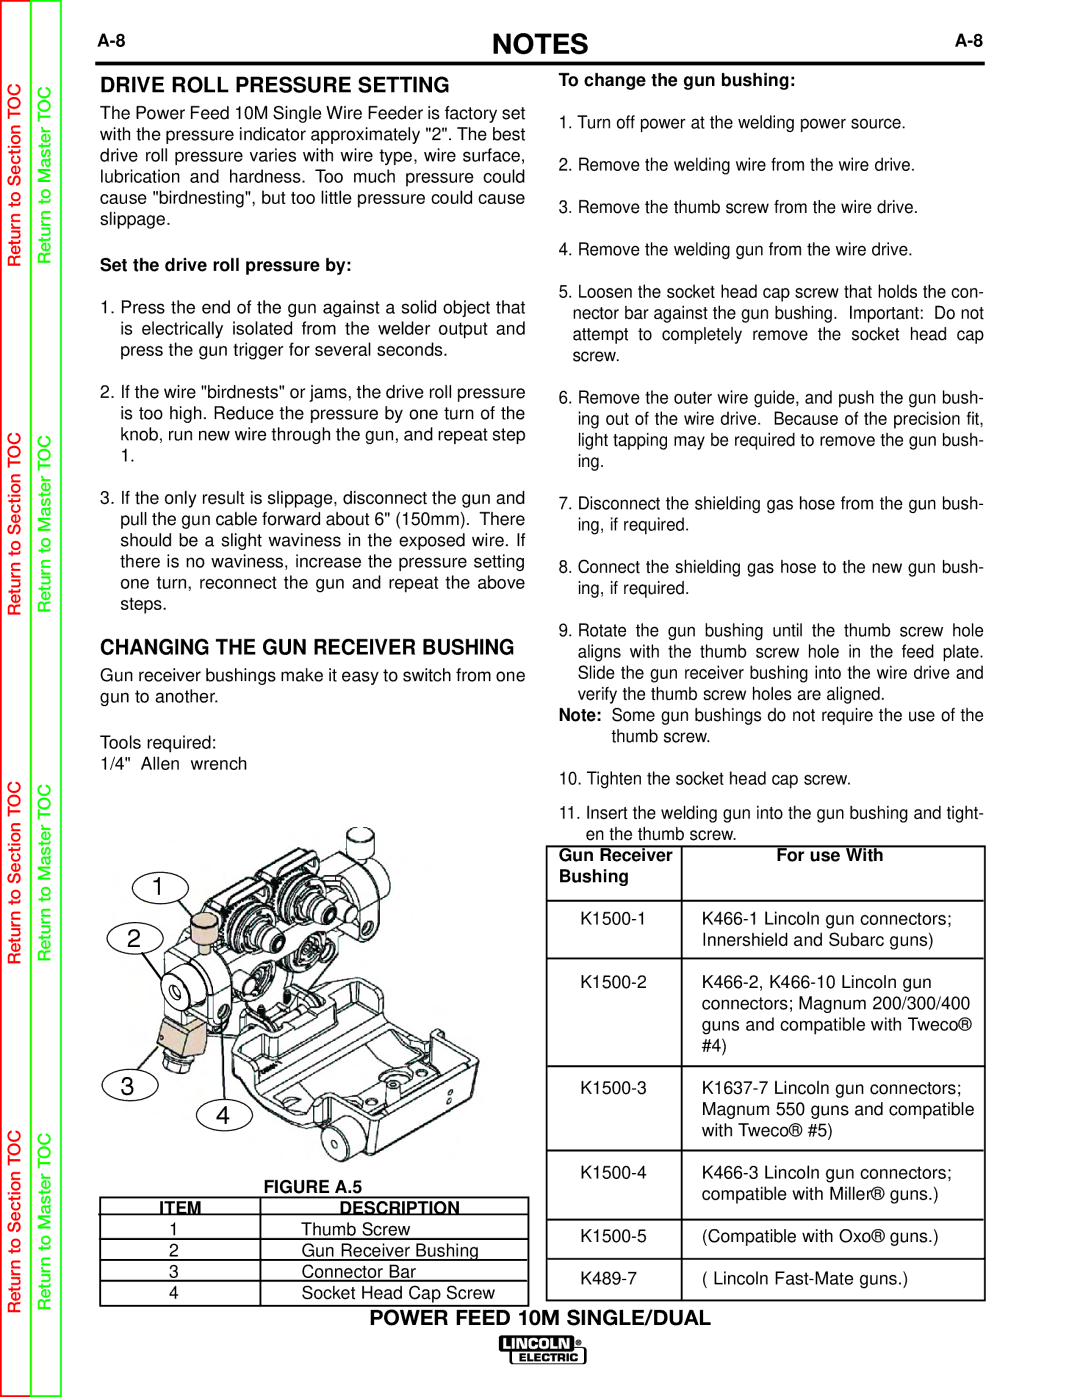
| FIGURE A.5 | |||
|
| compatible with Miller® guns.) | ||
ITEM | DESCRIPTION |
| ||
|
| |||
1 | Thumb Screw | (Compatible with Oxo® guns.) | ||
2 | Gun Receiver Bushing | |||
|
| |||
3 | Connector Bar | ( Lincoln | ||
4 | Socket Head Cap Screw | |||
|
|
POWER FEED 10M SINGLE/DUAL