| Handling |
|
| Section | |
|
|
|
|
|
|
LED Indicator |
|
|
| ||
CONNECT | ERR (red) | Meaning | |||
|
| (green) |
|
|
|
|
|
|
|
| |
|
| OFF | OFF | Not connected to PC (power supply OFF). | |
|
|
|
|
| |
|
| ON | OFF | Connected to a recognized PC. | |
|
|
|
|
| |
|
| Blinking | OFF | Uploading/downloading data. | |
|
|
|
|
| |
|
| ON | Blinking | Host link communications error, retry by user. | |
|
|
|
|
| |
|
| OFF | ON | PC model and EEPROM data not compatible. | |
|
|
|
|
| |
|
| OFF | Blinking | One of the following errors has occurred: | |
|
|
|
| An unrecognized PC is connected. | |
|
|
|
| An EEPROM error (EEPROM not present, EEPROM | |
|
|
|
| defect, or no program to download) or checksum | |
|
|
|
| error. | |
|
|
|
|
|
|
6-3 Handling
6-3-1 Mounting/Removing EEPROM
!Caution Do not mount or remove the EEPROM with the
Mounting EEPROM
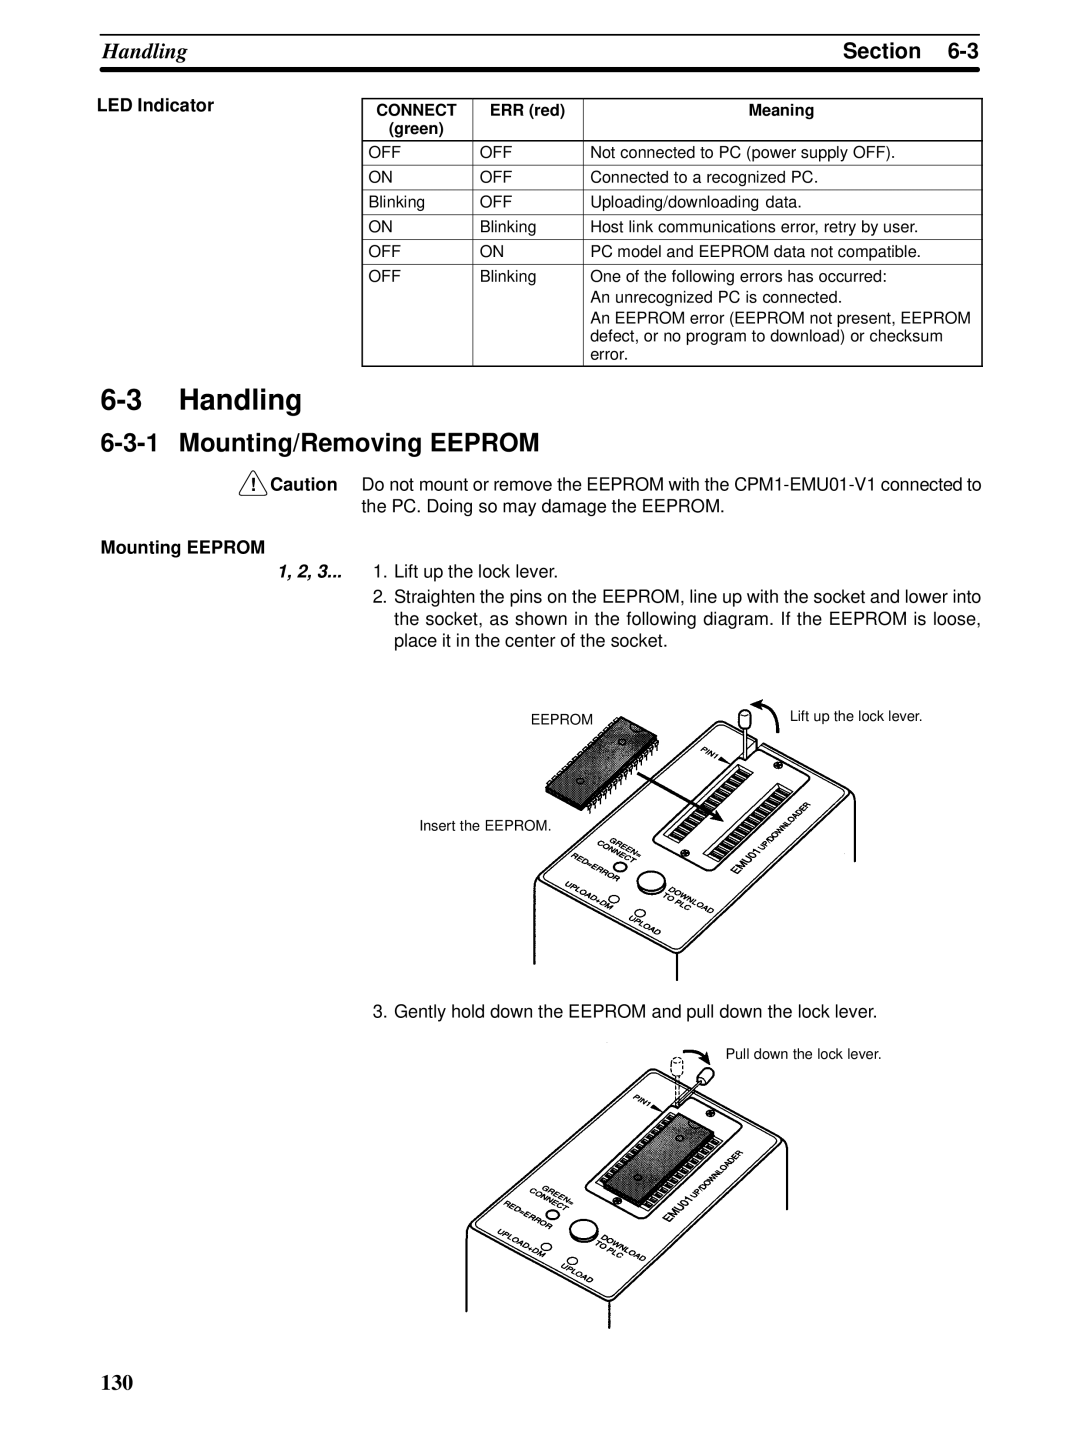
1, 2, 3... 1. Lift up the lock lever.
2.Straighten the pins on the EEPROM, line up with the socket and lower into the socket, as shown in the following diagram. If the EEPROM is loose, place it in the center of the socket.
EEPROM | Lift up the lock lever. |
Insert the EEPROM.
3. Gently hold down the EEPROM and pull down the lock lever.
Pull down the lock lever.
130
