Installing the CPM1A | Section | |
|
|
|
Installation
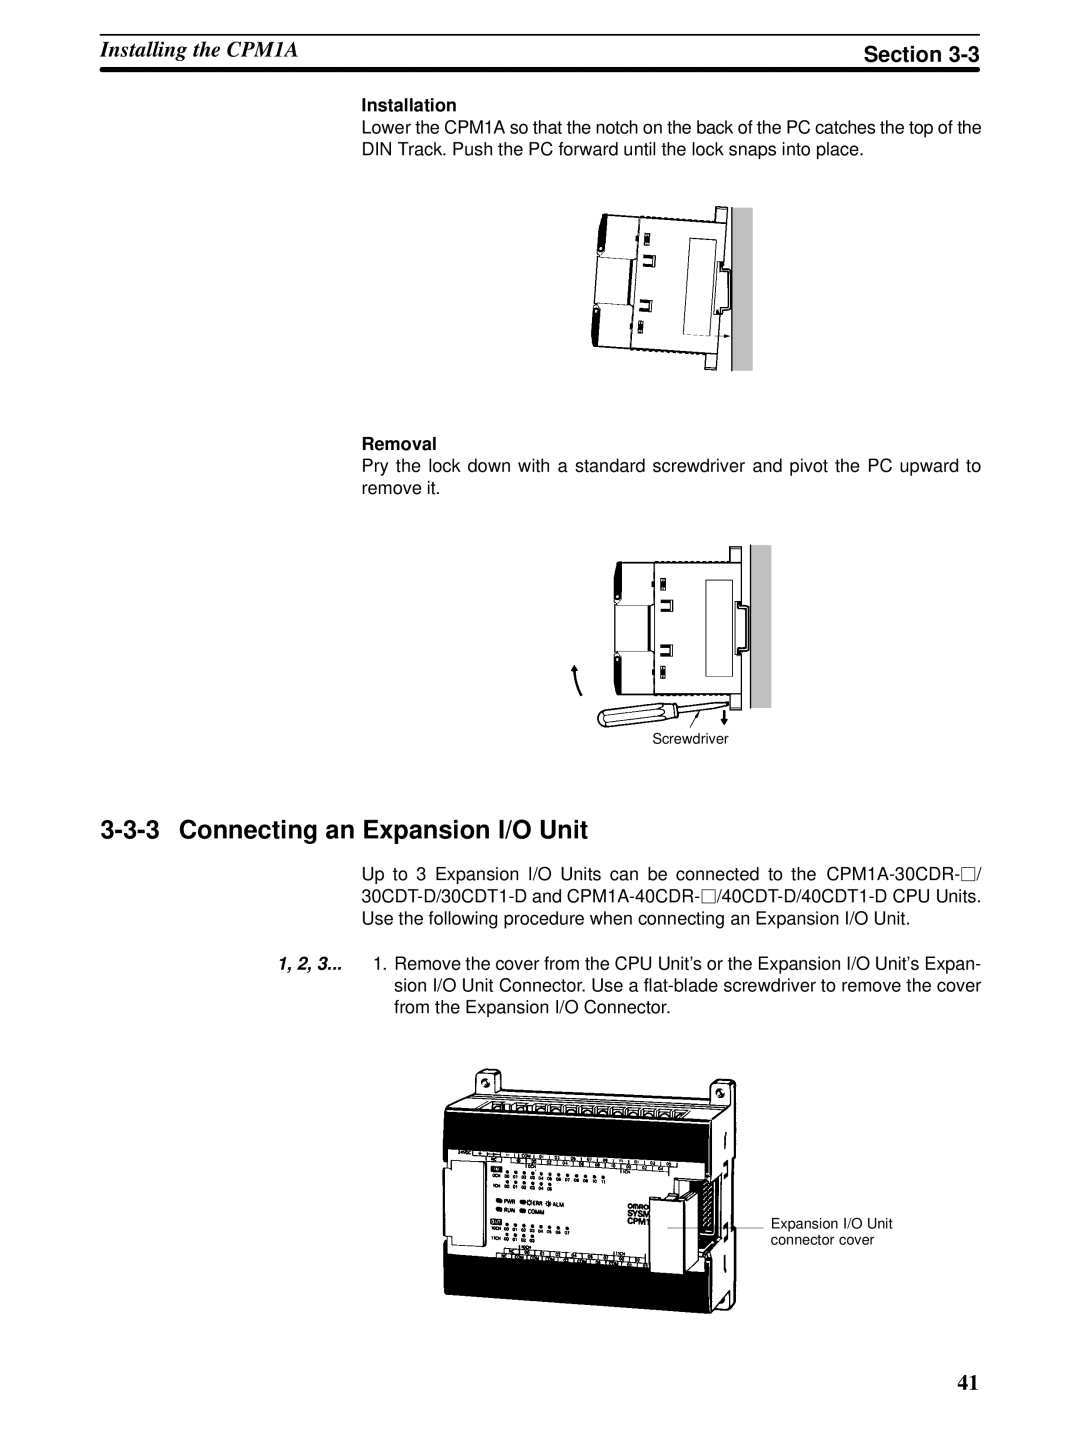
Lower the CPM1A so that the notch on the back of the PC catches the top of the
DIN Track. Push the PC forward until the lock snaps into place.
Removal
Pry the lock down with a standard screwdriver and pivot the PC upward to remove it.
Screwdriver
3-3-3 Connecting an Expansion I/O Unit
Up to 3 Expansion I/O Units can be connected to the
1, 2, 3... 1. Remove the cover from the CPU Unit’s or the Expansion I/O Unit’s Expan- sion I/O Unit Connector. Use a
Expansion I/O Unit connector cover
41
