Email Setting (Inbound FAX routing by TSI)
In the Email Setting page, you can specify the content of the Scan to Email document to be for- warded.
1
2
3
4
5
6
7
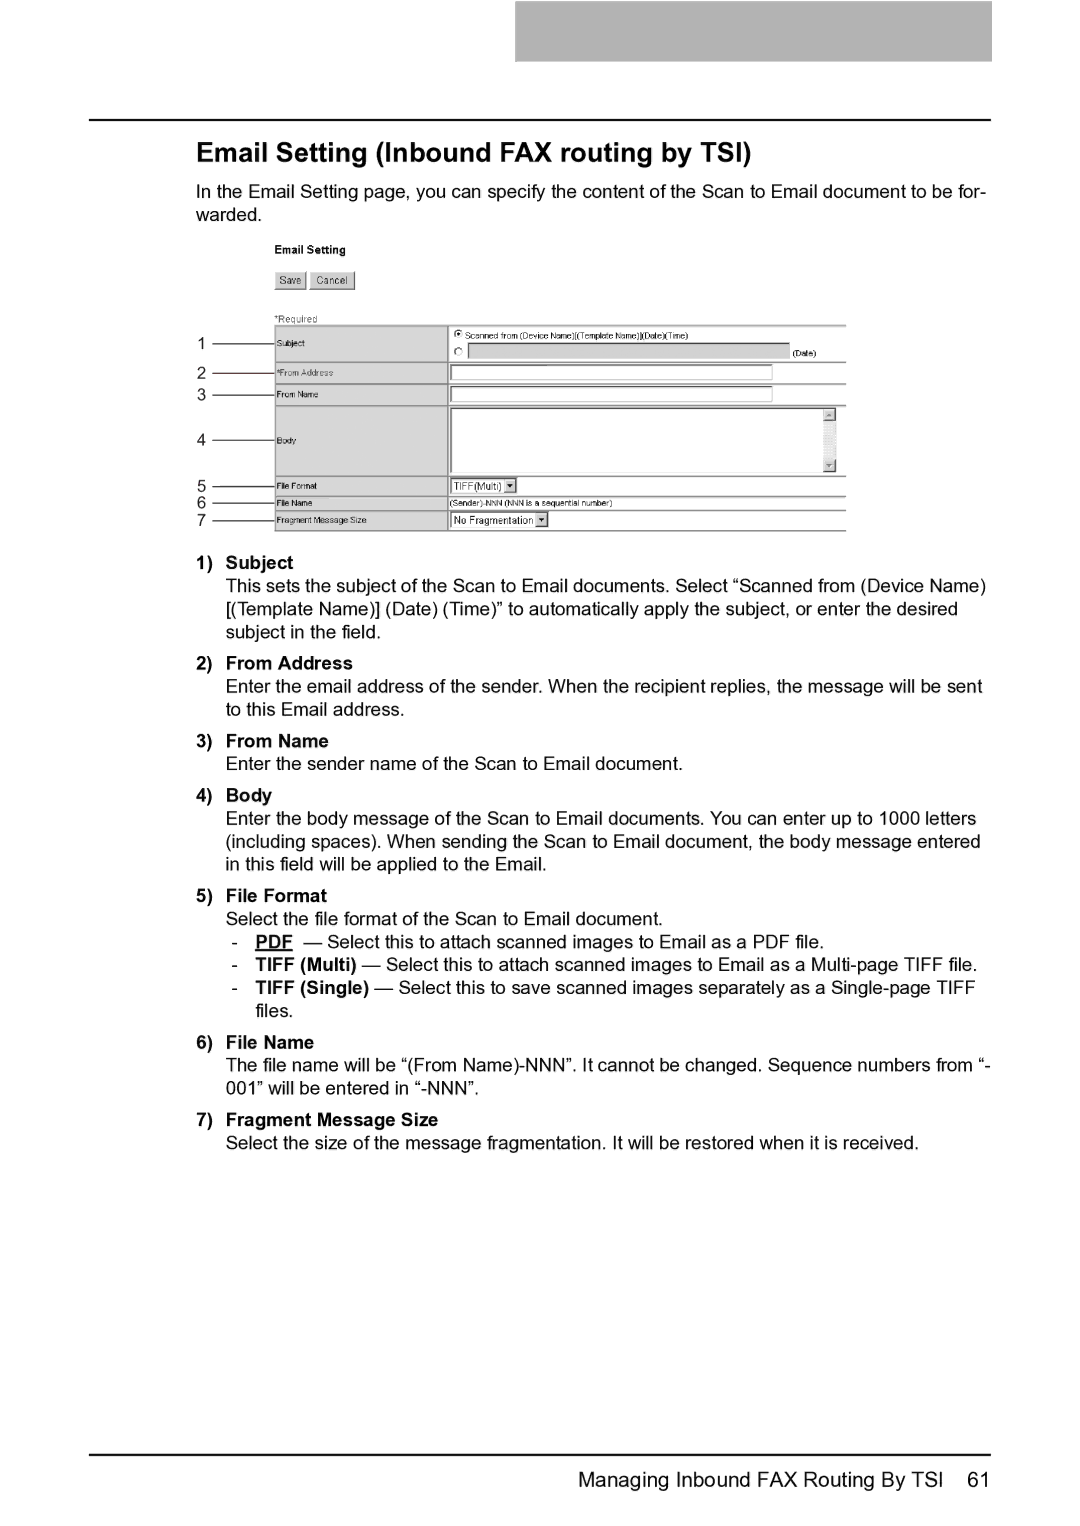
1)Subject
This sets the subject of the Scan to Email documents. Select “Scanned from (Device Name) [(Template Name)] (Date) (Time)” to automatically apply the subject, or enter the desired subject in the field.
2)From Address
Enter the email address of the sender. When the recipient replies, the message will be sent to this Email address.
3)From Name
Enter the sender name of the Scan to Email document.
4)Body
Enter the body message of the Scan to Email documents. You can enter up to 1000 letters (including spaces). When sending the Scan to Email document, the body message entered in this field will be applied to the Email.
5)File Format
Select the file format of the Scan to Email document.
-PDF — Select this to attach scanned images to Email as a PDF file.
-TIFF (Multi) — Select this to attach scanned images to Email as a
-TIFF (Single) — Select this to save scanned images separately as a
6)File Name
The file name will be “(From
7)Fragment Message Size
Select the size of the message fragmentation. It will be restored when it is received.