See the Setup Guide for Printing Functions for the following settings:
Setting up the Raw TCP print
Setting up the LPD print
Setting up the IPP print
Setting up the NetWare print
4 Click [Save].
The confirmation dialog box appears.
If you want to restore the current settings without saving the changes, click [Cancel]. Clicking [Cancel] cannot restore the defaults. This can only clear the changes and restore the current settings before saving the changes.
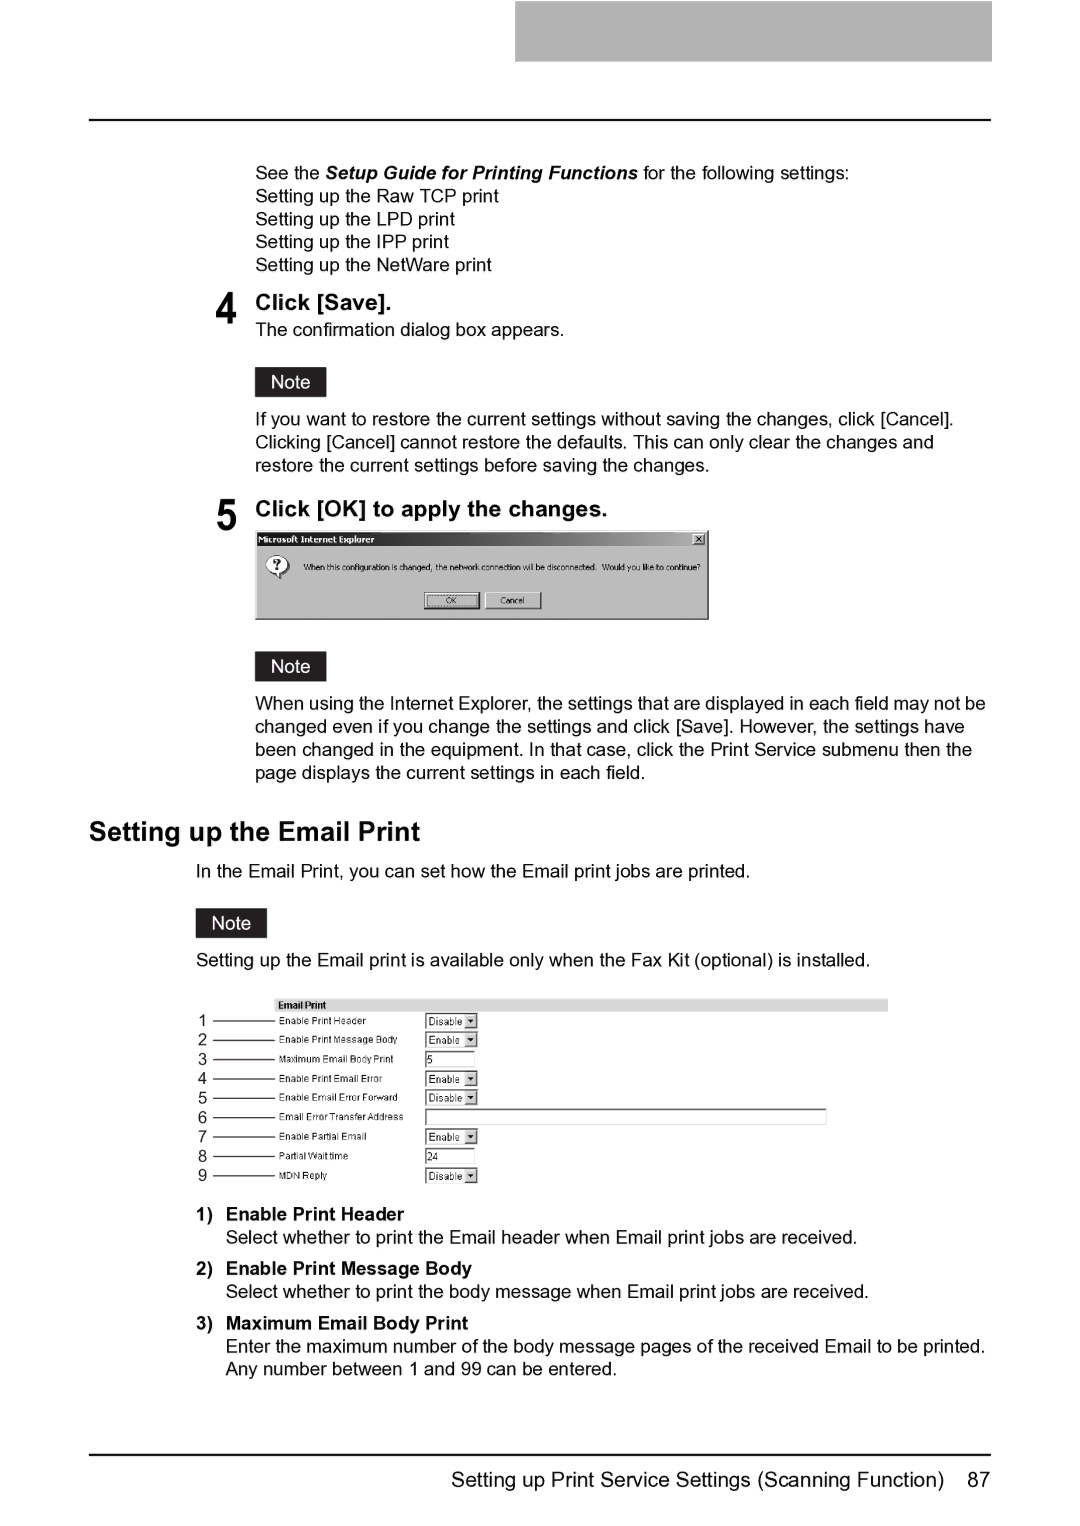
5 Click [OK] to apply the changes.
When using the Internet Explorer, the settings that are displayed in each field may not be changed even if you change the settings and click [Save]. However, the settings have been changed in the equipment. In that case, click the Print Service submenu then the page displays the current settings in each field.
Setting up the Email Print
In the Email Print, you can set how the Email print jobs are printed.
Setting up the Email print is available only when the Fax Kit (optional) is installed.
1
2
3
4
5
6
7
8
9
1)Enable Print Header
Select whether to print the Email header when Email print jobs are received.
2)Enable Print Message Body
Select whether to print the body message when Email print jobs are received.
3)Maximum Email Body Print
Enter the maximum number of the body message pages of the received Email to be printed. Any number between 1 and 99 can be entered.