Setting up the POP3 Network Service
In the POP3 Network Service menu, you can specify the POP3 server which receives an Inter- netFax or an Email print job.
POP3 Network Service settings are available only when the Fax Kit (optional) is installed.
1
2
3
4
5
6
7
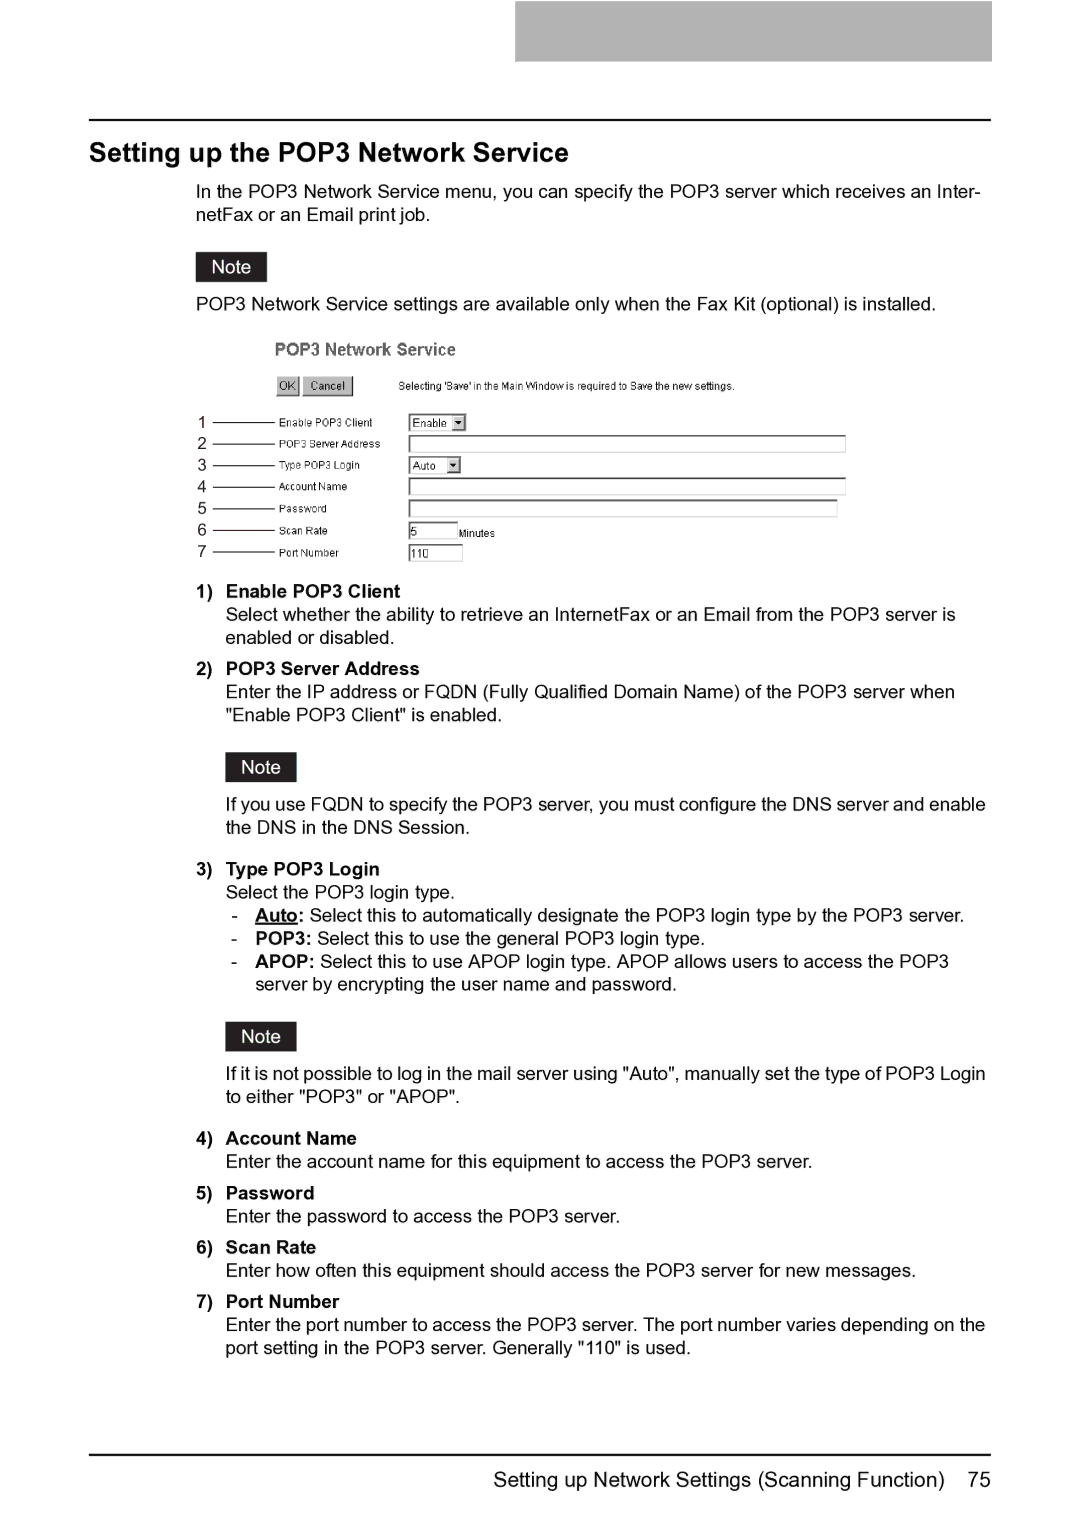
1)Enable POP3 Client
Select whether the ability to retrieve an InternetFax or an Email from the POP3 server is enabled or disabled.
2)POP3 Server Address
Enter the IP address or FQDN (Fully Qualified Domain Name) of the POP3 server when "Enable POP3 Client" is enabled.
If you use FQDN to specify the POP3 server, you must configure the DNS server and enable the DNS in the DNS Session.
3)Type POP3 Login
Select the POP3 login type.
-Auto: Select this to automatically designate the POP3 login type by the POP3 server.
-POP3: Select this to use the general POP3 login type.
-APOP: Select this to use APOP login type. APOP allows users to access the POP3 server by encrypting the user name and password.
If it is not possible to log in the mail server using "Auto", manually set the type of POP3 Login to either "POP3" or "APOP".
4)Account Name
Enter the account name for this equipment to access the POP3 server.
5)Password
Enter the password to access the POP3 server.
6)Scan Rate
Enter how often this equipment should access the POP3 server for new messages.
7)Port Number
Enter the port number to access the POP3 server. The port number varies depending on the port setting in the POP3 server. Generally "110" is used.
Setting up Network Settings (Scanning Function) 75