10TopAccess ADMINISTRATION TAB PAGE -
REGISTRATION MENU
Save As File Setting (Public Template)
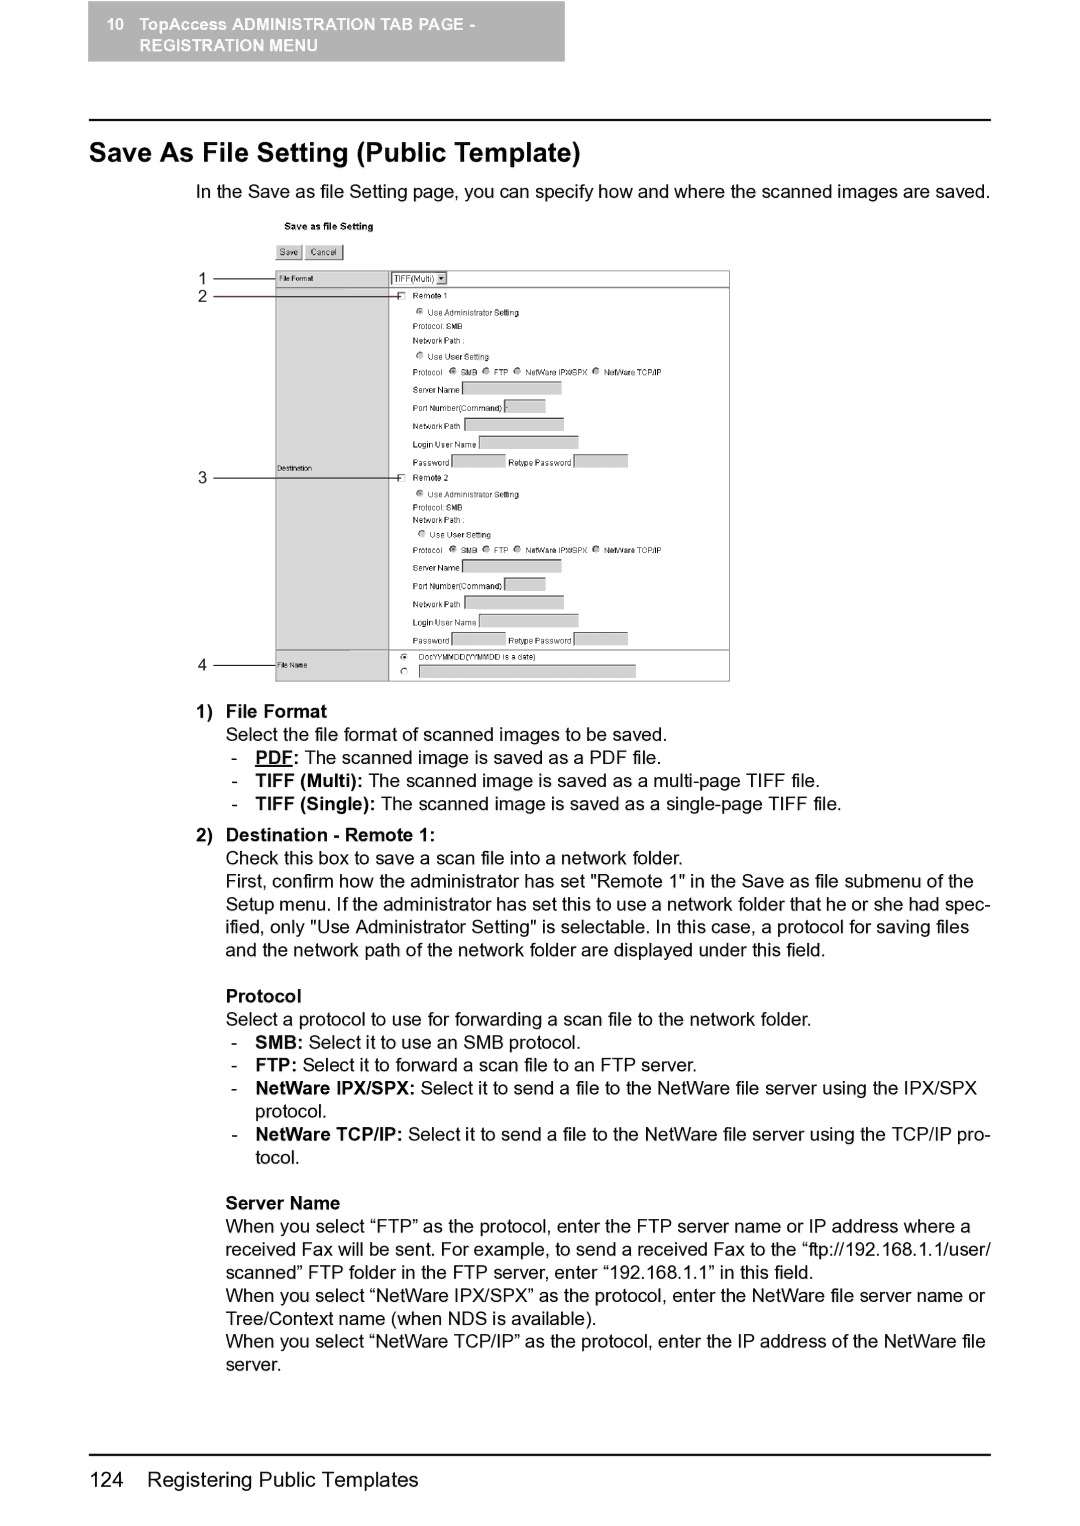
In the Save as file Setting page, you can specify how and where the scanned images are saved.
1
2
3
4
1)File Format
Select the file format of scanned images to be saved.
-PDF: The scanned image is saved as a PDF file.
-TIFF (Multi): The scanned image is saved as a
-TIFF (Single): The scanned image is saved as a
2)Destination - Remote 1:
Check this box to save a scan file into a network folder.
First, confirm how the administrator has set "Remote 1" in the Save as file submenu of the Setup menu. If the administrator has set this to use a network folder that he or she had spec- ified, only "Use Administrator Setting" is selectable. In this case, a protocol for saving files and the network path of the network folder are displayed under this field.
Protocol
Select a protocol to use for forwarding a scan file to the network folder.
-SMB: Select it to use an SMB protocol.
-FTP: Select it to forward a scan file to an FTP server.
-NetWare IPX/SPX: Select it to send a file to the NetWare file server using the IPX/SPX protocol.
-NetWare TCP/IP: Select it to send a file to the NetWare file server using the TCP/IP pro- tocol.
Server Name
When you select “FTP” as the protocol, enter the FTP server name or IP address where a received Fax will be sent. For example, to send a received Fax to the “ftp://192.168.1.1/user/ scanned” FTP folder in the FTP server, enter “192.168.1.1” in this field.
When you select “NetWare IPX/SPX” as the protocol, enter the NetWare file server name or Tree/Context name (when NDS is available).
When you select “NetWare TCP/IP” as the protocol, enter the IP address of the NetWare file server.