Setting up the SMTP Client
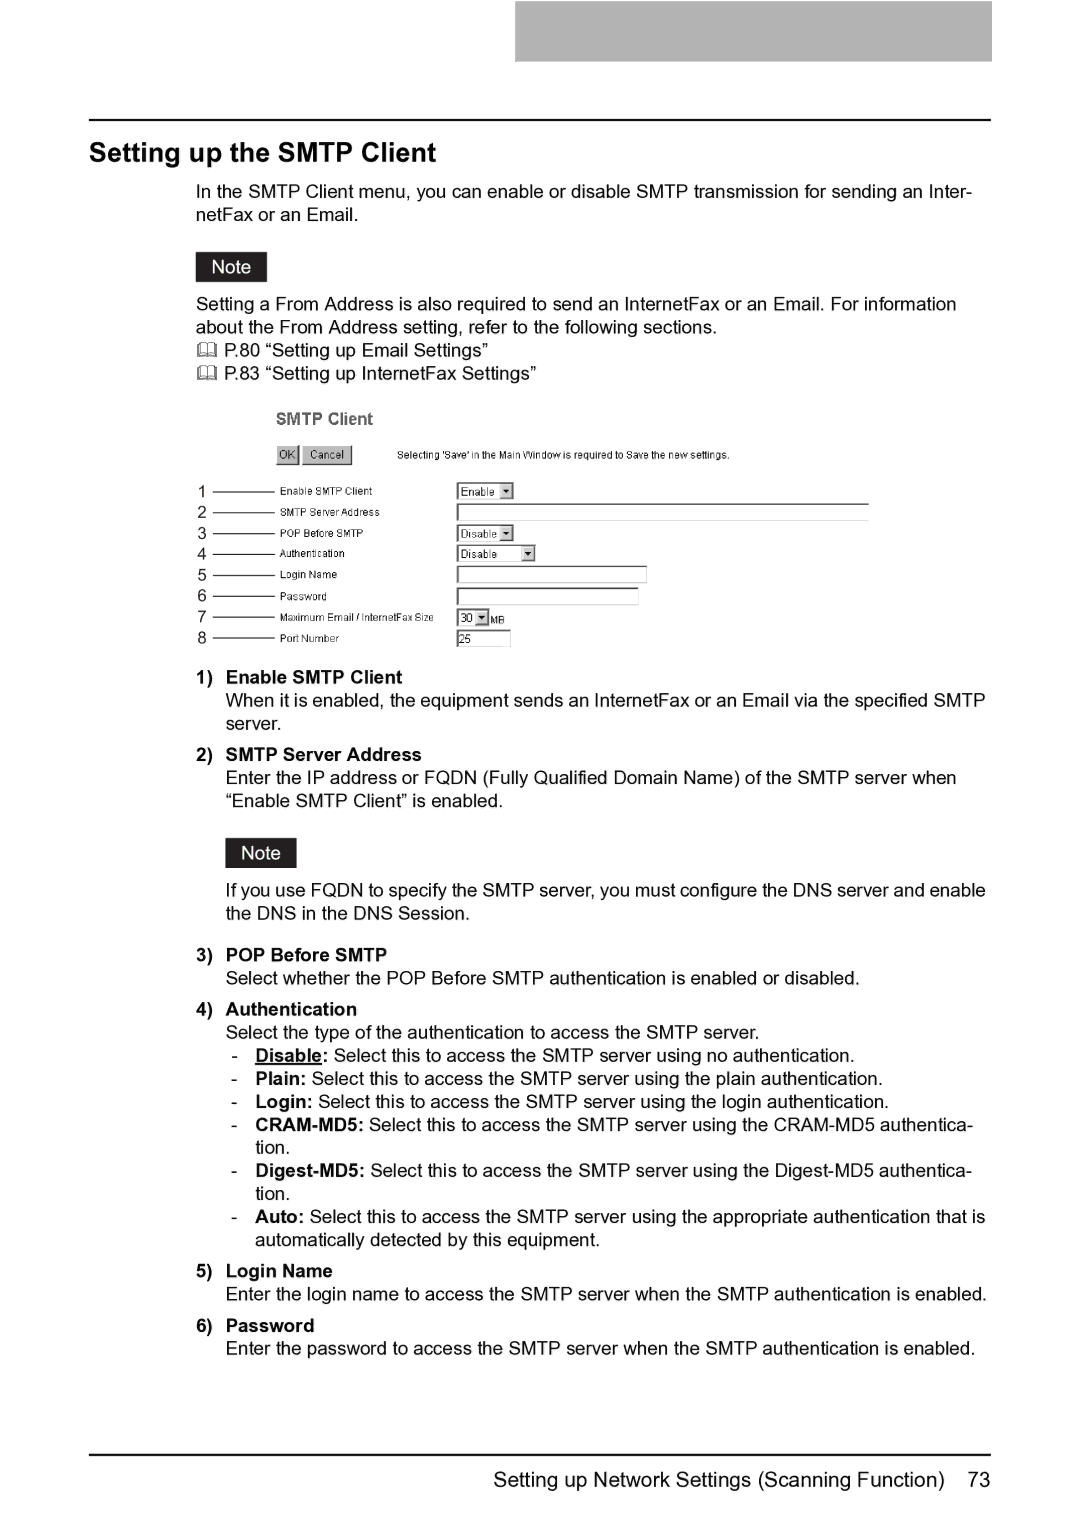
In the SMTP Client menu, you can enable or disable SMTP transmission for sending an Inter- netFax or an Email.
Setting a From Address is also required to send an InternetFax or an Email. For information about the From Address setting, refer to the following sections.
P.80 “Setting up Email Settings”
P.83 “Setting up InternetFax Settings”
1
2
3
4
5
6
7
8
1)Enable SMTP Client
When it is enabled, the equipment sends an InternetFax or an Email via the specified SMTP server.
2)SMTP Server Address
Enter the IP address or FQDN (Fully Qualified Domain Name) of the SMTP server when “Enable SMTP Client” is enabled.
If you use FQDN to specify the SMTP server, you must configure the DNS server and enable the DNS in the DNS Session.
3)POP Before SMTP
Select whether the POP Before SMTP authentication is enabled or disabled.
4)Authentication
Select the type of the authentication to access the SMTP server.
-Disable: Select this to access the SMTP server using no authentication.
-Plain: Select this to access the SMTP server using the plain authentication.
-Login: Select this to access the SMTP server using the login authentication.
-
-
-Auto: Select this to access the SMTP server using the appropriate authentication that is automatically detected by this equipment.
5)Login Name
Enter the login name to access the SMTP server when the SMTP authentication is enabled.
6)Password
Enter the password to access the SMTP server when the SMTP authentication is enabled.
Setting up Network Settings (Scanning Function) 73
