SETTING THE SYSTEM CONFIGURATION
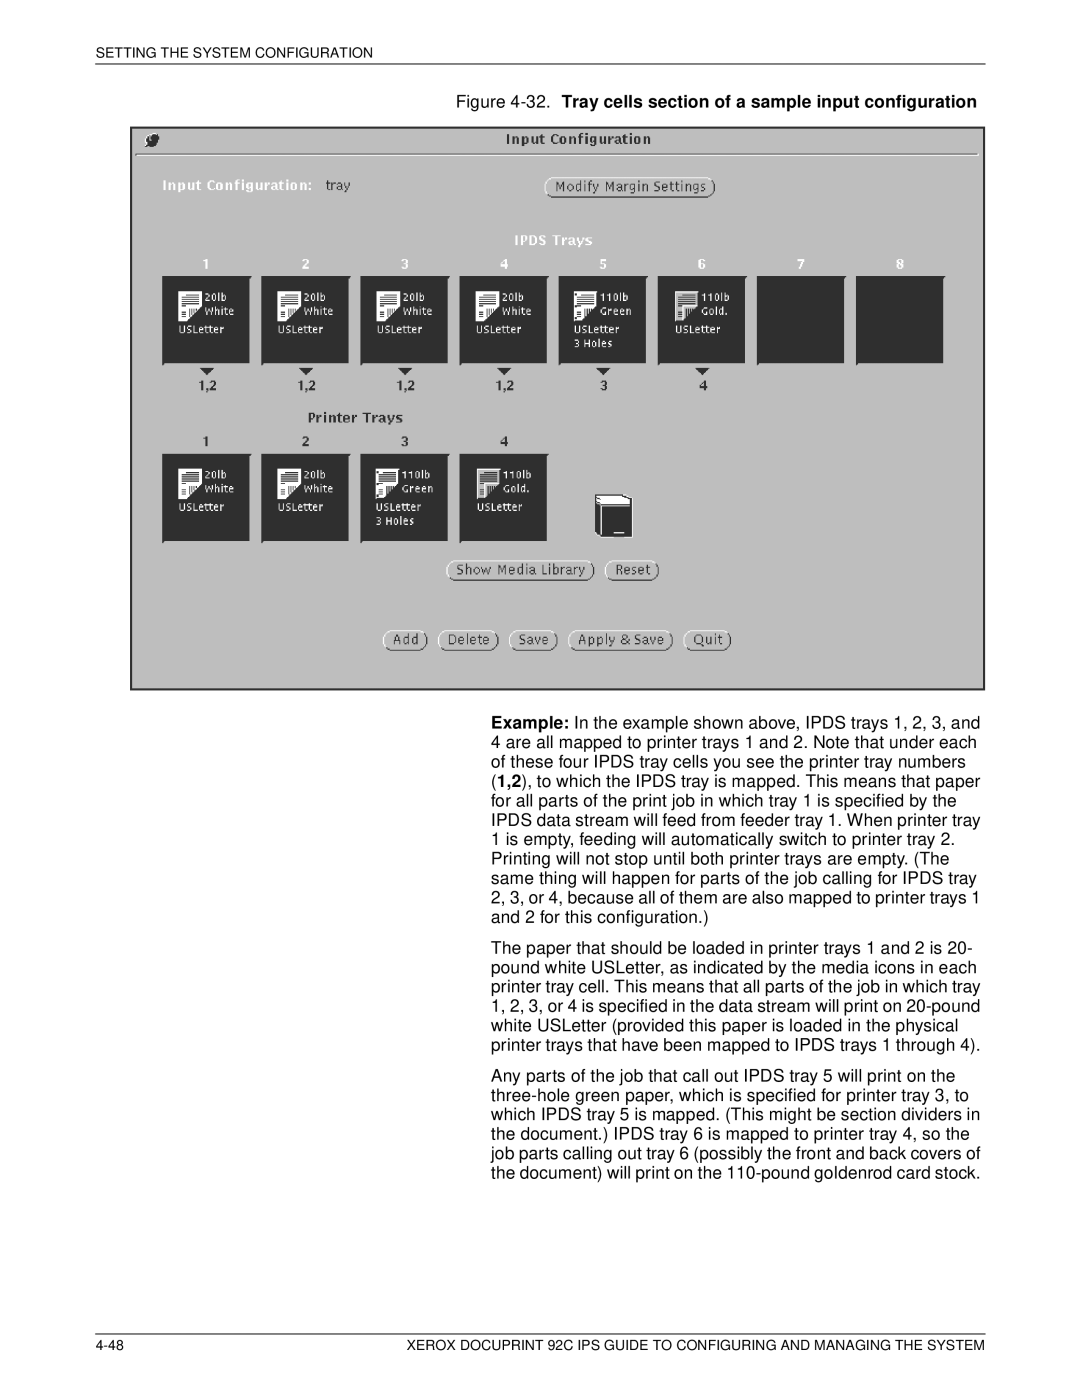
Figure 4-32. Tray cells section of a sample input configuration
Example: In the example shown above, IPDS trays 1, 2, 3, and 4 are all mapped to printer trays 1 and 2. Note that under each of these four IPDS tray cells you see the printer tray numbers (1,2), to which the IPDS tray is mapped. This means that paper for all parts of the print job in which tray 1 is specified by the IPDS data stream will feed from feeder tray 1. When printer tray 1 is empty, feeding will automatically switch to printer tray 2. Printing will not stop until both printer trays are empty. (The same thing will happen for parts of the job calling for IPDS tray 2, 3, or 4, because all of them are also mapped to printer trays 1 and 2 for this configuration.)
The paper that should be loaded in printer trays 1 and 2 is 20- pound white USLetter, as indicated by the media icons in each printer tray cell. This means that all parts of the job in which tray 1, 2, 3, or 4 is specified in the data stream will print on
Any parts of the job that call out IPDS tray 5 will print on the
XEROX DOCUPRINT 92C IPS GUIDE TO CONFIGURING AND MANAGING THE SYSTEM |
