Using the BayStack 350 10/100 Autosense Switch
Quick Start to Installing the BayStack 350 Switch
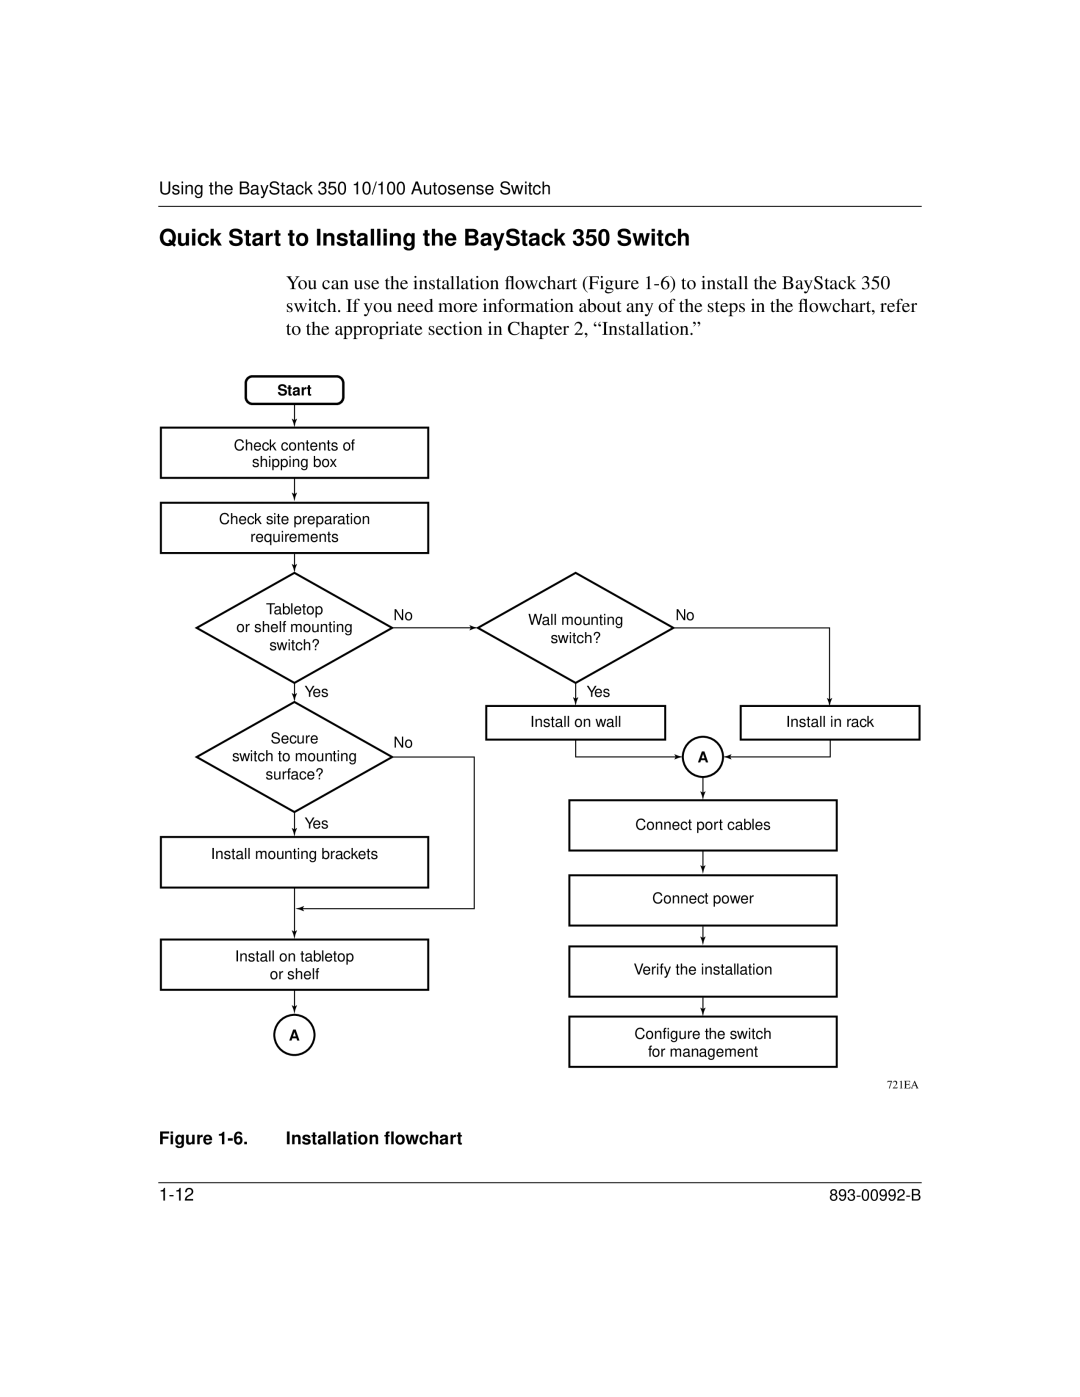
You can use the installation flowchart (Figure
Start
Check contents of
shipping box
Check site preparation
requirements
Tabletop | No | |
or shelf mounting | ||
| ||
| ||
switch? |
|
Yes |
|
Secure | No |
switch to mounting |
|
surface? |
|
Wall mounting | No |
| |
switch? |
|
Yes
Install on wall
A
Install in rack
Yes |
Install mounting brackets |
Install on tabletop
or shelf
A
Connect port cables
Connect power
Verify the installation
Configure the switch
for management
721EA