Bay Technical Associates manual 6. Installing the BayStack 350 switch in a 19-inch rack, 611FA

Models: 350

1 146
Download 146 pages 41.7 Kb
Page 59
Image 59
611FA

Installation

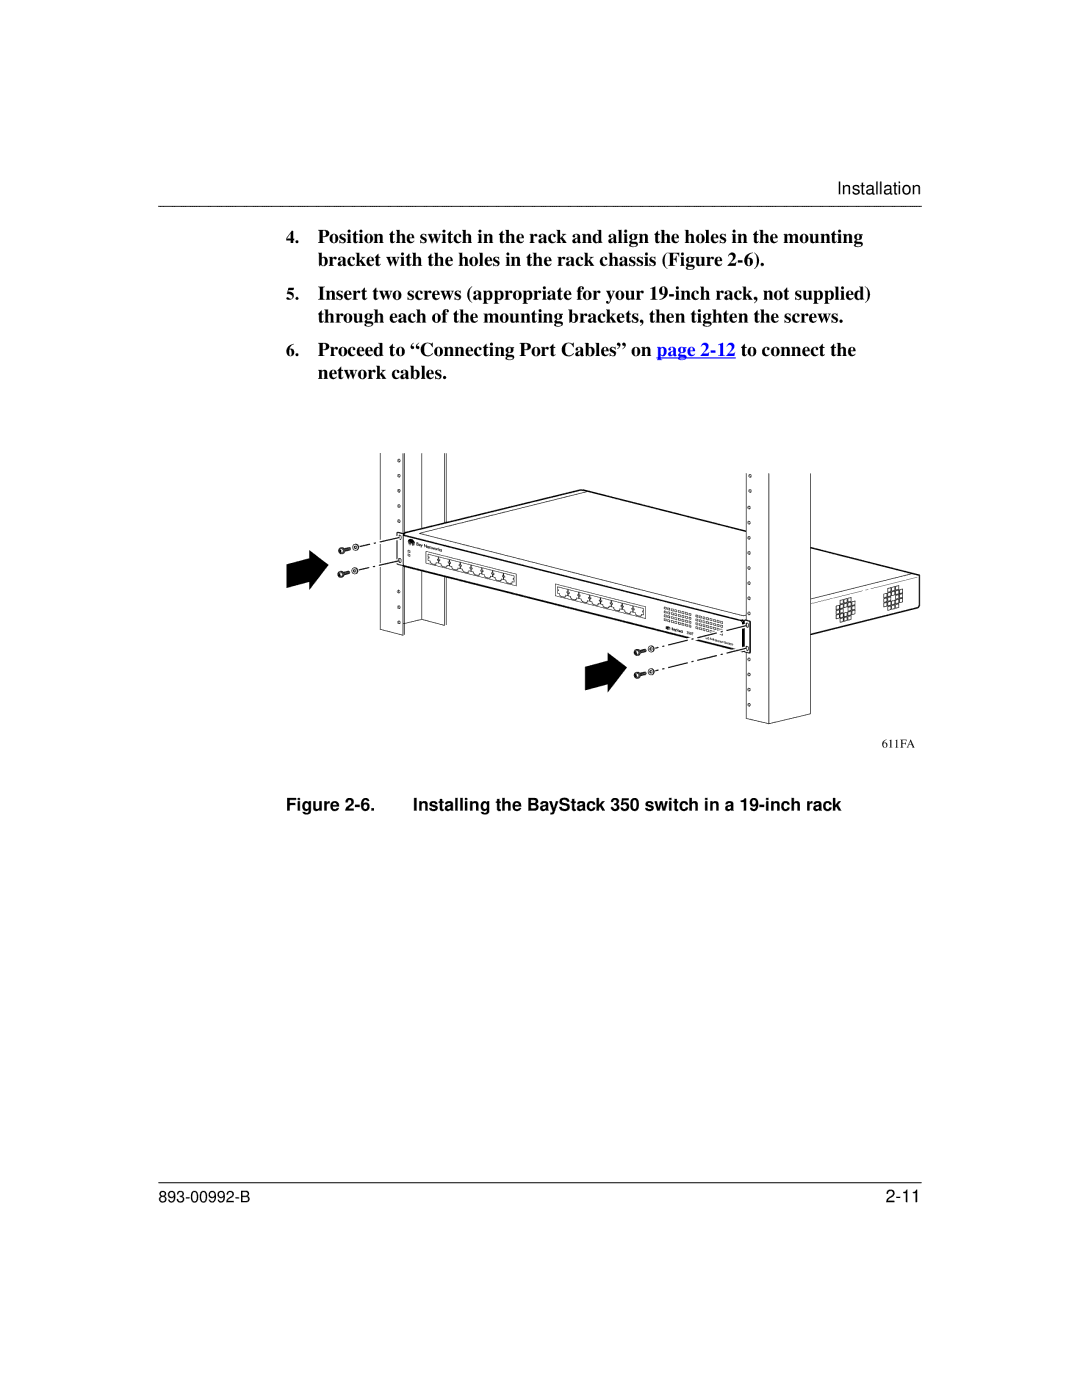
4.Position the switch in the rack and align the holes in the mounting bracket with the holes in the rack chassis (Figure 2-6).

5.Insert two screws (appropriate for your 19-inch rack, not supplied) through each of the mounting brackets, then tighten the screws.

6.Proceed to “Connecting Port Cables” on page 2-12 to connect the network cables.

350T

10/100


Autosense


Switch


611FA

Figure 2-6. Installing the BayStack 350 switch in a 19-inch rack

893-00992-B

2-11

Page 59
Image 59
Bay Technical Associates manual 6. Installing the BayStack 350 switch in a 19-inch rack, 611FA