Multiserver
Multiserver
Trademarks
Table of Contents
Table of Contents
Getting Started
Bench Configuration and Testing
Using Modems with the Interconnect Link
Link Configuration
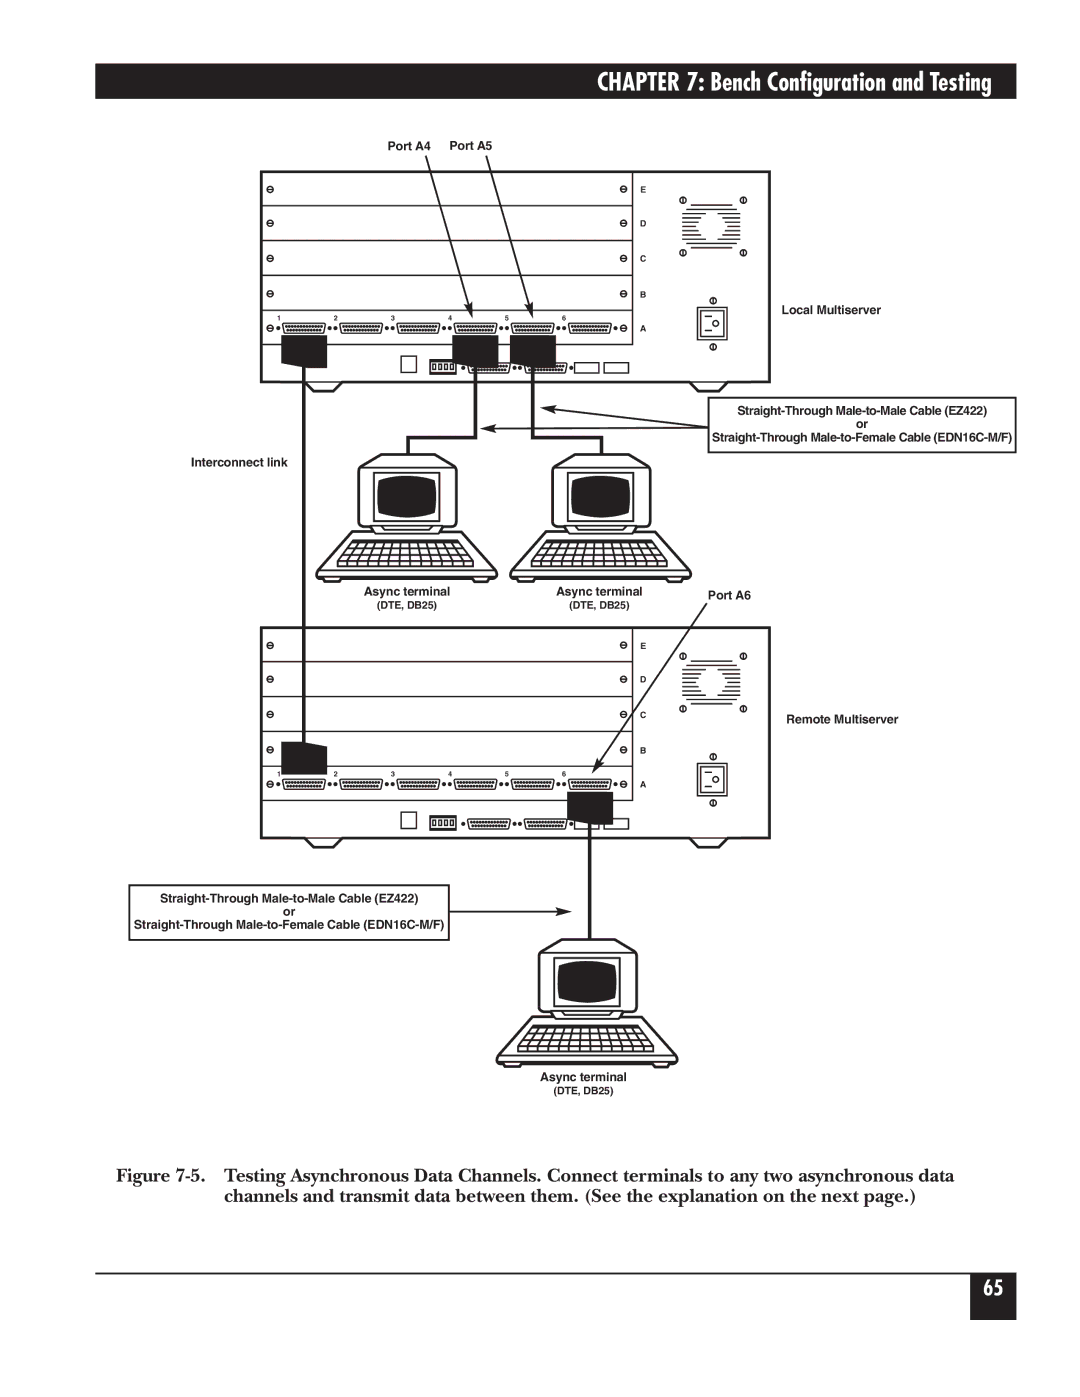
Testing Asynchronous Data Channels
Switching Configuration
Data-Channel Configuration
Administration
Diagnostics
Appendix a Worksheets
LCD/Keypad
Appendix C Defaults
Appendix B Cabling Diagrams
Appendix D Messages
Appendix E Indicators
Appendix F Device Applications
Multiserver 5000 Base Unit
Specifications
Performance Specifications
Physical Specifications
Sync Channel Characteristics
Multiserver Async Channel Characteristics
MX215C
Configuration DCE Speed
Expansion Modules MS5 Expansion Module Sync/Async
MS1 Expansion Module-Async Only
Analog Specifications
General Specifications
MS1 Voice/Fax Cards
Digital Specifications
Signaling Specifications
MS RLB Module
MS1 56K CSU/DSU Module
MS1 V.35 Converter/DCE
MS1 NMS Module
Converter/DCE
LAN
Introduction
Module
Feeder Muxes
LCN300A
MS1 56K CSU/DSU Module MT150C
CommPak
Expansion Modules
MS1 Voice/Fax Card
Documentation
MS1 NMS Module MX227C
MS1 V.35 Converter/DCE MX226
11 MS1 Rackmount Kit RM220
Bold
Manual Text Conventions
Multiserver
Initial Considerations
Network Design and Topologies
Syntax for Node Numbers and IDs
Default Node Numbers and Node IDs
Worksheets for the Network
Nodes and Hubs
Local Hub Group
Examples of Network Designs
Point-to-Point Switching Topology
Typical Point-to-Point, Dual Link with Load Balancing
Typical String Network
Typical Star Application
10. Typical Distributed-Star Application
Check Contents
Base-Unit Installation
Behind it
CommPak Cartridge Installation and Removal
Power Up the Unit
LCD Display
LCD/Keypad Information if you wish to stop
Checking the CCM Indicators
Channel numbers are assigned to all the ports on
CCM Indicator LEDs
Module and Channel Nomenclature
CCM Board. The front-panel of the unit is to the left
Module Stacking Order
Module Installation
Module-Location Switch Settings
Inter-module stacking connectors
Inter-Module Stacking Connectors
Blank Back Panel
Disassembly Procedures
Remove the cover after taking out four fastening screws
Remove any blank panels
CEM, VOICE/FAX CARD, or CSU/DSU Module
11. Installing the CCM
Installation Procedures
Ports
Asynchronous-Channel Switching Parameters, EIA
11. Asynchronous Channel Features
100
12. Asynchronous Channel Extended Features
Copy Channel Parameters
Review Data-Channel Configuration
104
Connecting Data Channels Cables
Data-Channel Configuration
Switching Control
Switching Configuration
Switching Control
107
108
All
Prompt From the Command Facility Main Menu, select
Disconnecting ranges, see .3, Force Connecting a Range
Force-Connecting a Range
Ports
Synchronous Connections
Classes, for class
Asynchronous Connections
Information
113
Matching Capability for Asynchronous Channels
Menu options is discussed in Table
Asychronous-Channel Switching Parameters
Asynchronous Channels, and -11, Asynchronous Channel
Switching Parameters
117
Local and Remote Hub Groups
Classes
119
Enter the primary class name selected. Press cr
User is connected to the class
Class Configuration
122
123
Connect Protocol Details
Initiated by device Device initiates
Disconnect Sequence
Call Completion Receiving port
Port Contention/Queueing
Configure the port for DTR and assign it to the class
10.11 X.21 Switching Considerations
128
Async Channel
Reset
Administration
Each type of reset is described in Table
Menu-flow diagram for LCD/Keypad resets
Reset Options
Command Mode menu will appear
Command Mode
Options of this menu are detailed in -2on the following
Selection of loopback tests. See .3, Async Channel Loopback
Command Mode
Administration
Configuring the Command Facility
Command Facility Configuration
137
138
139
Enter the node ID and channel number or range of channels
Messages
If the port or range selected is all async, the system
Special Message Characters
Dialog Messages
Max Option Default Char Description
143
Three menu options are detailed in -6, which is on the next
Network Security
Password Menu
Status/Statistics
Status/Statistics
147
148
199
200
201
Cabling for the 12-Channel CEM with Line Drivers
203
Cabling for the MS1 56K CSU/DSU Module
Cabling for the NMS Module
Cabling for Converters
207
208
209
Cabling for Use with Tandem
Figure B-13. Tandem Cable Diagram
Port Configuration
Appendix C Defaults
System Administration
Multiserver and Feeder Mux Default Node Numbers and IDs
Dialog Messages
Command Facility Parameters
Extended Features
Asynchronous Channel Configuration
Channel Characteristics
Channel Features
DLC
Ascii Bisync and Ebcdic Bisync
Sync-Pad
Synchronous Channel Configuration
Micom Voice
Sync
Fast Packet
OPX Interface
Voice/Fax Module
KTS Interface
Interface
Voice/Fax Node Parameters
Voice/Fax Switching Parameters
NMS Module
Command Port
Log Printer Port
Screen Display Messages
Appendix D Messages
Screen Display Messages
Message
224
Screen Display Messages
226
227
228
229
230
231
232
Message Message Type Explanation
LCD Messages
Class name or Matrix if matrix switching is used
Node ID n/channel number c
LCD Messages
236
LCD Messages
238
Definition Off Flashing
Appendix E Indicators
Table E-2. CCM Indicator LEDs
241
LED
243
244
Tandem
Appendix F Device Applications
Type of Terminal
Table F-1. Spool Mode
Figure G-1. Clip nut assembly for rack
Appendix G Rackmount Installation
248