Installing the operating system | Preparation for use and operation |
4.3Installing the operating system
ÊInsert the ServerStart CD and keep ready the CD of the operating system you want to install.
ÊReboot the server.
ÊFollow the instructions on the screen and in the manual for the operating system.
If your server is equipped with a disk array controller, please read in the appro- priate manual how to configure the disk array before you install the desired system.
4.4Configuring the server and components
The configuration software and utilities supplied with the product make it easy for you to configure the server and its components (see the chapter “Configu- ration software and utilities” on page 45).
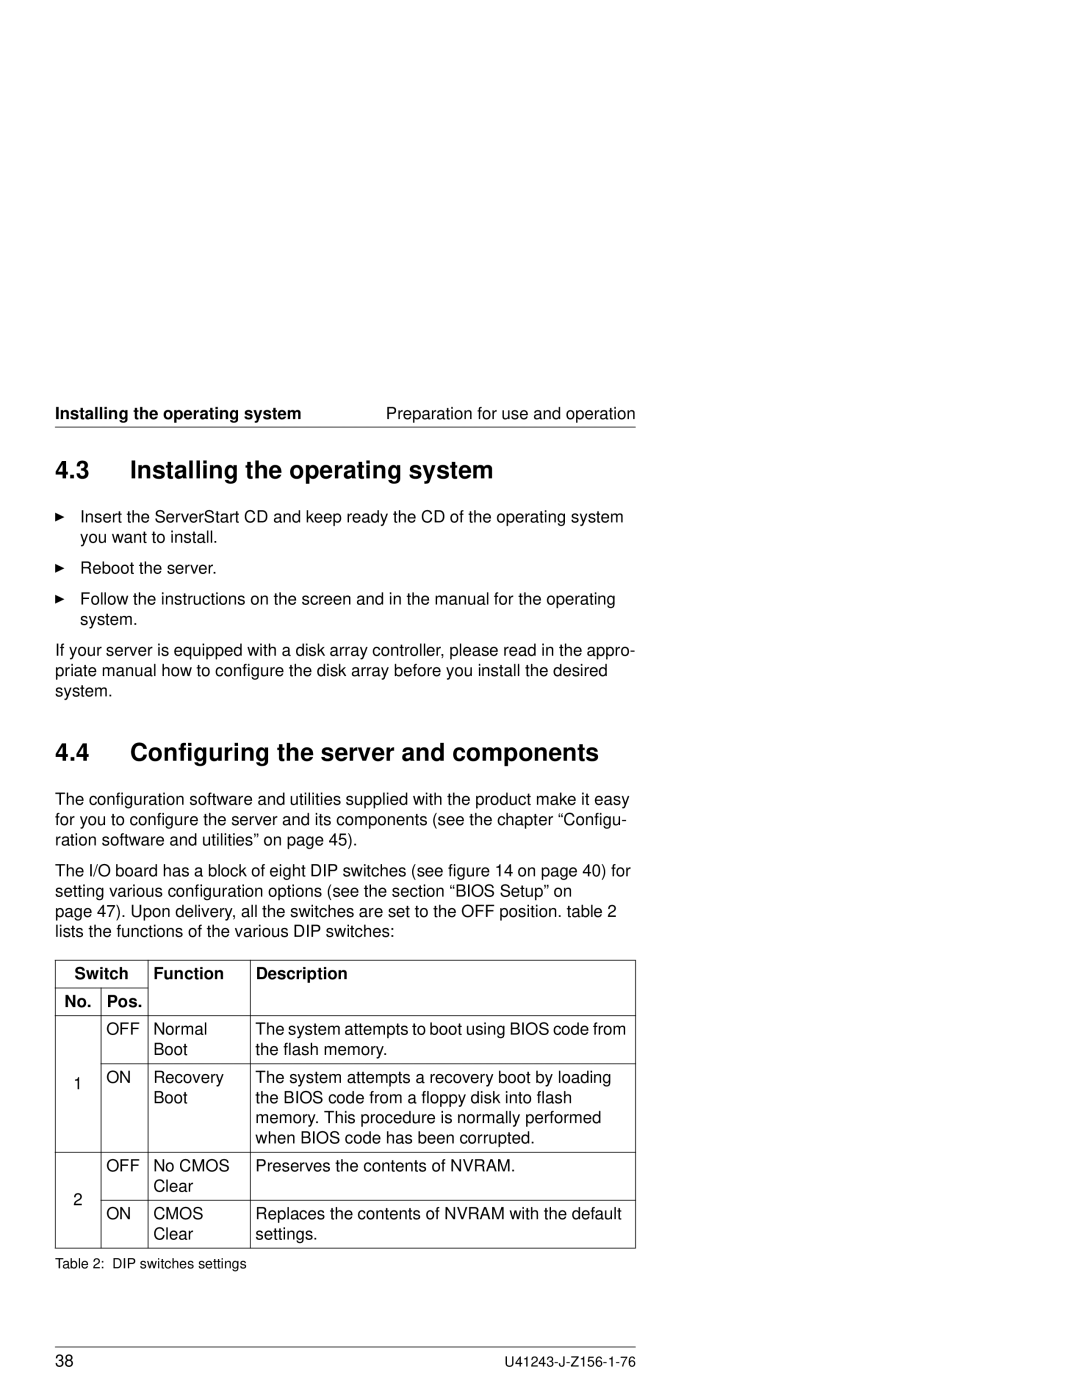
The I/O board has a block of eight DIP switches (see figure 14 on page 40) for setting various configuration options (see the section “BIOS Setup” on
page 47). Upon delivery, all the switches are set to the OFF position. table 2 lists the functions of the various DIP switches:
Switch | Function | Description | ||
|
|
|
| |
No. | Pos. |
|
| |
|
|
|
|
|
|
| OFF | Normal | The system attempts to boot using BIOS code from |
|
|
| Boot | the flash memory. |
|
|
|
|
|
1 |
| ON | Recovery | The system attempts a recovery boot by loading |
|
| Boot | the BIOS code from a floppy disk into flash | |
|
|
| ||
|
|
|
| memory. This procedure is normally performed |
|
|
|
| when BIOS code has been corrupted. |
|
|
|
|
|
|
| OFF | No CMOS | Preserves the contents of NVRAM. |
2 |
|
| Clear |
|
|
|
|
| |
| ON | CMOS | Replaces the contents of NVRAM with the default | |
|
| |||
|
|
| Clear | settings. |
|
|
|
|
|
Table 2: DIP switches settings
38 |