Changing Your Computer Hardware Configuration
Removable Media Devices
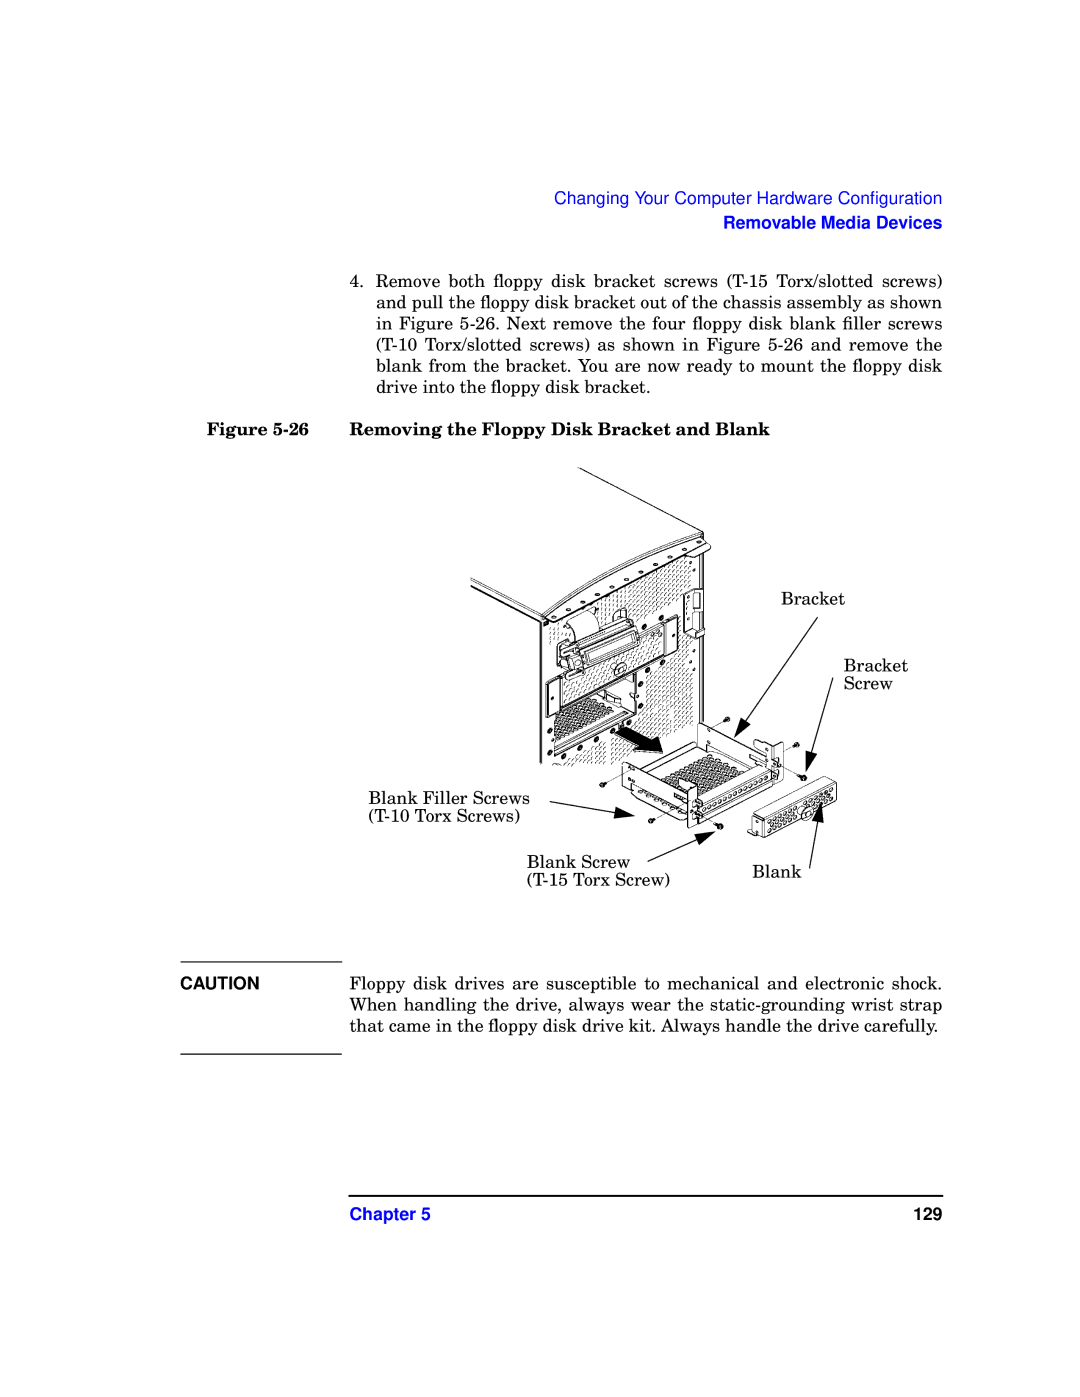
4.Remove both floppy disk bracket screws
Figure 5-26 Removing the Floppy Disk Bracket and Blank
Bracket
Bracket
Screw
Blank Filler Screws
Blank Screw | Blank | |
|
CAUTION | Floppy disk drives are susceptible to mechanical and electronic shock. |
| When handling the drive, always wear the |
| that came in the floppy disk drive kit. Always handle the drive carefully. |
|
|
Chapter 5 | 129 |