Configuring network interfaces
On the Network Interfaces page, you can set access to the Remote Supervisor
Adapter by:
vConfiguring an Ethernet connection to a Remote Supervisor Adapter
vConfiguring
Configuring an Ethernet connection to the Remote Supervisor Adapter
Complete the following steps to configure the Ethernet setup for the Remote
Supervisor Adapter:
1.Log in to the Remote Supervisor Adapter where you want to setup the configuration. For more information, see Chapter 2, “Opening and using the ASM Web interface” on page 3.
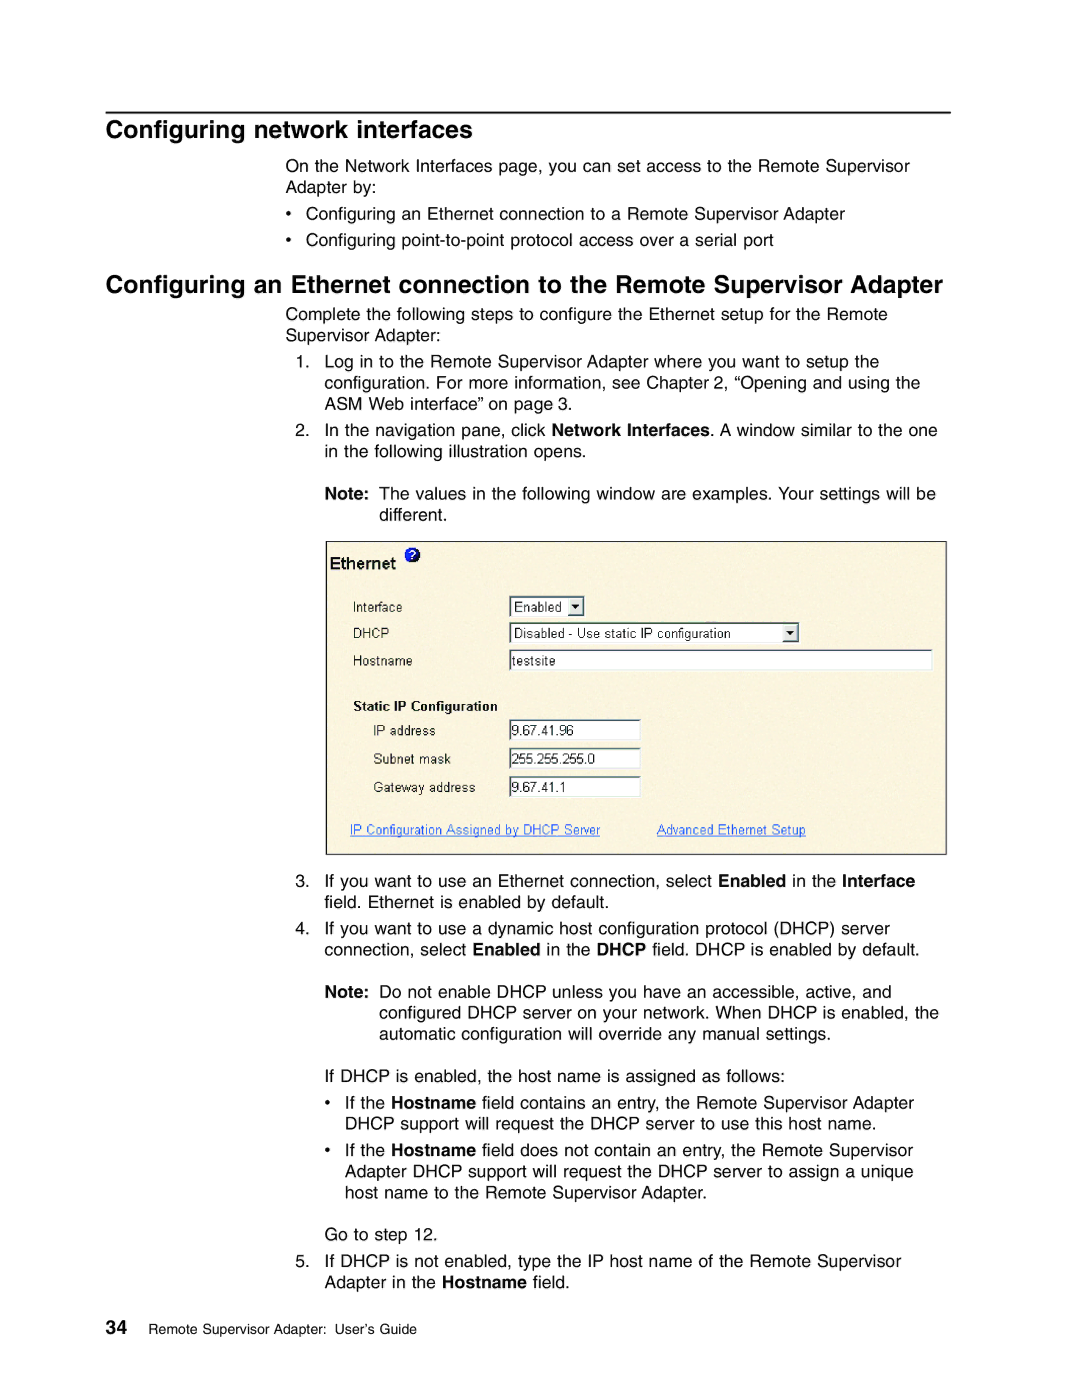
2.In the navigation pane, click Network Interfaces. A window similar to the one in the following illustration opens.
Note: The values in the following window are examples. Your settings will be different.
3.If you want to use an Ethernet connection, select Enabled in the Interface field. Ethernet is enabled by default.
4.If you want to use a dynamic host configuration protocol (DHCP) server connection, select Enabled in the DHCP field. DHCP is enabled by default.
Note: Do not enable DHCP unless you have an accessible, active, and configured DHCP server on your network. When DHCP is enabled, the automatic configuration will override any manual settings.
If DHCP is enabled, the host name is assigned as follows:
vIf the Hostname field contains an entry, the Remote Supervisor Adapter DHCP support will request the DHCP server to use this host name.
vIf the Hostname field does not contain an entry, the Remote Supervisor Adapter DHCP support will request the DHCP server to assign a unique host name to the Remote Supervisor Adapter.
Go to step 12.
5.If DHCP is not enabled, type the IP host name of the Remote Supervisor Adapter in the Hostname field.