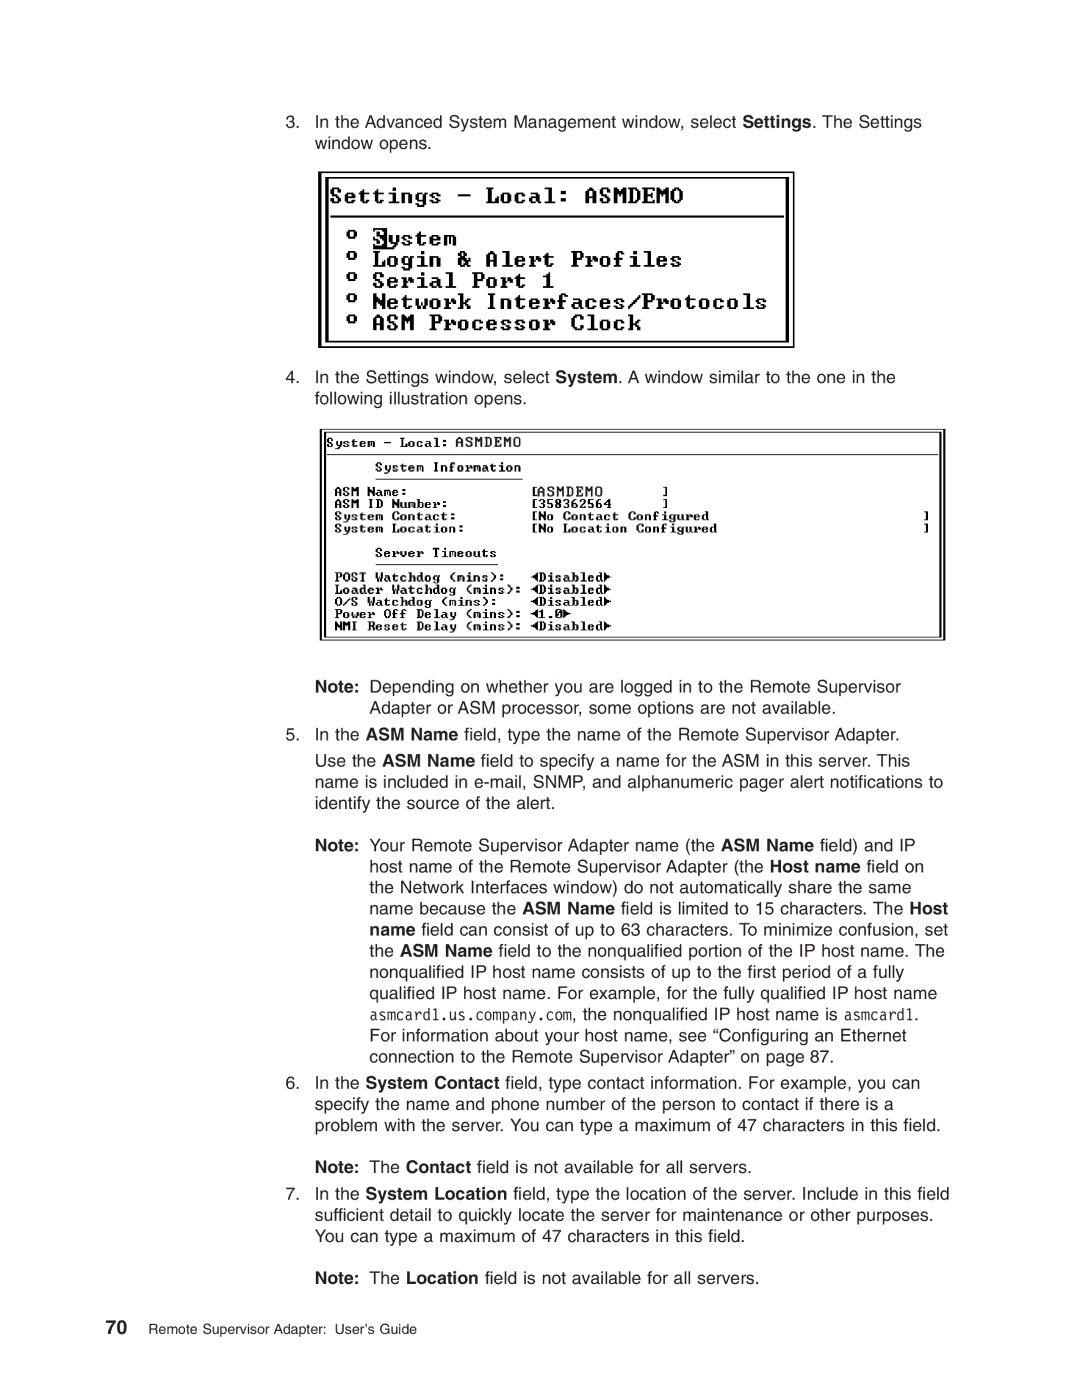
3.In the Advanced System Management window, select Settings. The Settings window opens.
4.In the Settings window, select System. A window similar to the one in the following illustration opens.
AS M DEMO
A S M DEM O
Note: Depending on whether you are logged in to the Remote Supervisor Adapter or ASM processor, some options are not available.
5.In the ASM Name field, type the name of the Remote Supervisor Adapter.
Use the ASM Name field to specify a name for the ASM in this server. This name is included in
Note: Your Remote Supervisor Adapter name (the ASM Name field) and IP host name of the Remote Supervisor Adapter (the Host name field on the Network Interfaces window) do not automatically share the same name because the ASM Name field is limited to 15 characters. The Host name field can consist of up to 63 characters. To minimize confusion, set the ASM Name field to the nonqualified portion of the IP host name. The nonqualified IP host name consists of up to the first period of a fully qualified IP host name. For example, for the fully qualified IP host name asmcard1.us.company.com, the nonqualified IP host name is asmcard1. For information about your host name, see “Configuring an Ethernet connection to the Remote Supervisor Adapter” on page 87.
6.In the System Contact field, type contact information. For example, you can specify the name and phone number of the person to contact if there is a problem with the server. You can type a maximum of 47 characters in this field.
Note: The Contact field is not available for all servers.
7.In the System Location field, type the location of the server. Include in this field sufficient detail to quickly locate the server for maintenance or other purposes. You can type a maximum of 47 characters in this field.
Note: The Location field is not available for all servers.
