4.In the ID number field, assign the Remote Supervisor Adapter a unique identification number.
5.In the Contact field, type the contact information. For example, you can specify the name and phone number of the person to contact if there is a problem with this server. You can type a maximum of 47 characters in this field.
Note: The Contact field is not available for all servers.
6.In the Location field, type the location of the server. Include in this field sufficient detail to quickly locate the server for maintenance or other purposes. You can type a maximum of 47 characters in this field.
Note: The Location field is not available for all servers.
7.Scroll to the bottom of the page and click Save.
Setting server timeouts
Complete the following steps to set your server timeout values:
1.Log in to the Remote Supervisor Adapter where you want to set the server timeouts. For more information, see Chapter 2, “Opening and using the ASM Web interface” on page 3.
2.For an xSeries 330 server: Log in to the ASM processor. For more information, see “Logging in to the ASM processor in an xSeries 330 server” on page 6.
3.In the navigation pane, click System Settings and scroll down to the Server Timeouts section.
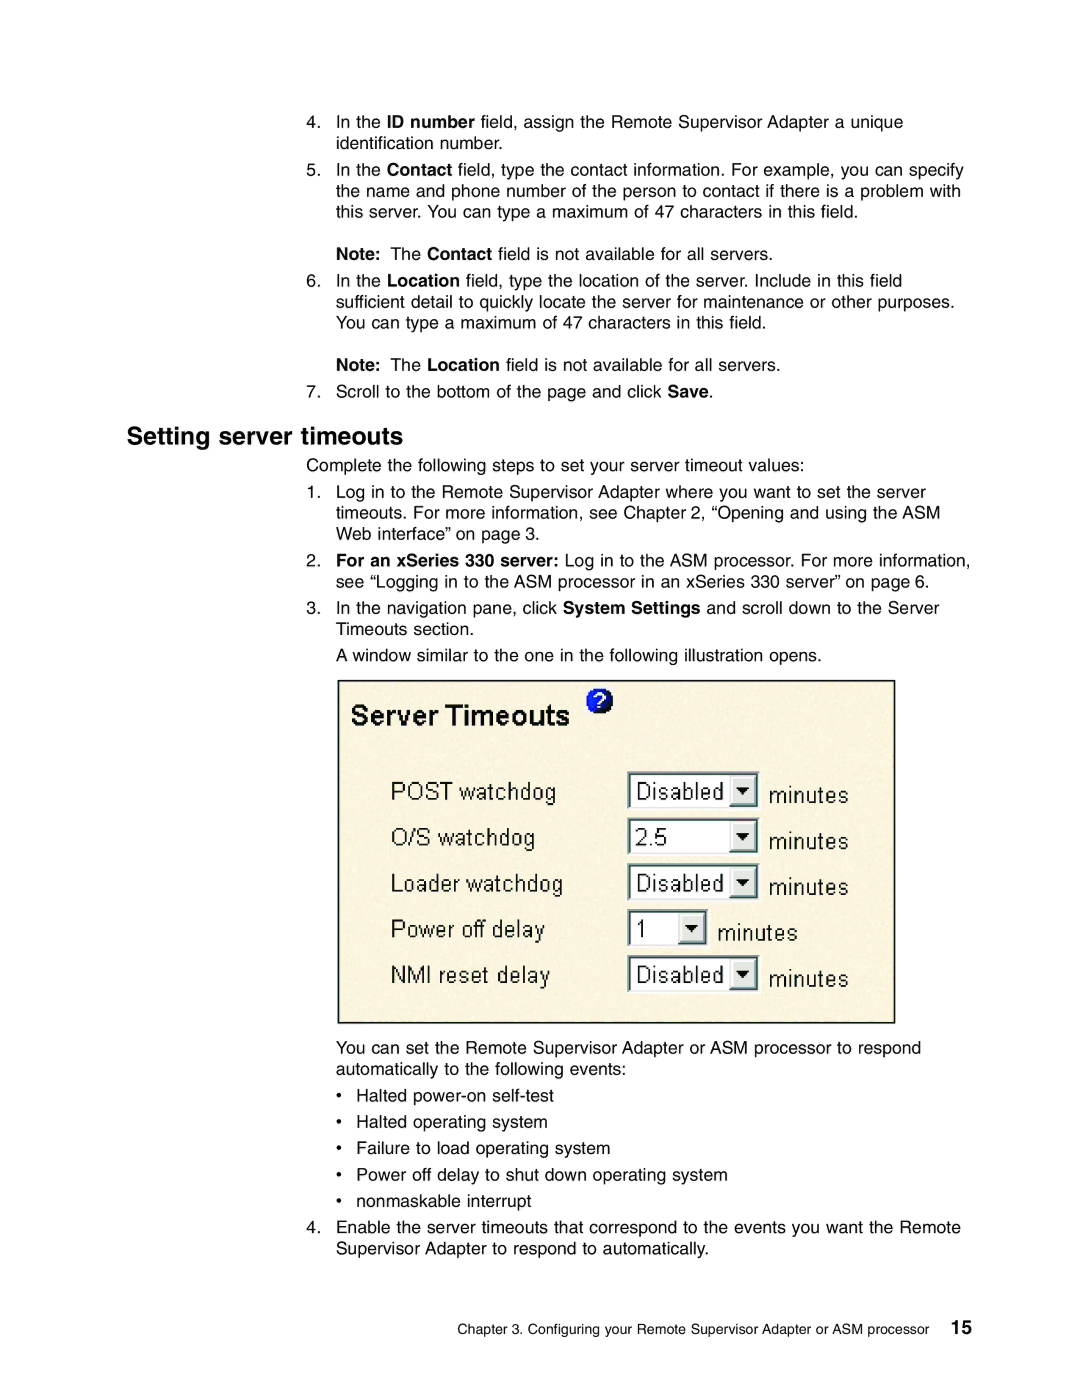
A window similar to the one in the following illustration opens.
You can set the Remote Supervisor Adapter or ASM processor to respond automatically to the following events:
vHalted
vHalted operating system
vFailure to load operating system
vPower off delay to shut down operating system
vnonmaskable interrupt
4.Enable the server timeouts that correspond to the events you want the Remote Supervisor Adapter to respond to automatically.
Chapter 3. Configuring your Remote Supervisor Adapter or ASM processor 15