AP206
Important Information
Printer Manager for Administrator
Trademarks
Safety Information
Safety During Operation
Iii
Energy Star Program
Low-power mode Energy Saver mode
Specifications
Manuals for This Printer
Quick Installation Guide
Setup Guide
How to Read This Manual
Symbols
Table of Contents
Error & Status Messages
Cleaning and Adjusting the Printer
Setting Menus Protecting the Menus
Menu Table Menu Settings
Administering Printing by User Code 102
Using the Job Log 108
Moving and Transporting the Printer 115 Specifications 116
Color Guide 111
Page
IPDL-C Accessing the Printer Properties
Windows 95/98/Me Accessing the Printer Properties
Making printer default settings
Making printer settings from an application
On the File menu, click Print
Windows 2000 Accessing the Printer Properties
Making printer default settings Printer Properties
Printing Preferences Properties appear
Windows NT 4.0 Accessing the Printer Properties
Making printer default settings Default Document Properties
Document Properties appear
Windows 98/Me
RICOH-SCRIPT2 Setting Up for Printing
Windows
Print window appears
Windows 2000 Accessing the Printer Properties
On the File menu, click Printing Preferences.1
Windows NT 4.0 Accessing the Printer Properties
Making printer settings from an application
Macintosh Setting Up for Printing
Making paper settings from an application
Setting up for printing from an application
On the File menu, click Page Setup
Reference
Windows 2000 Canceling a Print Job
Canceling a Print Job
Windows 95/98/Me Canceling a Print Job
Windows NT 4.0 Canceling a Print Job
Macintosh Canceling a Print Job
Double-click the printer icon on the desktop
Uninstalling the IPDL-C Printer Driver
Windows 95/98/Me Uninstalling the IPDL-C Printer Driver
Windows 2000 Uninstalling the IPDL-C Printer Driver
Click Yes to uninstall the printer driver
Windows NT 4.0 Uninstalling the IPDL-C Printer Driver
Printer driver, log on under Full Control permission
Close all the applications that are currently running
Printers window appears
Uninstalling the RICOH-SCRIPT2 Printer Driver
Windows 2000 Uninstalling the RICOH-SCRIPT2 Printer Driver
Macintosh Uninstalling the RICOH-SCRIPT2 Printer Driver
Close all applications that are currently running
Paper and Other Media Supported by This Printer
Paper Types and Sizes
Tray
Paper weight and number of sheets to be set
Types of paper and other media Plain paper
Paper Recommendations
Storing paper
OHP transparencies
Thick paper
Adhesive labels
⇒ P.79 Using the Operation Panel
Envelopes
Paper not supported by this printer
Printable Area
Loading Paper
Loading Paper in the Paper Tray
Media Paper Tray
Media j 2.Paper Size l
Paper Size j *Auto Detect l
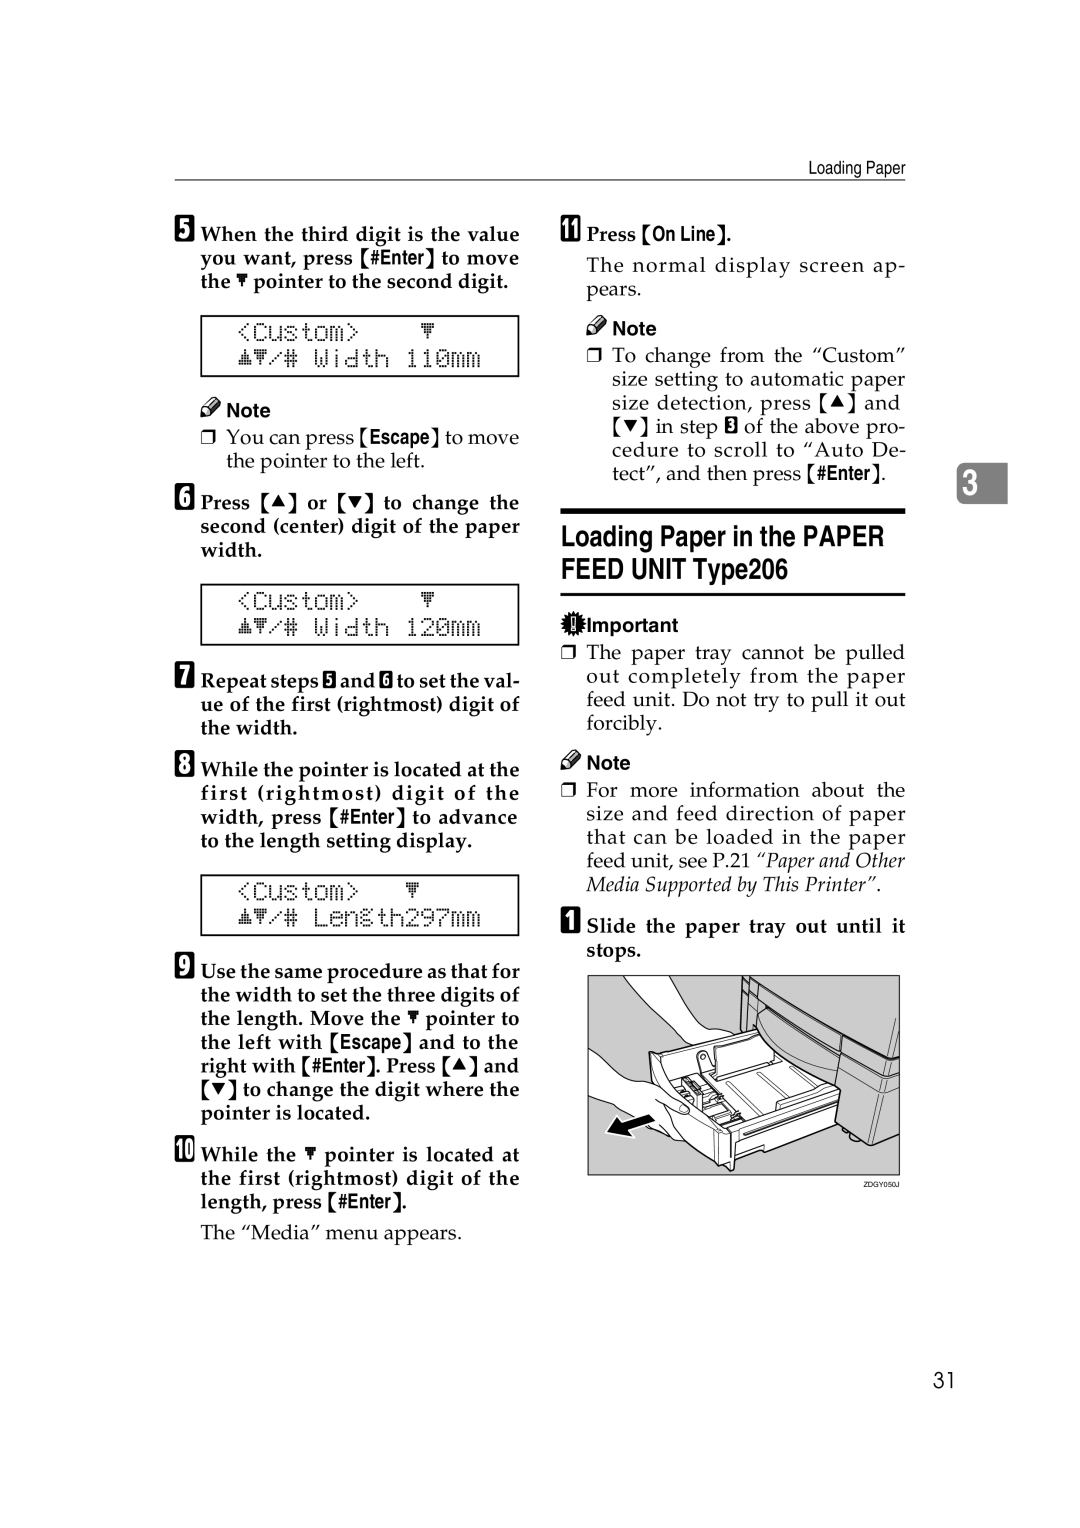
Custom l Jl/# Width 210mm
Custom l Jl/# Width 120mm
Custom l Jl/# Length297mm
Press On Line
Slide the paper tray out until it stops
Slide the paper tray into the paper feed unit until it stops
Paper Tray j *Tray1/8.5x11 l
Switching between Paper Trays
Paper Tray j Tray1/A4 l
Paper and Other Media
Error & Status Messages
Printed Error Messages
Error & Status Messages on the Operation Panel
Paper
⇒ P.66 Replacing the Toner Cartridge
⇒ P.56 When the Message
⇒ P.57 When the Message
⇒ P.54 When the Message
Open Rear Cover Remove
Ing the Operation Panel
Operation Panel
See P.114 Low Memory
Message Description Comments
Mshell
Getting Printer Information over the Network
Printer current status
When the Message Open
When the Message Re
Tray. ⇒ P.29 Loading Paper
DuplexCover Remove Misfeed
Unit. ⇒ P.68 Replacing Photoconductor Unit
Replacing the Toner Car Tridge
⇒ P.75 Replacing the Waste Toner Bottle
Placing the Toner Cartridge
Printer configuration
Input Tray Name
Emulation Name
Input Tray PageSize
Input Tray Status
Printer Does Not Print
Windows 95/98/Me
Windows
Windows NT
Macintosh
If the printer is using I/O Timeout
Network connection
Macintosh
Windows 95/98/Me
Windows NT
Other Printing Problems
Ory.⇒ P.90 System Menu
Removing Misfed Paper
⇒ P.29 Loading Paper
Density
Toconductor Unit
Color.⇒ P.66 Replacing the Toner Cartridge
Color. ⇒ P.66 Replacing the Toner Cartridge
Supported by This Printer
Area on the MISC. tab
Pull out the paper tray
When the Message Remove Misfeed From Paper Tray Appears
Removing Misfed Paper
Slide the paper tray completely into the printer
Close the rear cover
Open the rear cover of the printer
When the Message Open
If the paper is inside the fusing unit, open the top cover
When the Message Remove Misfeed From Output Tray Appears
Carefully pull the misfed paper from the rear cover side
Carefully pull the misfed paper from the rear cover side
When the Message Open DuplexCover Remove Misfeed Appears
Open the paper guide unit inside the duplex unit
Close the paper guide unit and the cover of the duplex unit
Raise the green lock levers to a vertical position
Cleaning and Adjusting the Printer
Cleaning the Charge Wire
Press the power switch to turn on the printer power
Return the green lock levers to their original positions
Adjusting the Image Density
List Print j 1.Config.Page l
Maintenance j 1.Toner Level l
Menu List Print
Press T or U to display List Print, and then press #Enter
Maintenance j 4.Registrationl
Config.Page Press # key
Registration Tray2Horiz
Tray2Horiz Jl/#0
Open the front cover by pulling the front cover open lever
Replacing Consumables
Low onxxx Add Toner Xxx
Important4
Replacing the Photoconductor Unit
Change PCU
Stand up the green lock levers to a vertical position
Remove the new photoconductor unit from the box
Remove the protective sheet from the new photoconductor unit
Maintenance j 1. Toner Level l
Reinstall Fuser Cleaner
Press the power switch to turn on the power Press Menu
PCU Press # key
Replacing the Fuser Oil Bottle and Ozone Filter
Add FuserOil Add Fuser Oil
Install a new ozone filter on Ventilator cover
Remove the ventilator cover
Remove the ozone filter from in- side the ventilator cover
Replace the ventilator cover onto the printer
Prior to moving and transporting the printer
Rotate the lock levers to release the bottle
Close the top cover
Replacing the Waste Toner Bottle
Waste T Full Waste Toner is
Replacing the Fuser Cleaner
Chg. Cleaner Change Fuser
Reinstall j Fuser Cleaner l
Rotate the lock levers to release the lock
Fuser Cleaner Press # key
Menu Table
Setting Menus
Setting Menus
Take Offline Then Press Reset
Menu System Menu
System Menu j 1.Paper Tray l
System Menu j 2.I/O Buffer l
Protecting the Menus
Protecting the Menus
Maintenance j 5.Menu Protectl
Removing Protection
Menu Protect j Offl
Menu Protect j Onl
Press T or U to display Off, and then press #Enter
Menu Table
Toner Level ⇒ P.63 Adjusting the Image Density
Reinstall⇒ P.68 Replacing the Photoconductor Unit
⇒ P.93 Maintenance Menu
Config.Page ⇒ P.95 Printing the Configuration
RPS2 Menu
Menu Settings
IPDL-C Menu
Color Set Color Setting
ColorProfile
Auto Tray SW Auto Tray Switch
Toner Saving
Dithering
Paper Type
O Timeout
Feed Timeout
Print Errors
KTalk Mode
System Menu
Parallel if
Paper Tray
O Buffer
Energy Saver
Transfer
Image Memory
Parallel
Bi-direction
PrinterLang
Language
IP Address 39. Active PTL
Maintenance Menu
Changing the Printer Language
Ethernet
Prt.Priority
Press T or U to display Select PDL, and then press #Enter
Menu Select PDL
Select PDL j Option#1 RPS2 l
Printing the Configuration
Interpreting the Configuration
Interpreting the Configuration Page/IPDL-C
Interpreting the Configuration Page/RICOH-SCRIPT2
Color Sample Press # key
Printing the Color Sample
List Print j 2.Color Samplel
This starts printing the color sample
Resetting Menus
Press T or U to display 3.Menu Reset, and then press #Enter
Maintenance j 3.Menu Reset l
Menu Reset Press # key
Administering Printing by User Code
Viewing the Number of Pages Printed Under Each User Code
List Print j 4.Statistics l
Statistics Press # key
Following message appears on the panel display
Reading the Statistics Report
User Code
Total
Black Two-color
Log Protect j Onl
Maintenance j 6.Log Protect l
Protecting the User Code Record
Press T or U to select On or Off, and then press #Enter
Deleting the User Code Record
Log Protect j Offl
Press T or U to display 5.Log Clear, and then press #Enter
Maintenance j 5.Log Clear l
Log Clear Press # key
Using the Job Log
Printing the Job Log
List Print Job Log
Job Log Press # key
Press T or U to display 3.Job Log, and then press #Enter
Reading the Job Log
User ID
Printer Language
Request Time
Additive Emitted and Subtractive Reflected Color Models
Color Guide
Color Printing Basics
Printed Color
Memory Capacity and Paper Size
Low Memory
Moving and Transporting the Printer
Specifications
Mainframe
Noise emission *1 Sound power level
Dimensions
Weight
Sound pressure level *2
Options
Interface connector
Number of pins
Access time
Network Interface Board Type306 Topology
Consumables
Toner cartridge
Consumables *1 Service life *2
Other consumables
Index
Fuser cleaner
Cancel a print job
RICOH-SCRIPT2, properties, 10 RICOH-SCRIPT2, uninstall
Memo
126
Means Power OFF
UE USA G063-8667


 Note
Note
 Note
Note Important
 Note
Note