ProSafe 802.11g Wireless VPN Firewall FVG318 Reference Manual
You are new ready to activate the tunnel, but you must do it from the client endpoint (see “Initiating and Checking the VPN Connections” on page
Initiating and Checking the VPN Connections
You can test connectivity and view VPN status information on the FVG318 and VPN Client according to the testing flowchart shown in Figure
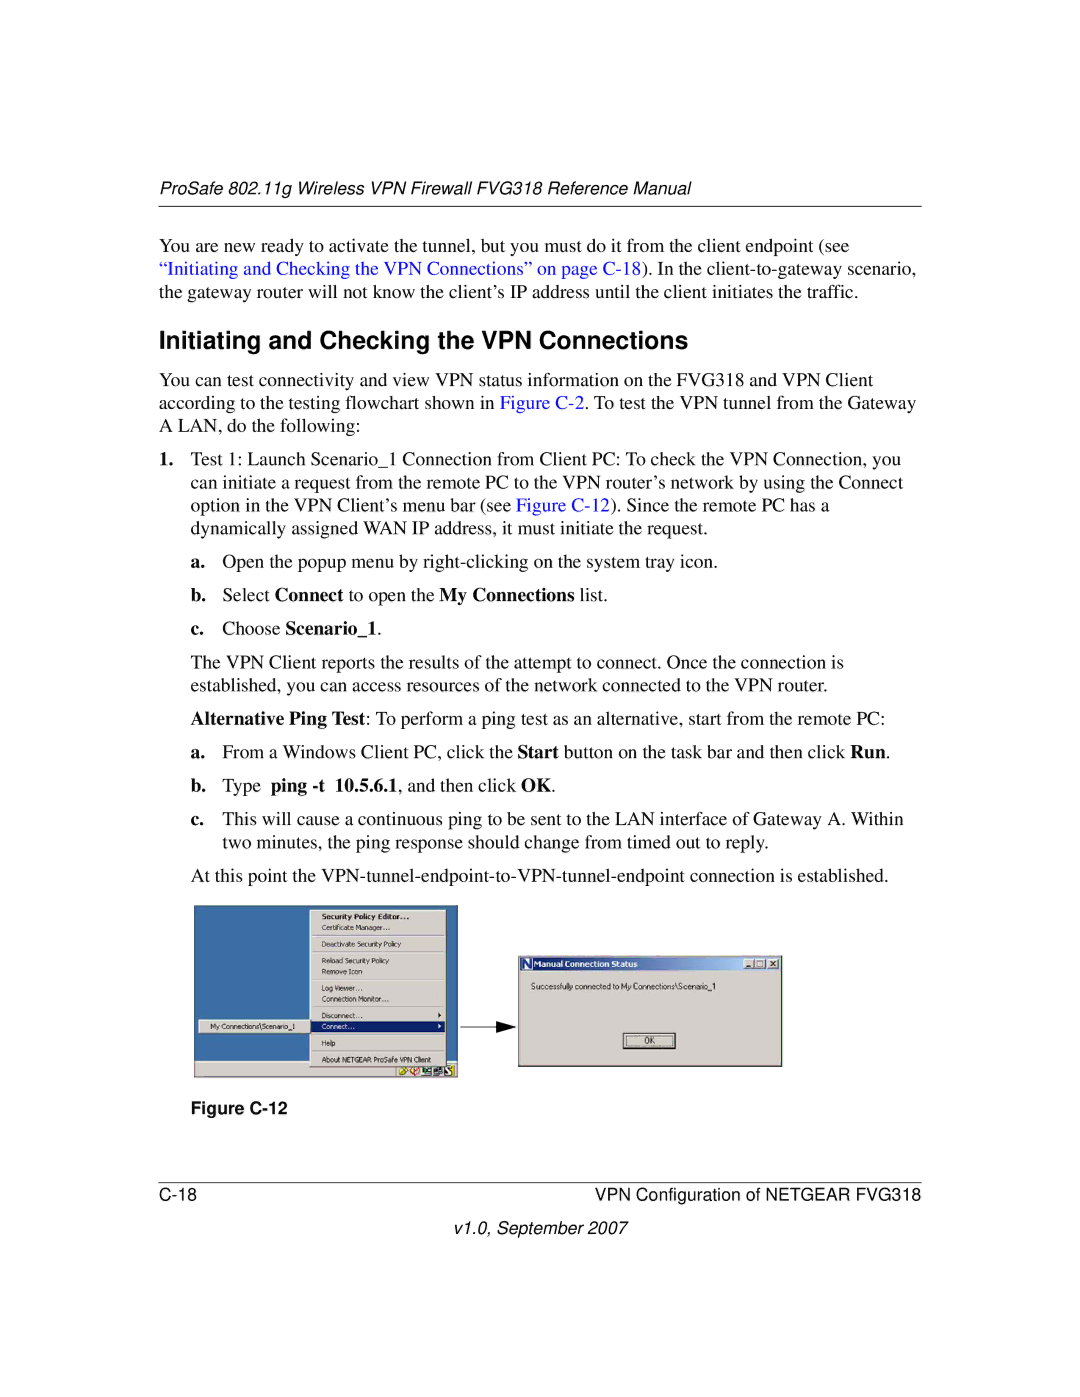
1.Test 1: Launch Scenario_1 Connection from Client PC: To check the VPN Connection, you can initiate a request from the remote PC to the VPN router’s network by using the Connect option in the VPN Client’s menu bar (see Figure
a.Open the popup menu by
b.Select Connect to open the My Connections list.
c.Choose Scenario_1.
The VPN Client reports the results of the attempt to connect. Once the connection is established, you can access resources of the network connected to the VPN router.
Alternative Ping Test: To perform a ping test as an alternative, start from the remote PC:
a.From a Windows Client PC, click the Start button on the task bar and then click Run.
b.Type ping
c.This will cause a continuous ping to be sent to the LAN interface of Gateway A. Within two minutes, the ping response should change from timed out to reply.
At this point the
Figure C-12
VPN Configuration of NETGEAR FVG318 |