Components
Front
1 | 2 | 3 | 4 | 5 | 6 | 7 | 8 | 9 | 10 | 11 | 12 | 13 | 14 | 15 | 16 | Lan 1 |
Power |
|
|
|
|
|
|
|
|
|
|
|
|
|
|
|
|
17 | 18 | 19 | 20 | 21 | 22 | 23 | 24 | 25 | 26 | 27 | 28 | 29 | 30 | 31 | 32 | Lan 2 |
|
|
|
|
|
|
|
|
|
|
|
|
|
|
| Reset |
|
|
|
|
|
|
| KVM2132P |
|
|
|
|
|
| ||||
1 | 2 | 3 | 4 | 5 | 6 | 7 8 9 10 11 | 12 | 13 | 14 | 15 | 16 | Lan 1 |
Power |
|
|
|
|
|
|
|
|
|
|
|
|
|
|
|
|
|
|
|
|
|
|
|
| Lan 2 |
|
|
|
|
|
|
|
|
|
|
| Reset |
|
|
|
|
|
|
| KVM2116P |
|
|
|
|
|
|
1 | 2 | 3 | 4 | 5 | 6 | 7 8 9 10 11 | 12 | 13 | 14 | 15 | 16 | Lan 1 |
Power |
|
|
|
|
|
|
|
|
|
|
|
|
|
|
|
|
|
|
|
|
|
|
| Reset | aem0371a |
|
|
|
|
|
|
|
|
|
|
|
| |
|
|
|
|
|
| KVM1116P |
|
|
|
|
|
|
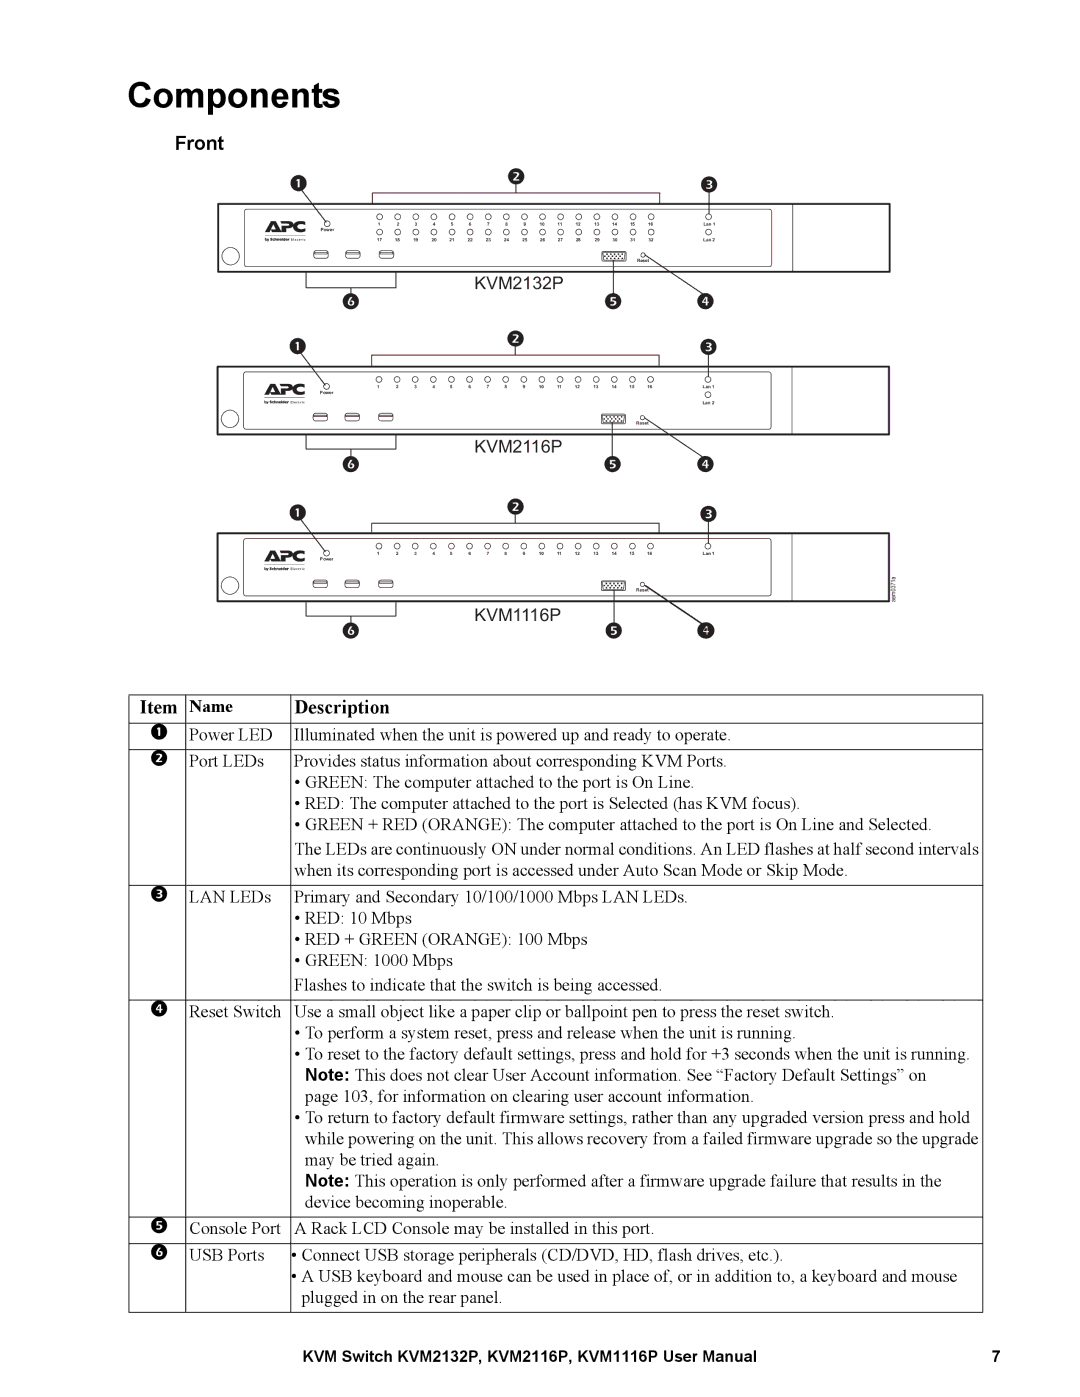
Item | Name | Description |
1 | Power LED | Illuminated when the unit is powered up and ready to operate. |
|
|
|
2 | Port LEDs | Provides status information about corresponding KVM Ports. |
•GREEN: The computer attached to the port is On Line.
•RED: The computer attached to the port is Selected (has KVM focus).
•GREEN + RED (ORANGE): The computer attached to the port is On Line and Selected.
The LEDs are continuously ON under normal conditions. An LED flashes at half second intervals when its corresponding port is accessed under Auto Scan Mode or Skip Mode.
3 LAN LEDs Primary and Secondary 10/100/1000 Mbps LAN LEDs.
•RED: 10 Mbps
•RED + GREEN (ORANGE): 100 Mbps
•GREEN: 1000 Mbps
Flashes to indicate that the switch is being accessed.
4 Reset Switch Use a small object like a paper clip or ballpoint pen to press the reset switch.
•To perform a system reset, press and release when the unit is running.
•To reset to the factory default settings, press and hold for +3 seconds when the unit is running. Note: This does not clear User Account information. See “Factory Default Settings” on page 103, for information on clearing user account information.
•To return to factory default firmware settings, rather than any upgraded version press and hold while powering on the unit. This allows recovery from a failed firmware upgrade so the upgrade may be tried again.
Note: This operation is only performed after a firmware upgrade failure that results in the device becoming inoperable.
5 | Console Port | A Rack LCD Console may be installed in this port. |
|
|
|
6 | USB Ports | • Connect USB storage peripherals (CD/DVD, HD, flash drives, etc.). |
•A USB keyboard and mouse can be used in place of, or in addition to, a keyboard and mouse plugged in on the rear panel.
KVM Switch KVM2132P, KVM2116P, KVM1116P User Manual | 7 |
