| INSTALLING THE IMAGING FILM |
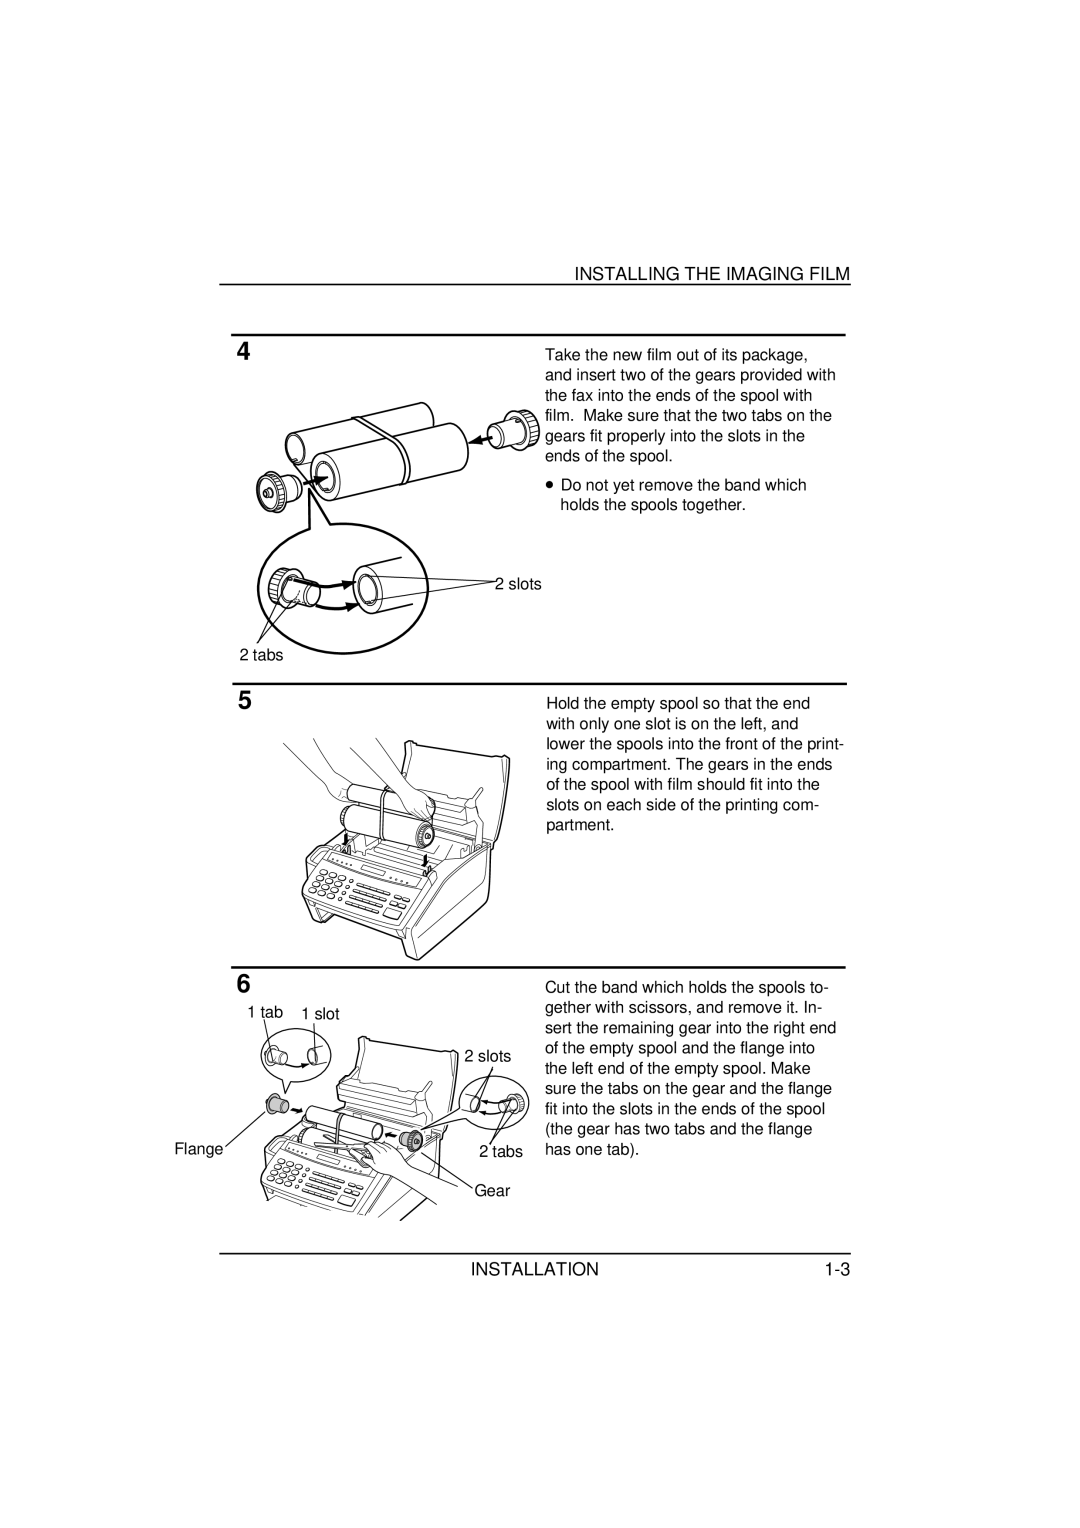
4 | Take the new film out of its package, |
| and insert two of the gears provided with |
| the fax into the ends of the spool with |
| film. Make sure that the two tabs on the |
| gears fit properly into the slots in the |
| ends of the spool. |
| • Do not yet remove the band which |
| holds the spools together. |
| 2 slots |
2 tabs |
|
5 | Hold the empty spool so that the end |
| with only one slot is on the left, and |
| lower the spools into the front of the print- |
ing compartment. The gears in the ends of the spool with film should fit into the slots on each side of the printing com- partment.
6
1 tab 1 slot
Flange
2slots
2 tabs
Cut the band which holds the spools to- gether with scissors, and remove it. In- sert the remaining gear into the right end of the empty spool and the flange into the left end of the empty spool. Make sure the tabs on the gear and the flange fit into the slots in the ends of the spool (the gear has two tabs and the flange has one tab).
Gear
INSTALLATION |