6F8A0917
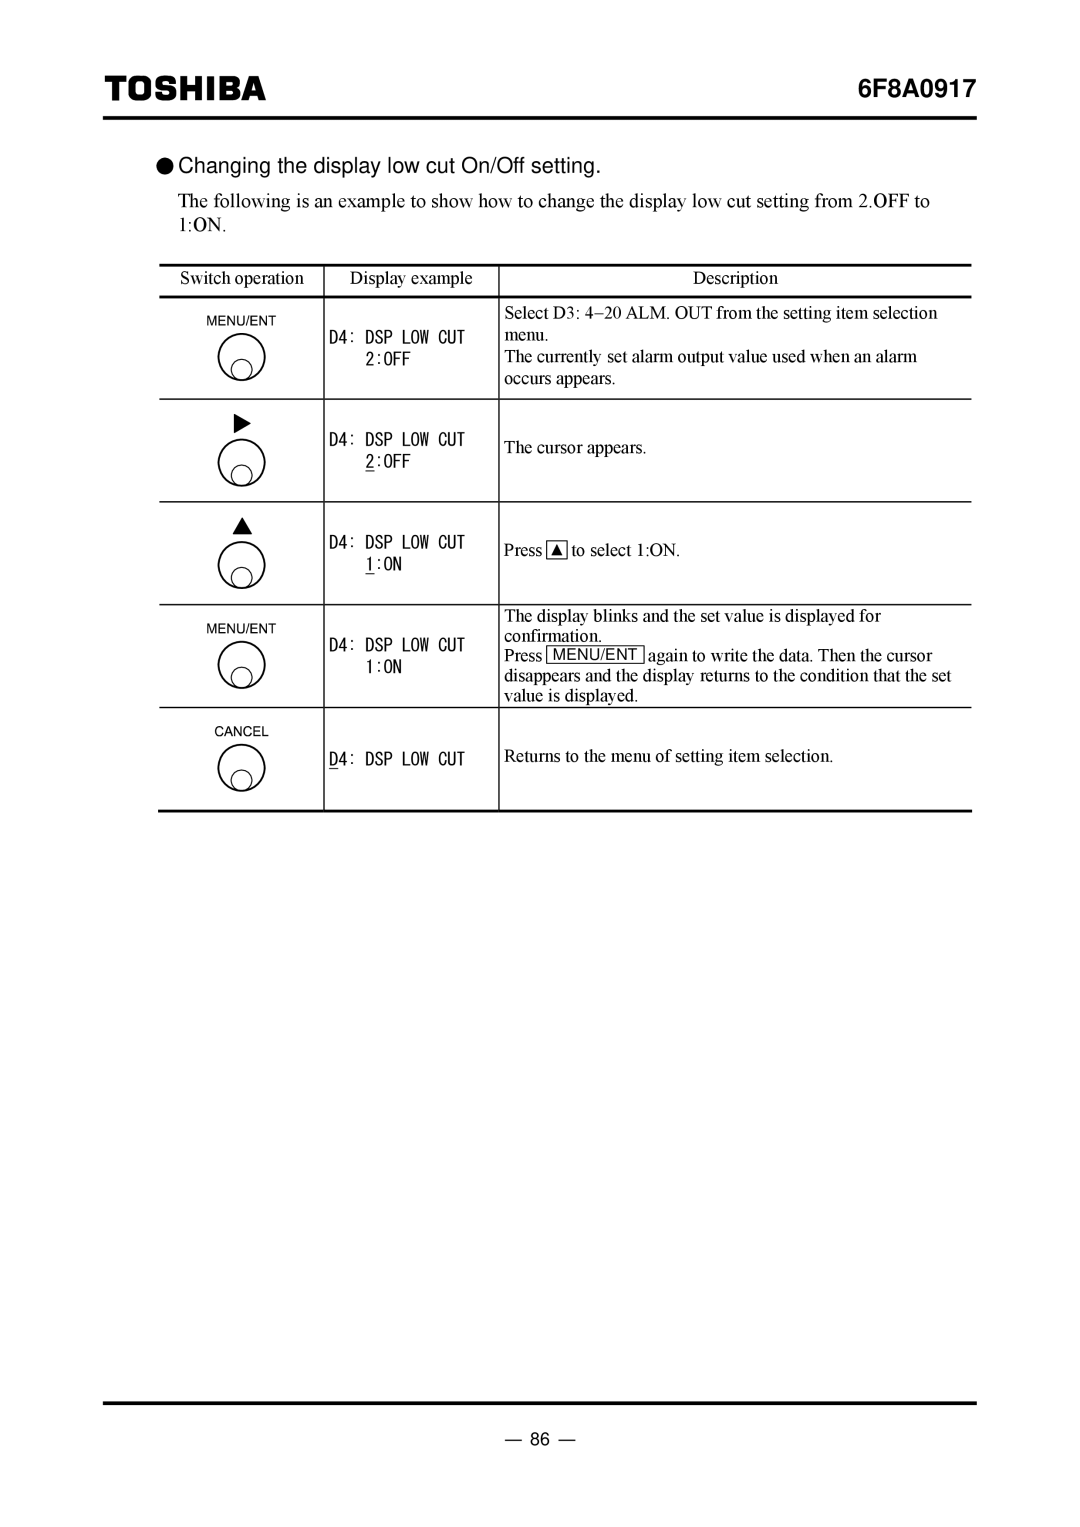
 Changing the display low cut On/Off setting.
The following is an example to show how to change the display low cut setting from 2.OFF to 1:ON.
Switch operation | Display example |
|
|
| Description |
|
|
|
|
| |
|
| Select D3: 4−20 ALM. OUT from the setting item selection | |||
| D4: DSP LOW CUT | menu. |
|
| |
| 2:OFF | The currently set alarm output value used when an alarm | |||
|
| occurs appears. | |||
|
|
|
|
|
|
| D4: DSP LOW CUT | The cursor appears. | |||
| 2:OFF | ||||
|
|
|
|
| |
|
|
|
|
|
|
| D4: DSP LOW CUT | Press | to select 1:ON. | ||
| 1:ON | ||||
|
|
|
|
| |
|
|
| |||
|
| The display blinks and the set value is displayed for | |||
| D4: DSP LOW CUT | confirmation. | |||
| Press |
| MENU/ENT | again to write the data. Then the cursor | |
| 1:ON |
| |||
| disappears and the display returns to the condition that the set | ||||
|
| ||||
|
| value is displayed. | |||
D4: DSP LOW CUT
Returns to the menu of setting item selection.
- 86 -
