4.17 Sound Board | 4 Replacement Procedures |
4.17 Sound Board
Removing the Sound Board
To remove the sound board, follow the steps below and refer to figure
CAUTION: When the sound board is installed on the system board outside of the chassis, do not connect or disconnect a cable to the headphone or microphone jack repeatedly for check. Before checking the jacks, install the sound board on the system board, and secure them with one screw. Otherwise, load might be applied to PJ3000 on the sound board or PJ1100 on the system board and cause solder crack.
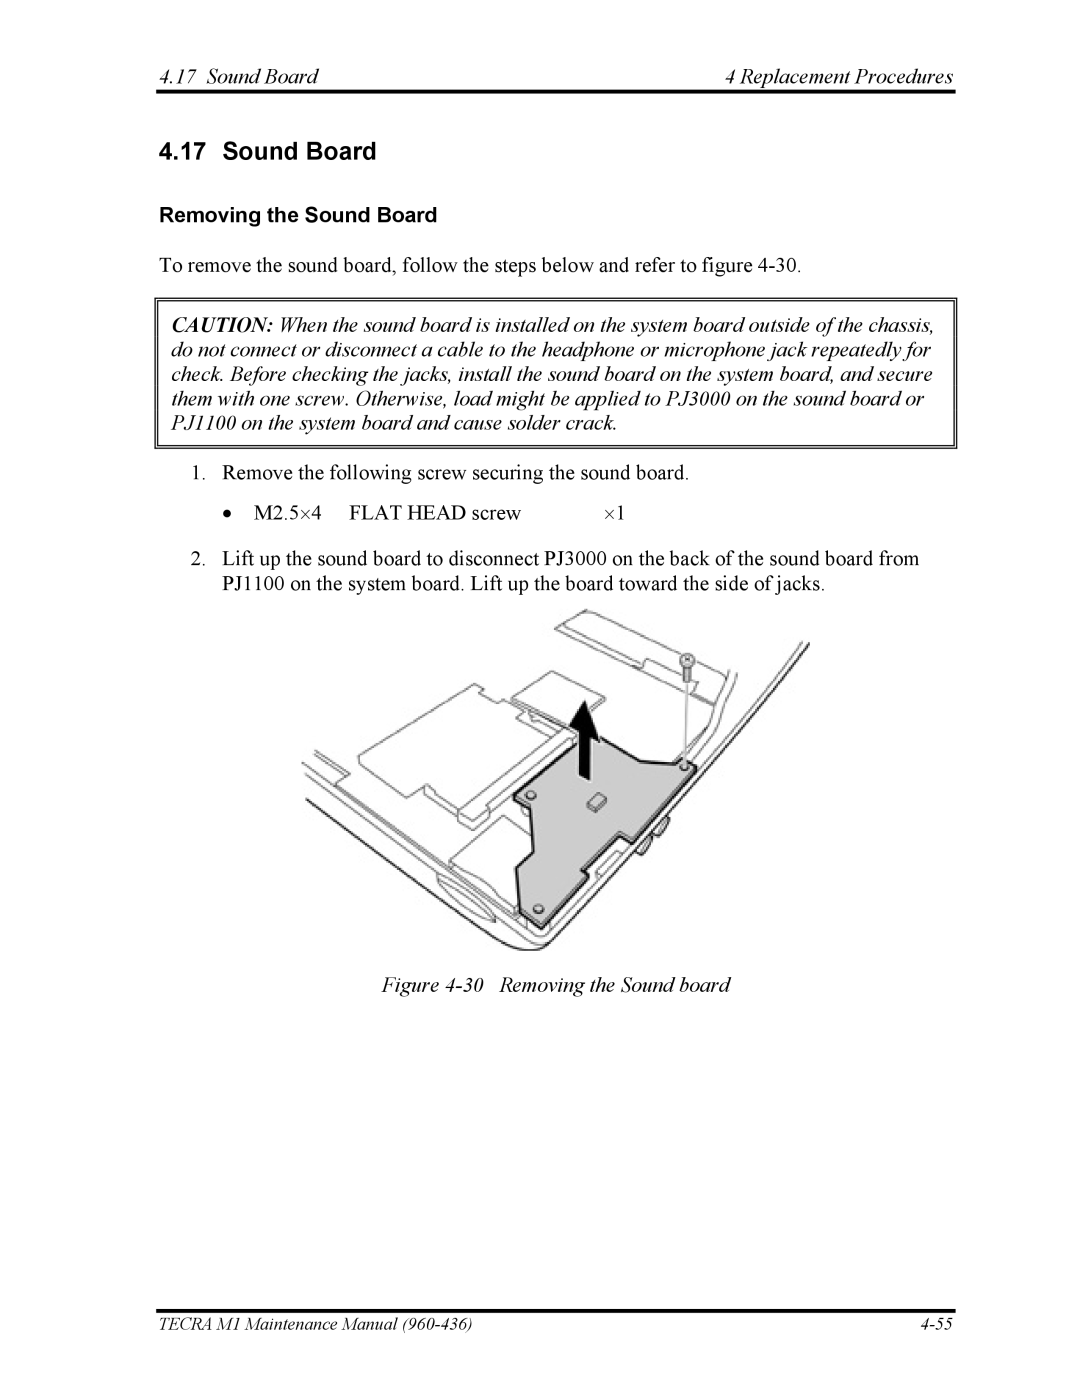
1. Remove the following screw securing the sound board.
• M2.5⋅4 FLAT HEAD screw | ⋅1 |
2.Lift up the sound board to disconnect PJ3000 on the back of the sound board from PJ1100 on the system board. Lift up the board toward the side of jacks.
Figure 4-30 Removing the Sound board
TECRA M1 Maintenance Manual |